I know summer is officially over, but its 70 degrees here in Cambridge, MA!! 70!! I also might have an overload of extra Halloween candy because I over-estimated how many trick or treaters I would have. This delightful ice cream celebrates the last of the summer weather, because it’s ice cream, and also uses up that extra candy.
I made this ice cream flavor for my husband. His favorite is vanilla ice cream with chocolate peanut butter cups, and chocolate and peanut butter swirl. It is hard to find in general, and impossible if you are looking for vegan ice cream. Most chocolate peanut butter ice cream has a chocolate ice cream base, this does not. Every time I make this we eat it all in way too short amount of time, then my husband will come home, look in the freezer and ask “oh, is the ice cream gone?” Always with a hopeful expression. There is nothing I can do but make more for him.
I didn’t think this was going to be the ice cream for me due to my love of extreme chocolate, but it is one of my favorites as well. It is like eating a perfectly balanced ice cream sundae without having to make one. The creamy vanilla is set off with the deep chocolate fudgy goodness, and the salty, crunchy peanut butter, YUM! This is a vegan ice cream to impress.
Vanilla ice cream with chocolate peanut butter cup swirl
Ingredients
1 batch vanilla ice cream (made without simmering vanilla beans unless you want to)
Make vanilla ice cream and freeze for 2-4 hours, just enough so it doesn’t start to melt when you stir everything in.
Meanwhile, heat the chocolate chips, milk, vanilla, and maple syrup together over low heat stirring to combine. (Or microwave for about 20 seconds, then stir together.)
Place the chopped peanut butter cups in the freezer as well during this time.
Once you have stirred the chocolate mixture until smooth, place it uncovered in the refrigerator to cool completely.
Once the ice cream has frozen for a few hours and the chocolate sauce and peanut butter cups are chilled remove the ice cream from the freezer.
Drizzle the chocolate sauce/scoop gobs of it onto the ice cream, drizzle the peanut butter, sprinkle on the peanut butter cups and fold together.
Re-freeze the mixture until you are ready to serve it, but at least another hour.
It’s Halloween! One of my favorite holidays. I love costumes and dressing up, and the general fun that Halloween brings. It’s a day when it’s ok to be silly, to take life a little less seriously, and be playful. It’s also a chance to try out different aspects of your personality and play them up in the spirit of Halloween. Even with my love of Halloween we haven’t been able to celebrate much the last few years:( Also my husband doesn’t love Halloween and I really have to push him to do anything that involves costumes. That being said, this year is different! This year we have an adorable child to dress up, and even my husband is excited. He is so excited, he came up with joint costume for he and my daughter, it’s a T-Rex. So cute. Anyway, Grammy made the costumes and I can’t wait to dress Wolfie up!
Is this post about food? Maybe… When I was growing up we used to have super fun time on Halloween. My brothers and I would make haunted houses, we would make our own costumes, carve pumpkins, and my mom would make a big pot of chili and a camp fire. She would sit by the fire and hand out candy while my brothers and I went Trick or Treating, then we would come home and sit by the fire eating chili and the 5 pieces of candy she allowed us to have on the actual day. Side note: this rule was developed after my brothers made themselves throwing up sick on candy by trying to consume it all in one sitting. Silly boys.
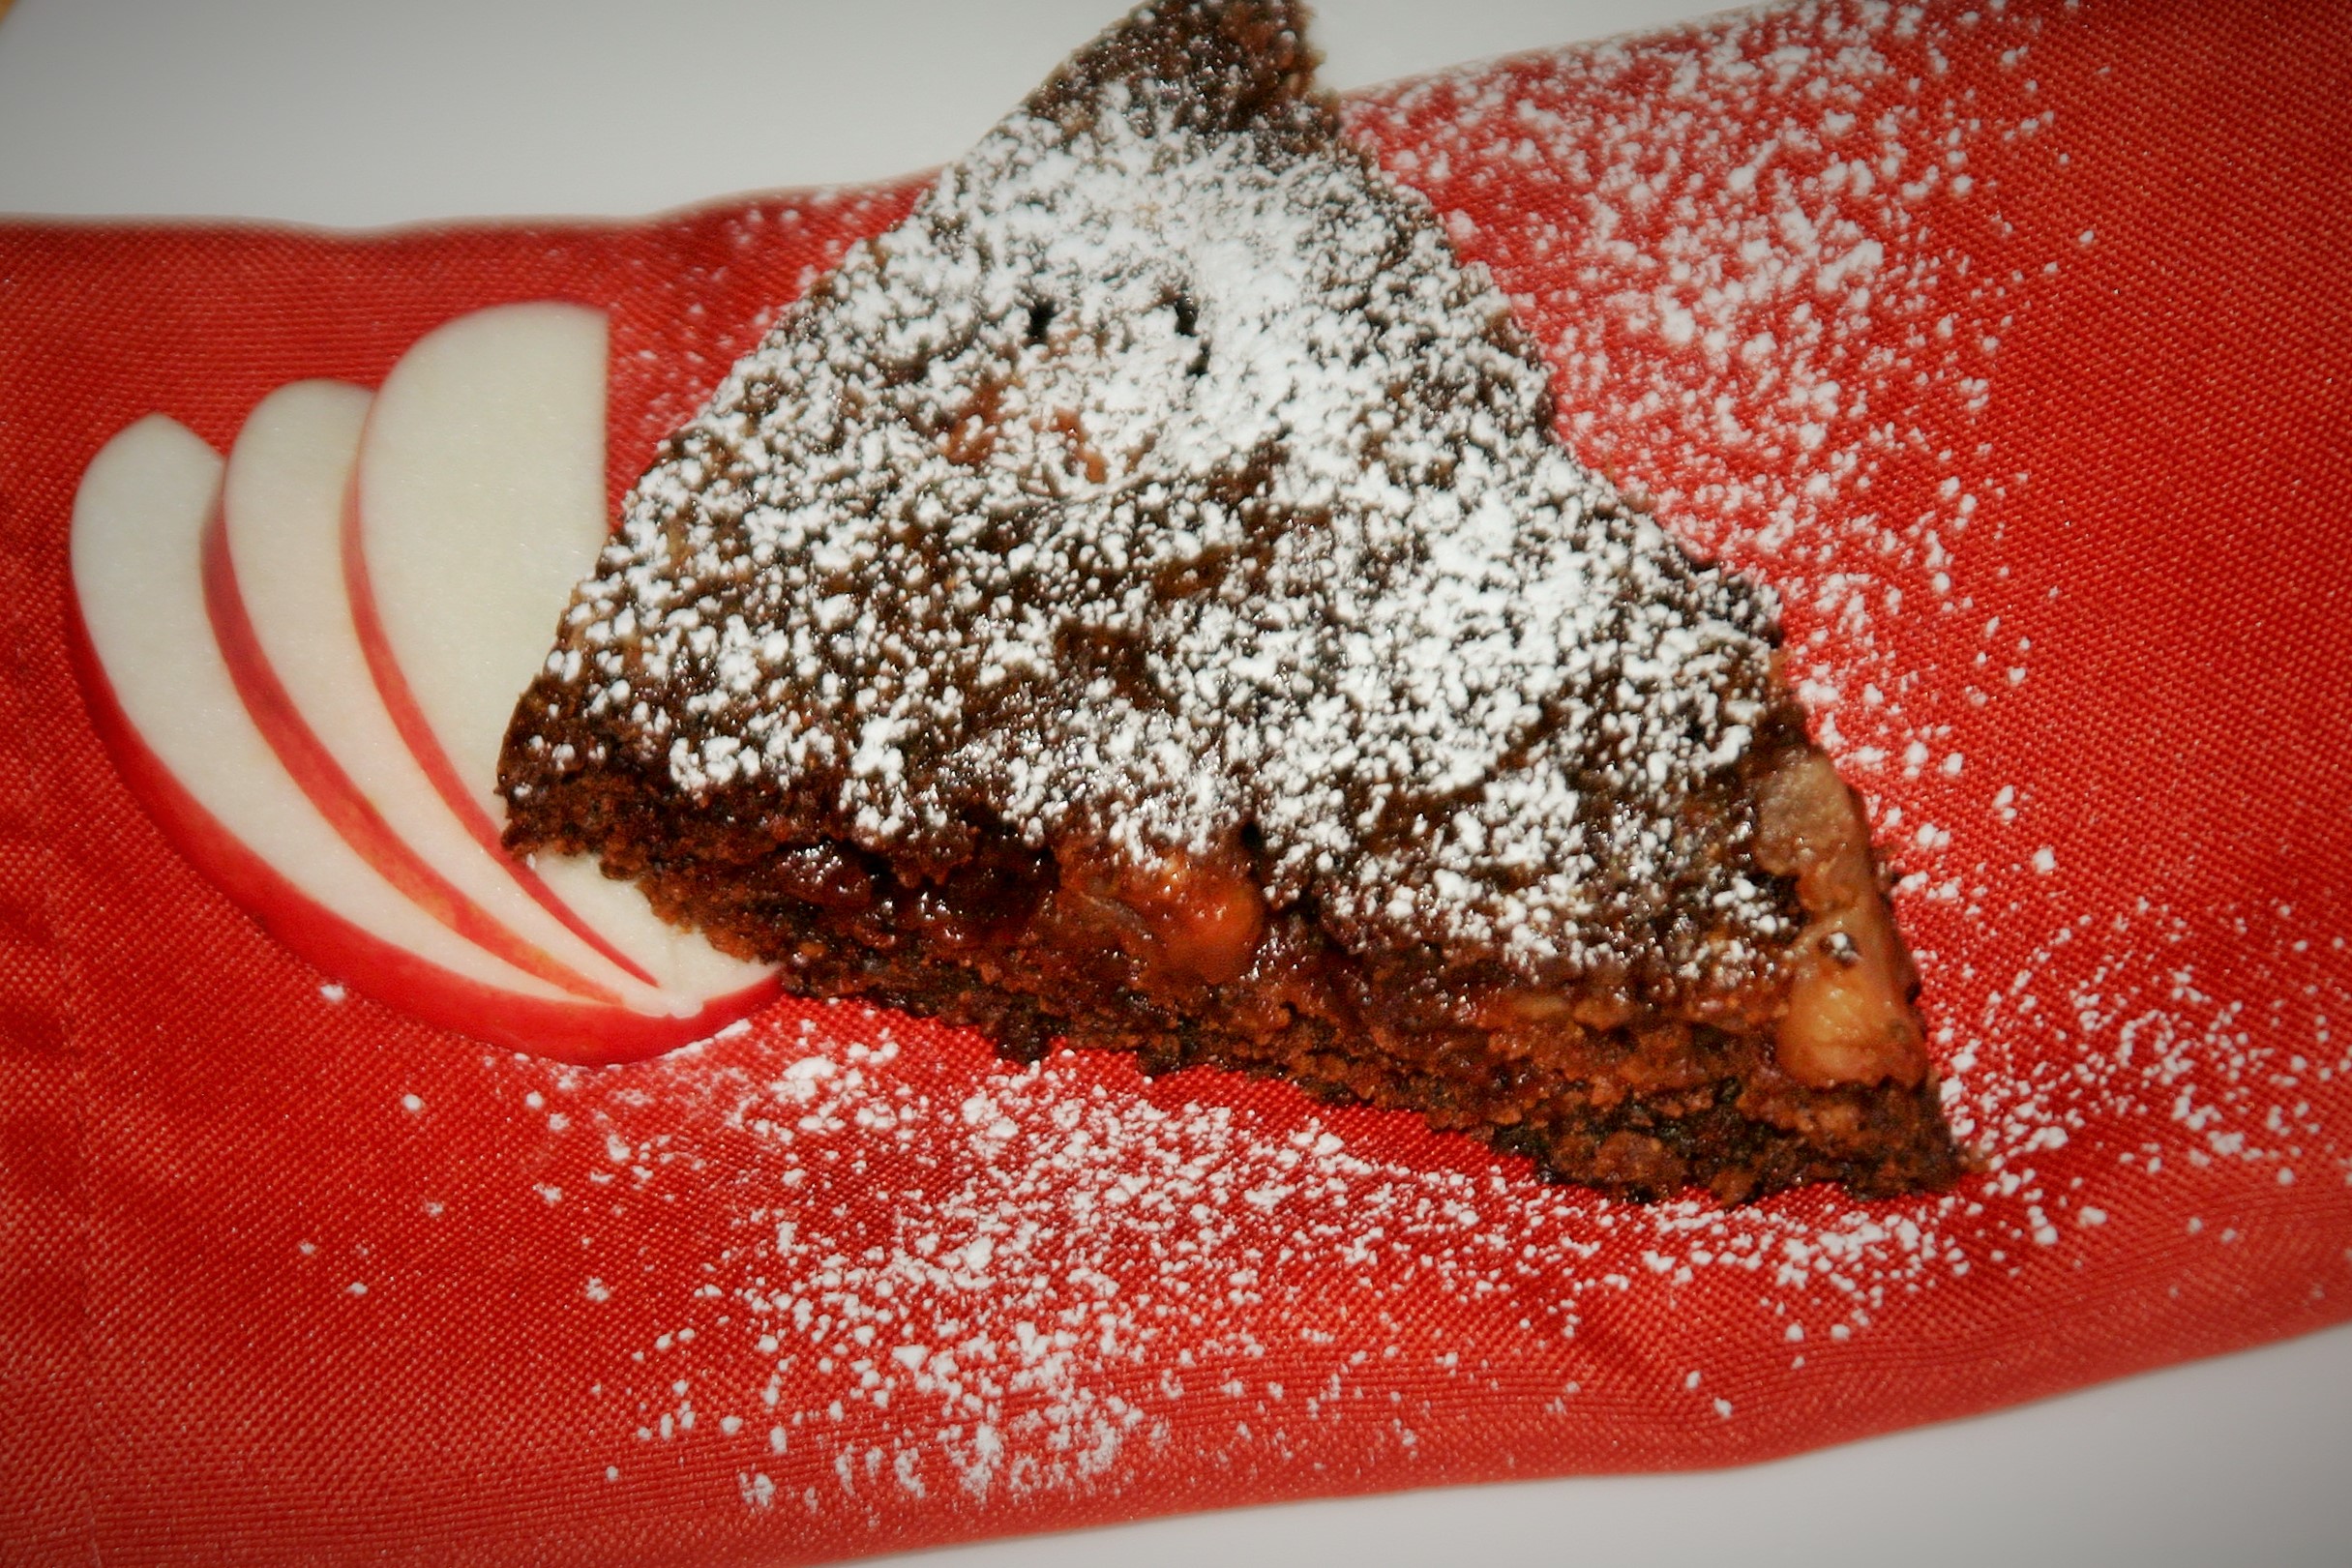
This year I’ll probably make chili because of tradition, and I’ll round it out with this apple cake. The base of this cake is my great-grandmother’s spice cake with some apples tossed in. This is a great way to use up apples that are maybe not as crisp as they once were. It is full of warming spices, has the delightful bits of apples that caramelize as the cake cooks, and is exactly what you want on a chilly fall day (plus it smells amazing as it cooks). So Throw you chili in the crock pot, bake this cake, and have a happy Halloween.
Apple Spice Cake
Ingredients
1 cup non-dairy milk
1 tsp. vinegar
1 cup sugar
1 TBL vegetable shortening
1 tsp. chia seeds or psyllium husks mixed with 2 TBL water, or an egg if you aren’t vegan
1 cup flour
1 tsp. baking soda
1 tsp. cinnamon
1/2 tsp. nutmeg
1/2 tsp. cloves
1/2 tsp. salt
1 large, or 2 small apples peeled, seeded, and chopped
Instructions
Preheat oven to 370F.
Add vinegar to milk and set aside.
Cream together sugar and shortening until smooth.
Add the chia seed/water mixture to sugar and mix together.
In a separate bowl mix together the flour, baking soda, cinnamon, nutmeg, cloves, and salt.
Alternate between adding flour mixture and milk to the shortening, mixing thoroughly between additions.
Stir in the apple.
Pour batter into a greased 9×9 cake pan and bake for 30-35 minutes, or until cake pulls away from the edges of the pan.
I was working on this recipe to serve to my daughter as she starts to eat more and more finger foods. This is a variation of my basic pancakes. I love pancakes because they are easy to make, store well, and are very easy for her to eat. The downside? They aren’t very nutritionally dense. But wait! These green pancakes do a great job of bringing some nutrients, and they taste delicious. I ate most of them, but I did share a few bites with Wolfie.
They are green from the spinach, but if you start the trend on Halloween (or before they know what pancakes look like) no one will question you. I topped mine with homemade blueberry jam. I promise these are good enough to eat as a snack even without a topping. The fruit gives them sweetness and the almond extract a flavor reminiscent of cake.
Halloween Pancakes
Ingredients
1 very ripe banana
3/4 cup oat flour (ground rolled oats)
1/4 cup buckwheat flour (or more oats)
1/3 cup all purpose wheat flour
1/4 tsp salt
2 tsp baking powder
1/4 tsp baking soda
1/2 tsp lemon juice or apple cider vinegar
1 cup non-dairy milk
1/2 cup sliced frozen peaches (optional)
1/2 cup (packed down) fresh spinach
2 TBL chia seeds (optional)
1 tsp vanilla extract
1/2 tsp almond extract
Coconut oil (or whatever you like) for cooking.
Instructions
Mash the banana into a large bowl.
Add the flours, salt, baking powder, and baking soda stirring the dry ingredients together briefly by tossing them together without touching the mashed banana.
Blend together the lemon juice, milk, peaches, spinach, and chia seeds until smooth. (I used my magic bullet, but a blender or food processor would work).
Pour the blended mixture into the dry mixture and stir just until everything is incorporated.
Heat a skillet over medium heat, melt in a little coconut oil, and pour the batter into the hot pan leaving enough room between pancakes to flip them.
When the are starting to look dry around the edges and bubbles are popping and not refilling, about 2 minutes, flip them over.
Cook on the second side for about a minute until golden brown.
I think this might be the first non-vegan recipe I have posted. It’s kind of scary to open myself to judgement as I switch to a non-vegan point of view. Historically this website has been totally vegan, though with the change a few months ago I decided to open the doors to no-vegan recipes. Personally I have gone through a process to make the decision to eat some animal products again, and it is a decision that works for me and my current lifestyle. When I do eat animal products I try to stay with “happy” animal products. I am working on a post about my food journey that will come soon.
I continue to eat vegan most of the time, though when I do venture out of my vegan ways this is one of my favorites. I think quiche is best when loaded with vegetables and baked in a perfectly flaky crust. Quiche is a dish that I have fond memories of from my childhood. We always had quiche for holiday brunch, and when we had people over for breakfast. It seems an impressive dish, but is actually easier than scrambled eggs!
What I love about quiche now is easy it is to throw together, that it feeds lots of people without slaving over a stove or worrying about timing eggs, and you can put whatever you have in your fridge, making it a delicious way to use up odds and ends. The only “hard” part of quiche is if you are making a homemade crust, and I made this sweet video to take the mystery out of that, so you are all set. I guess you could also buy a crust, it is up to you.
Wicked Easy Quiche
Ingredients
4 Happy Eggs (cage free, local, organic, from happy chickens)
3/4 cup unsweetened, plain, non-dairy milk
OR
3 Happy eggs
1 cup dairy milk
And
salt and pepper to taste
herbs to taste (I used fresh tyme and sage for this quiche)
spices to taste (I used smoked paprika, salt and pepper)
1-2 cups of chopped, cooked vegetables (I used kale, leeks, mushrooms, fennel, and little bit of red bell pepper for this one)
1/2-1 cup shredded happy cheese (I use goat gouda for this quiche)
Add milk, salt, pepper and whatever herbs and spices you are using mixing briefly.
Sprinkle the cheese evenly into the bottom of the prepared, unbaked pie crust.
Spread the cooked vegetables evenly over the cheese.
Pour the egg mixture over the vegetables and cheese.
Bake in the preheated oven for 45-60 minutes until a knife inserted in the center comes out clean.
Cool for at least 10 minutes before serving.
Discussion:
What is important for successful quiche?
Veggies
Cheese
Flavor
The custard (egg and milk mixture)
I I like to think of starting to build the flavor in quiche with the veggies accented by the cheese, herbs and spices, and all held together by the custard. Choose you vegetables based on either what you have, or a specific combination for a taste you are looking for. If it sounds like it would make a good omelette, it would make a good quiche.
How Does It All Work?
The Veggies
Your first layer of flavor.
Reallyany vegetables will work in this recipe; you can use as many or as few as you like. If you only do a little you might need to add more custard to fill the crust. I like mine stuffed with vegetables.
I love using greens such as spinach or kale, onions or something in that family (leeks, shallots, scallions), mushrooms, peppers, broccoli. Really whatever you like in the combination you like it. Somewhere between 1-2 cups of cooked vegetables per quiche.
Vegetables are the first layer of flavor, so choose those that you like together, chop them and cook them before adding them to the quiche. I usually saute mine.
When cooking the veggies you want to make sure they are just cooked as they will cook a little more as the quiche bakes.
You also want to start building flavor here while cooking the veggies. I usually add salt pepper, and finish with some fresh herbs if I have them. Dried are also good, but I add dried herbs while the veggies are cooking rather than at the end.
You can also use leftover cooked vegetables. Let’s say you had fajitas last night, chop up those leftovers and throw them in. Maybe it was steamed broccoli, or roasted asparagus; just toss it in.
Cheese
Adding a bit more flavor.
Almost any cheese you like should work fine here. Shredded is best as it will melt more evenly.
Add the cheese to the crust first and it will help create a barrier so the crust doesn’t get soggy from the filling.
Think about the cheese you might want on an omelette with the vegetables you chose, and use that cheese.
Somewhere between 1/2 and 1 cup of cheese is good. You can also mix types of cheeses here.
Herbs and spices
Keep building flavor
Fresh herbs are great in quiche, but if you don’t have them dried are fine. Don’t forget the salt and pepper!
Season every layer separately (vegetables, custard, even the crust if you are making it homemade).
I used thyme, sage, salt and pepper in my quiche today. Again, think of flavor profiles you like together and build a quiche based off those. Maybe basil and tomato with mozzarella, broccoli cheddar with just a little salt and pepper, mushrooms, spinach and swiss cheese with herbs de provence. Whatever sounds good.
The Custard
Holding it all together
You need something that holds it all together, and makes it, well, a quiche. The custard does this.
If you are using dairy milk 3 eggs to 1 cup milk works well, if you are using non-dairy milk then 4 eggs to 3/4 cup milk.
Sometimes I add too many vegetables and have to whisk another egg and pour it over the top to make sure the veggies are covered in the custard mixture.
Season this layer too; salt and pepper for sure, and a little bit of whatever herbs and spices you are using.
I usually just post a link to my videos in the post that they relate to, but this one is special. My mom came to visit last week and I convinced her to go on camera and make her famous pie crust! Not only is my mom sweet and wonderful, she is also an incredible cook and baker. She is the original “happy food ninja”. The pie crust she makes is basically the one she was taught by her grandmother (we just substitute vegetable shortening for lard). My mom is sharing some super fun tips and letting you in on the secrets to the perfect crust. I hope you enjoy!
My mom always said “you only make homemade pie crust for people you love.” This is a true statement as pie crust is a labor of love. It really isn’t hard, but it does take a little time, effort, and mess to make. My mom always made pretty much everything from scratch and I have many memories of her rolling out the dough for pie crust. Pie was her favorite, and her specialty. Every holiday in our house was celebrated with pie. Thanksgiving was really a time to rejoice as she spent DAYS making pie. We would have apple, pumpkin, pecan, and french silk every Thanksgiving. It was amazing! The heart of her pie started with this simple crust.
The perfect pie crust is light, flaky, a bit salty, and falls in crispy pieces when you take a bite. This crust has always been vegan, the accidental vegan thing, and lives up to the perfect crust. I have added a few tips and tricks from my mom for a perfect crust which I am sharing after the recipe.
I had a lot of fun with this post and I didn’t even have to make the pie! My mom is here for a visit and she joined me for a video and made me an amazing apple pie with her perfect crust. I got to help:) It was a perfect rainy day of baking and hanging out with my mom and filming the video with her while Wolfie took a super long nap. I don’t get much better than that!
Pefect Vegan Pie Crust
Makes 2 crusts, or one two crust pie (Such as apple)
Ingredients
2 1/2 cups all purpose flour-plus extra to roll crust
1 tsp. salt
10 TBL vegetable shortening
4-6 TBL very cold water-add an ice cube while making the recipe
Instructions
Mix the flour and salt together in a medium bowl, or in your food processor.
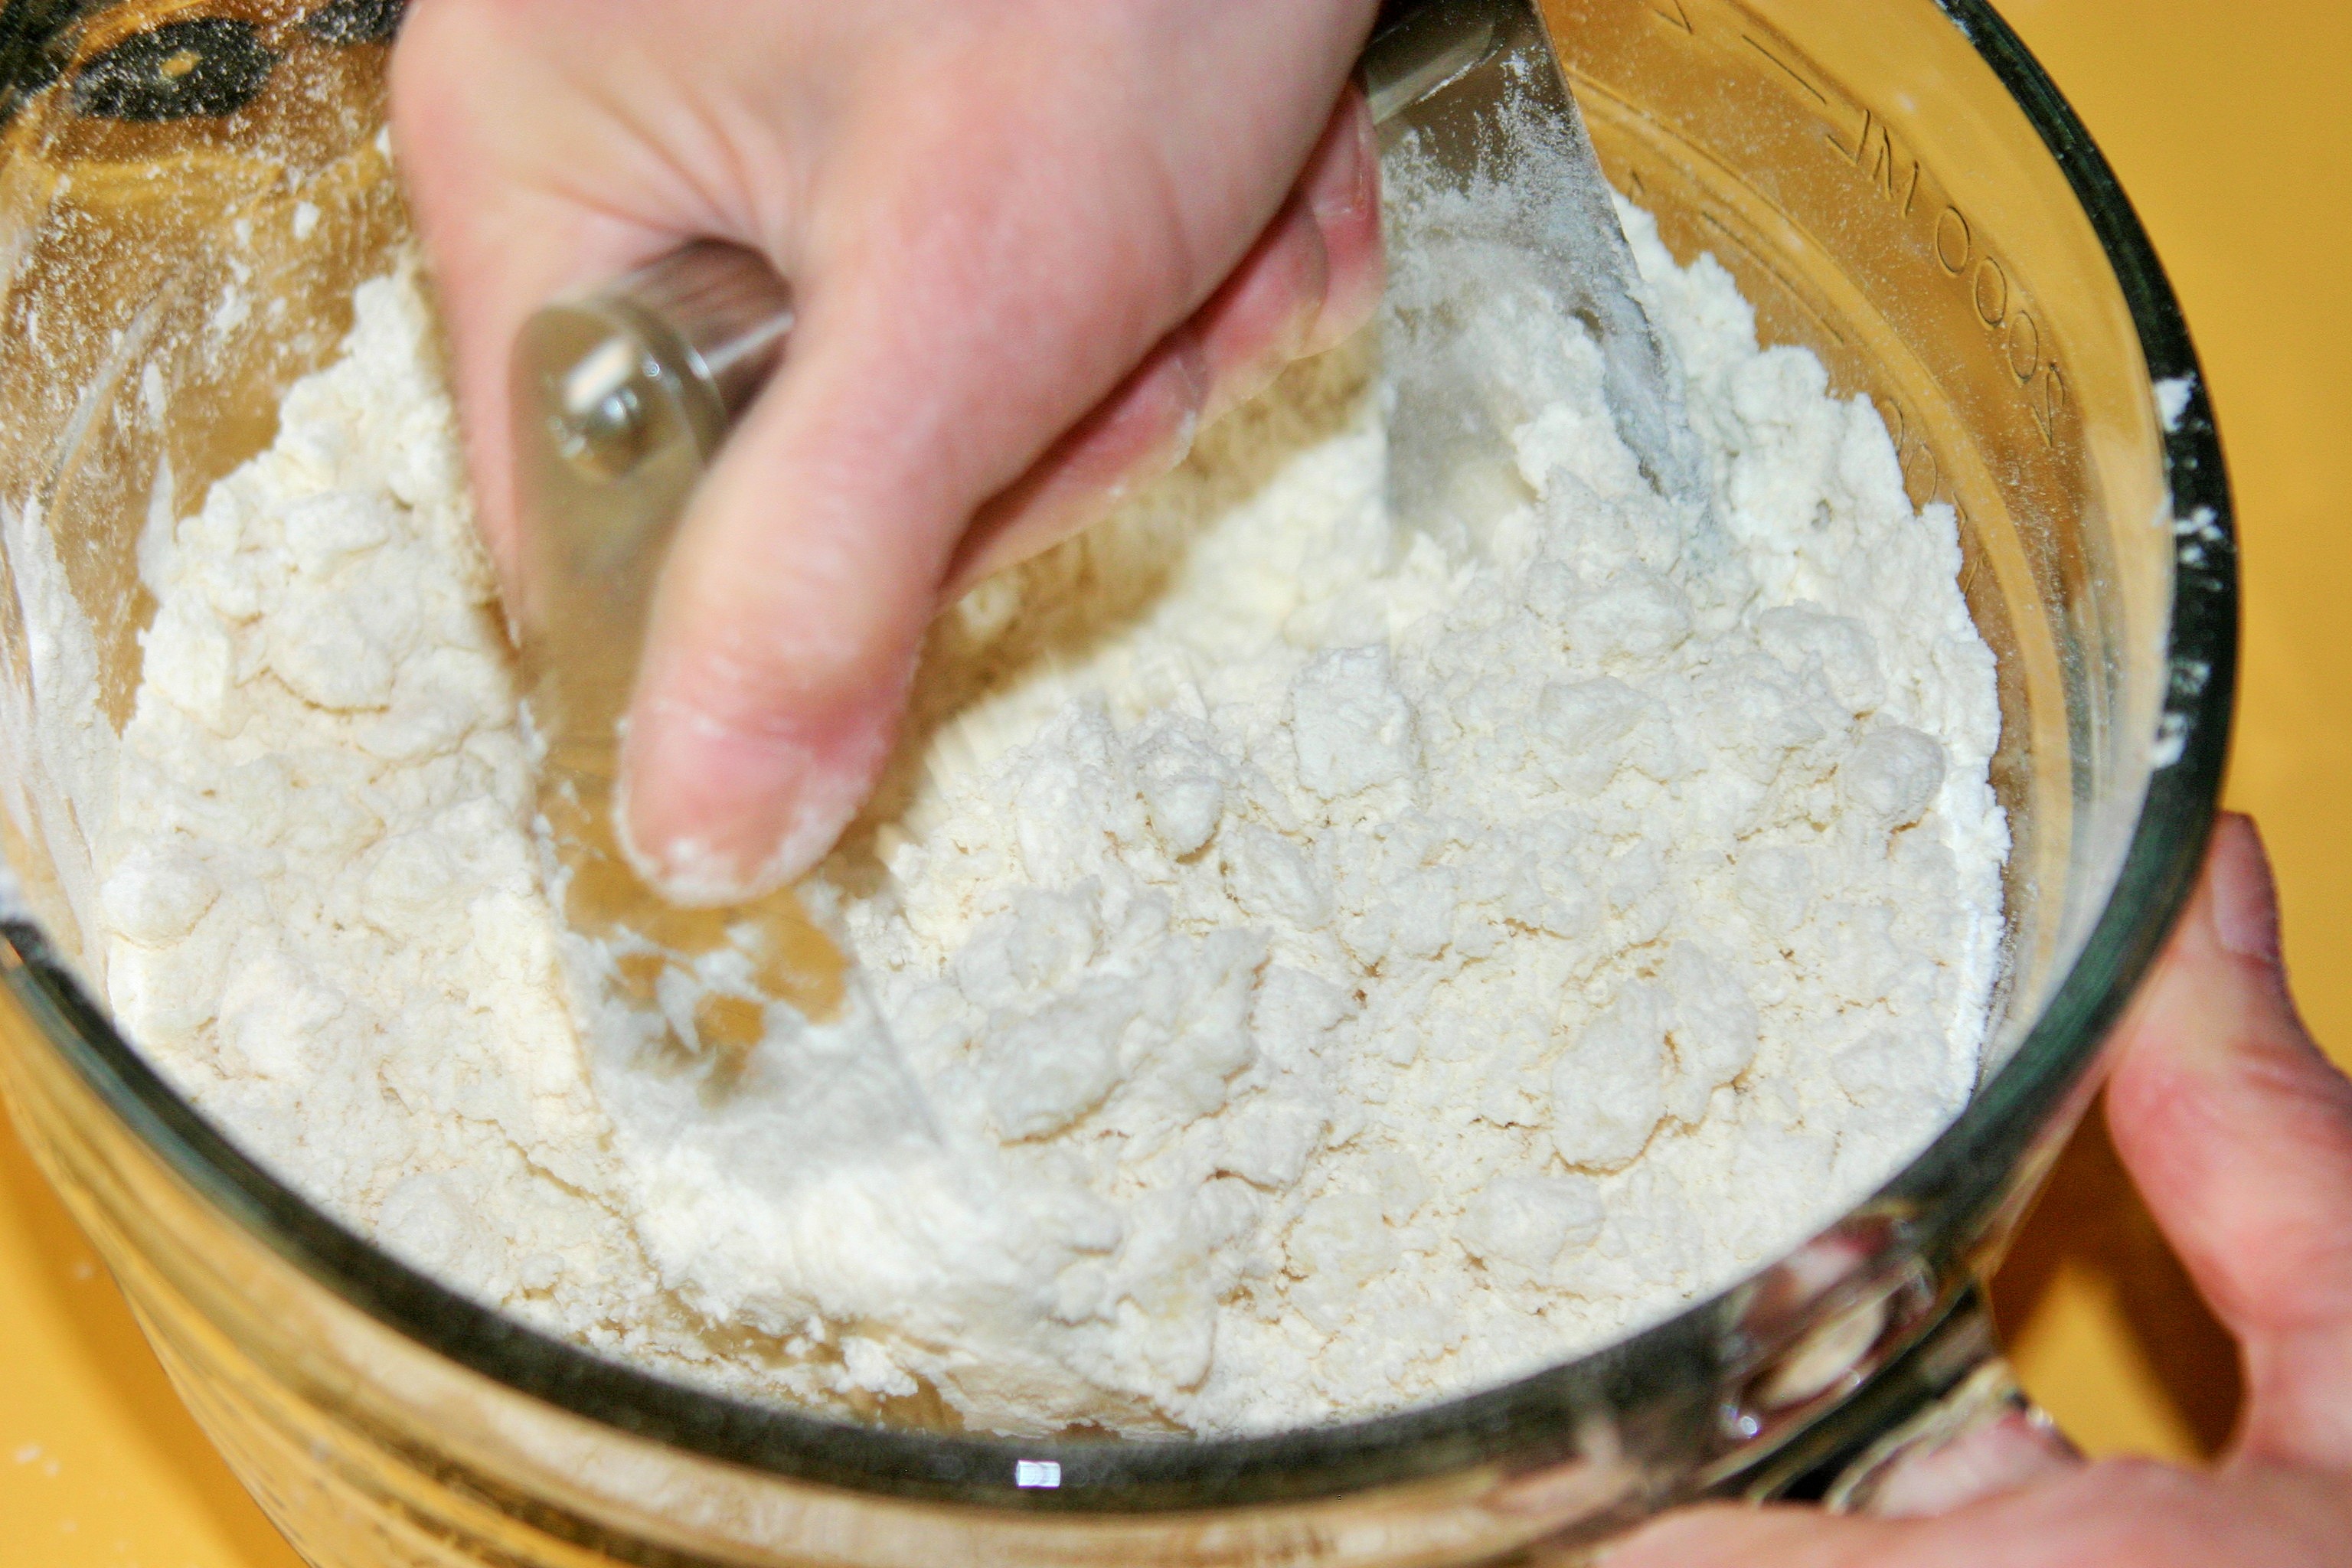
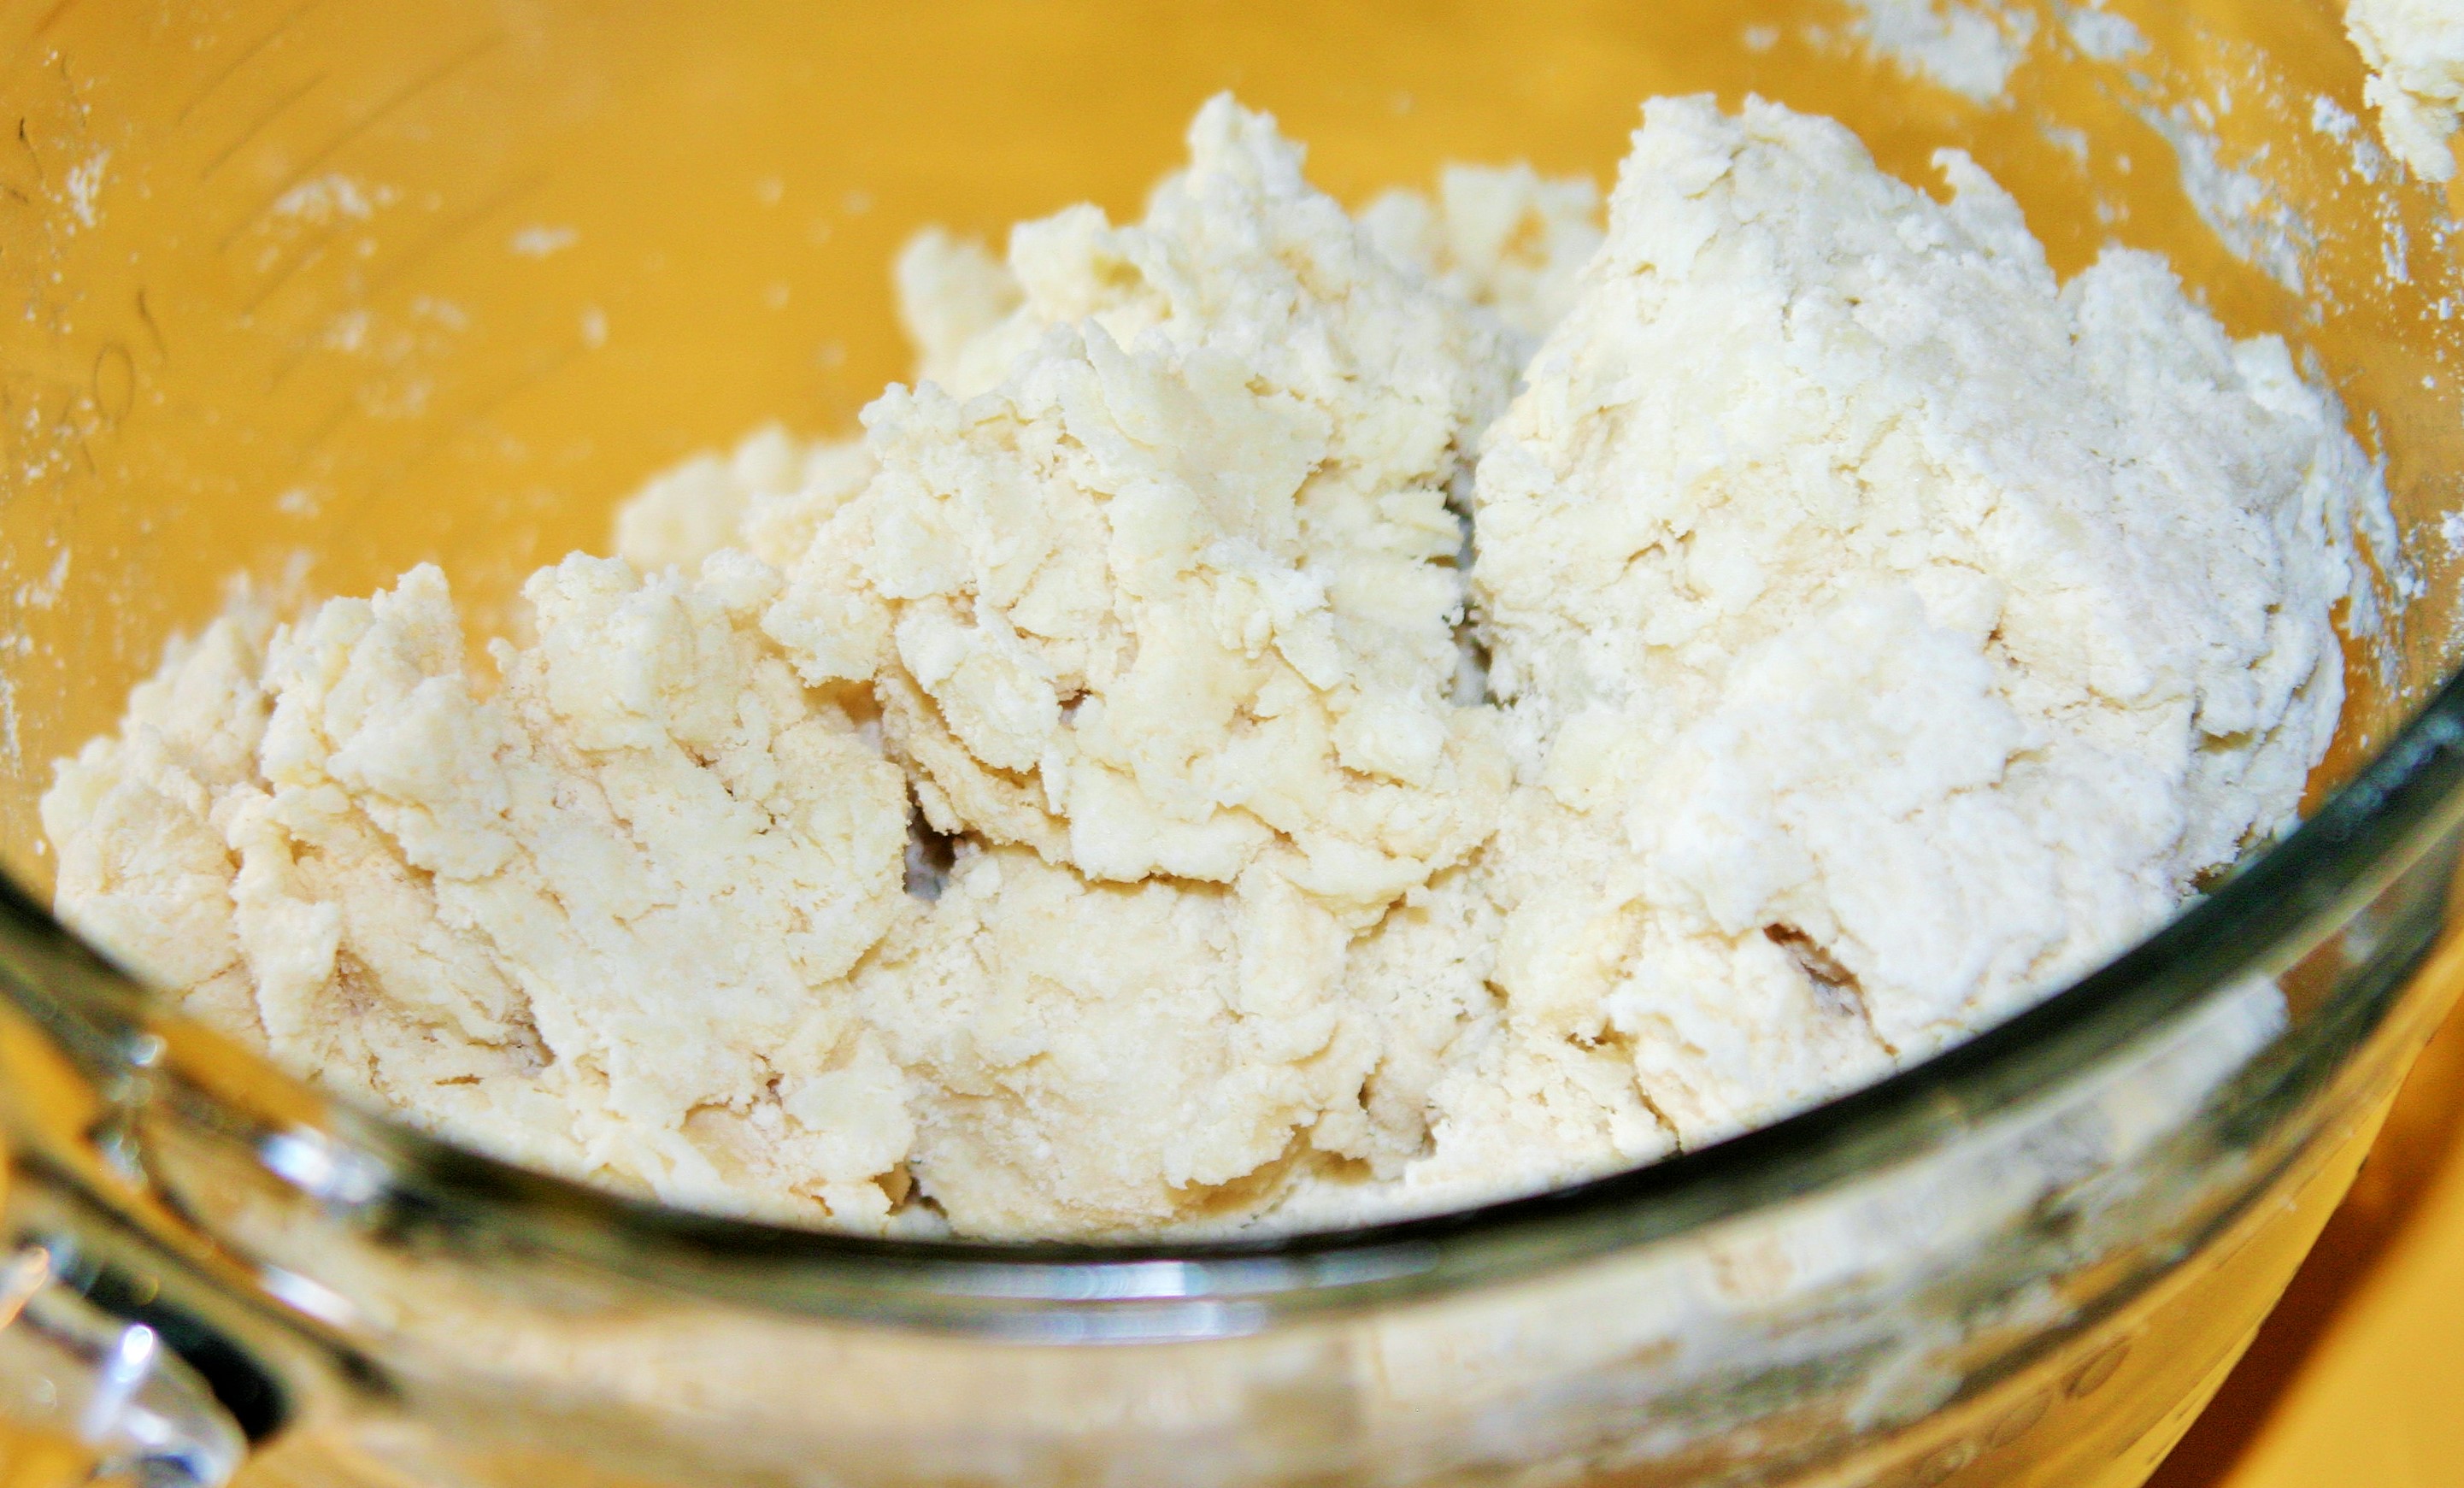
Cut in the shortening with a pastry cutter, fork, or with short pulses in your food processor.
Mixing with a fork, rubber spatula add just enough of the water to hold the crust together in a ball with no large cracks when you press it together with your hands or the spatula.
On a clean dry flat area sprinkle flour in a shape larger than you want your crust.
Split the dough in half and make each half in to a ball.
Place the dough ball in the middle of the floured area and sprinkle more flour on the dough as well as on a rolling pin.
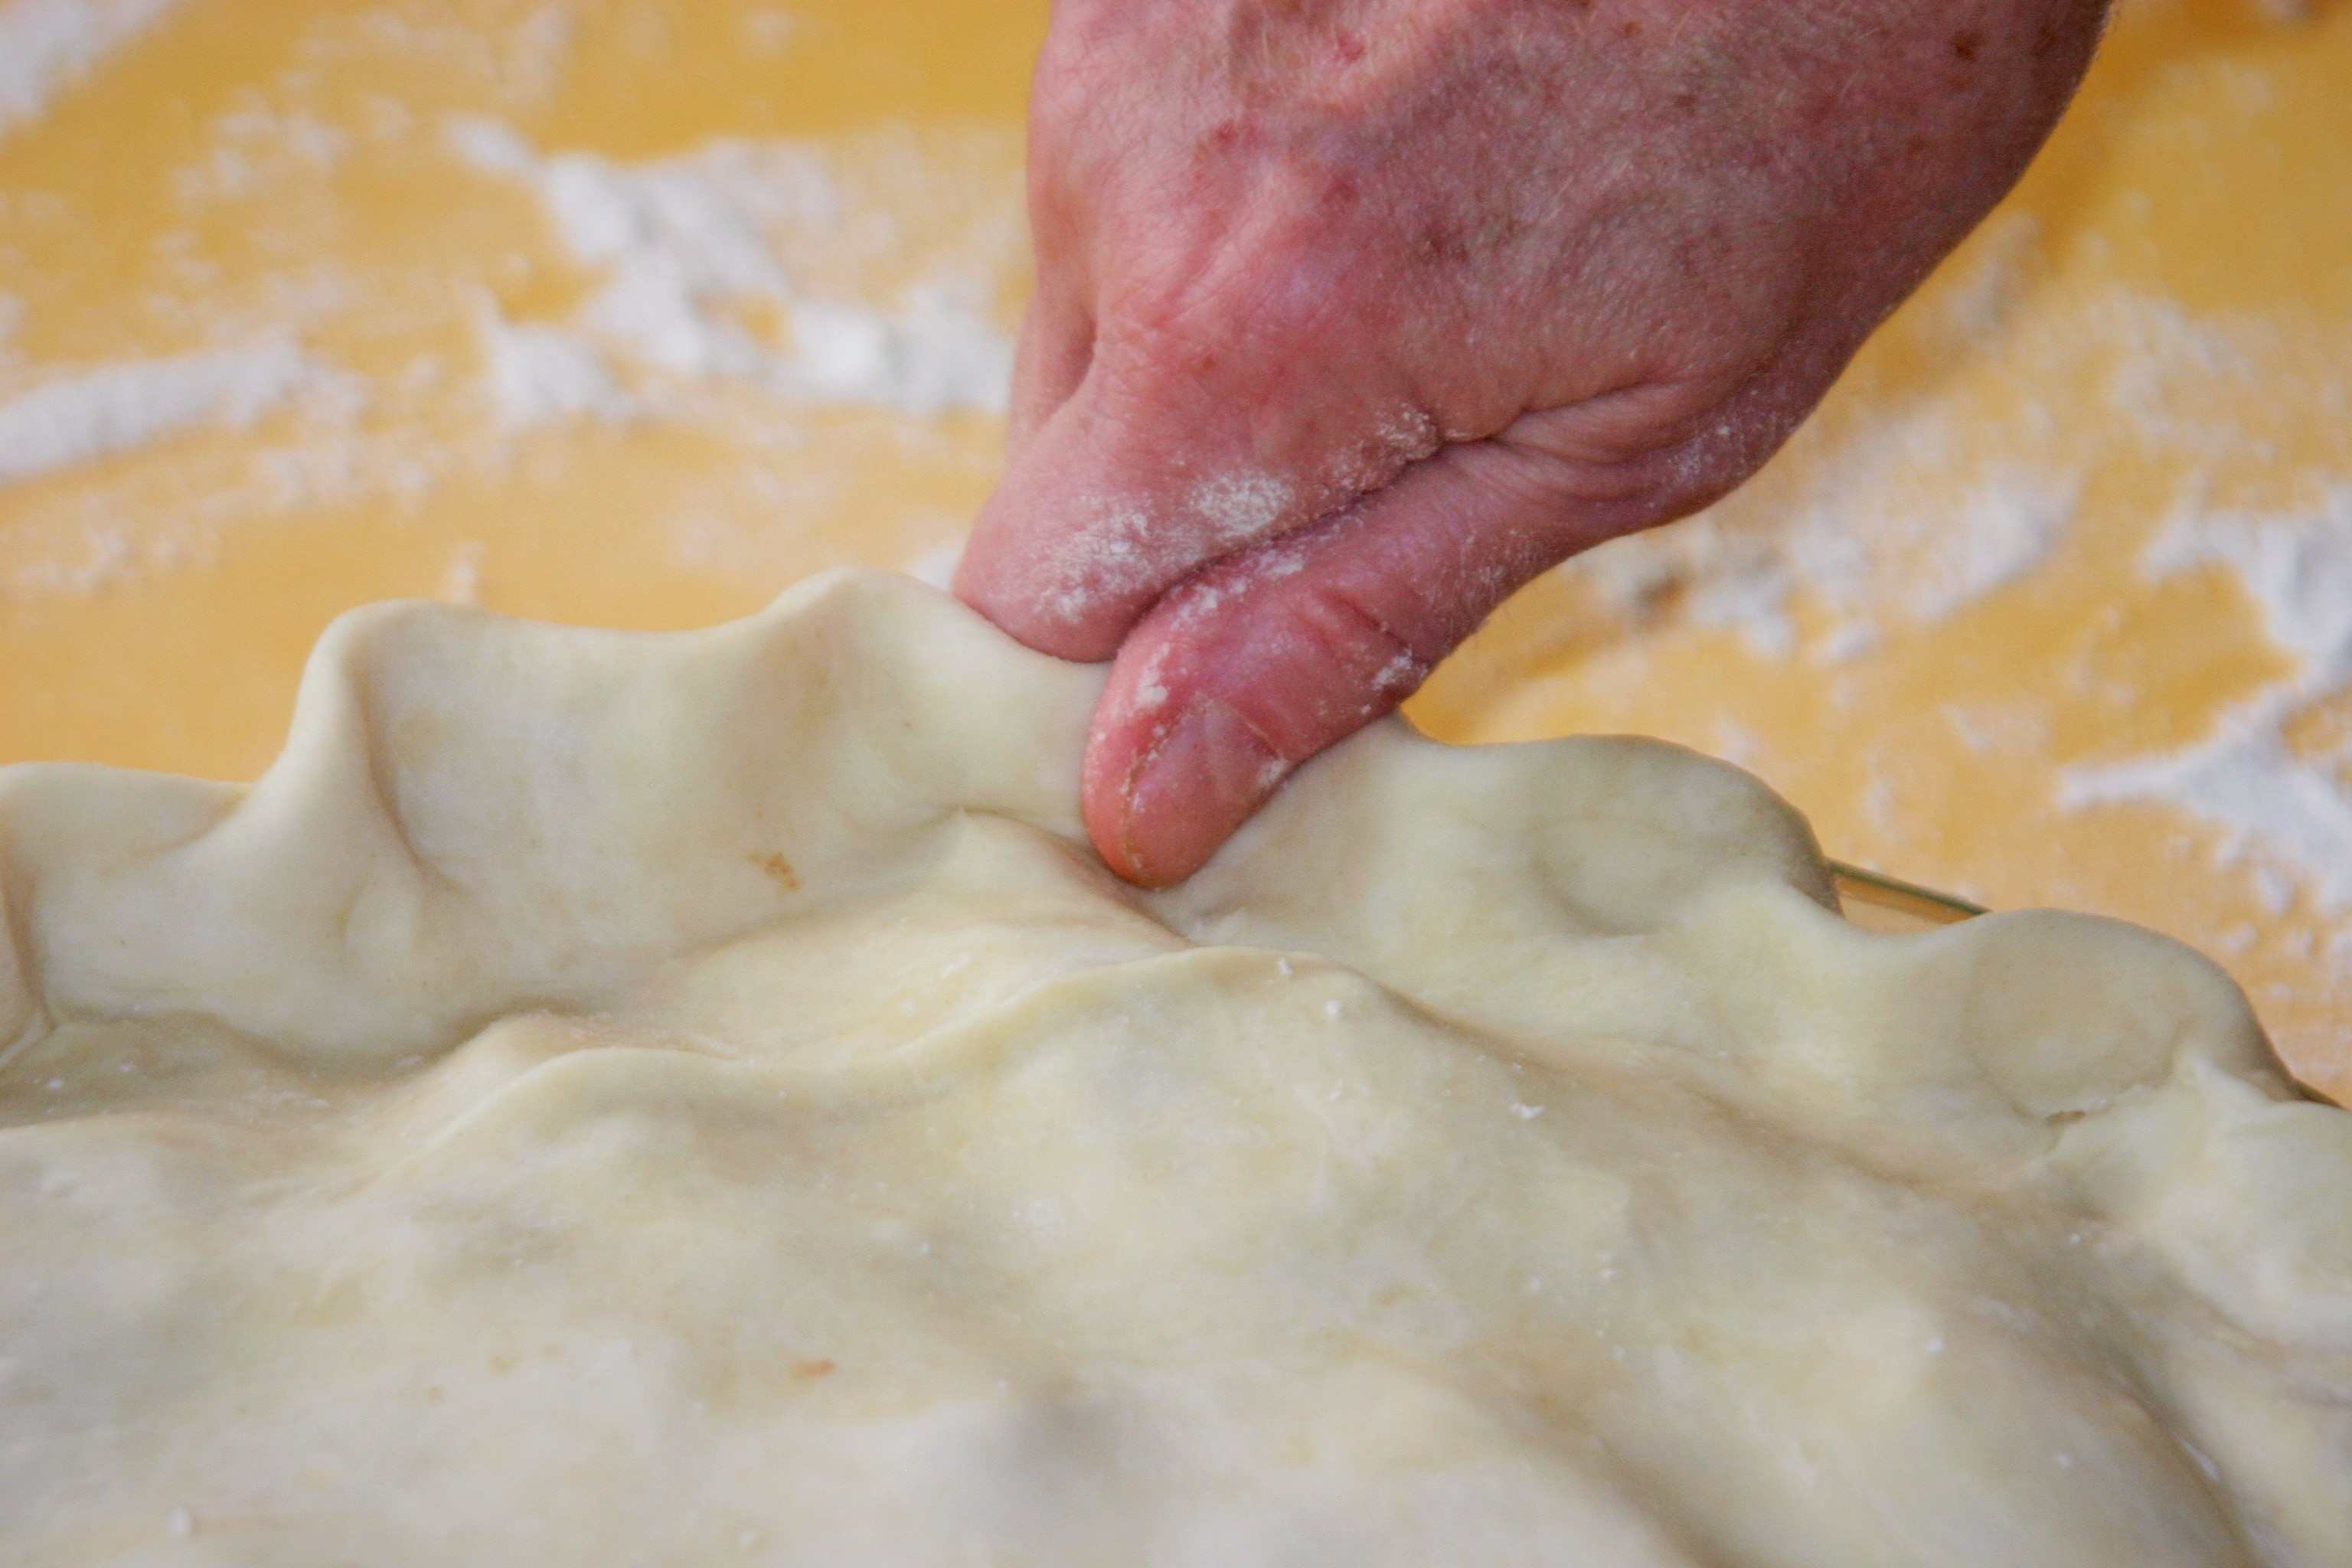
Role the crust starting in the center of the ball and working toward the edges. -touch the dough as little as possible.
When the crust is rolled to the size you desire pick it up using the rolling pin and place in pie plate.
The second half can be used for a top crust or another bottom crust.
Use the crust to make anything that requires a perfect pie crust.
Tips and Tricks:
The less you touch and play with your crust the better it will be.
The more you work with a wheat crust the more the gluten in the wheat develops. When gluten develops it makes the product chewy; perfect for bread, not perfect for pie crust.
A food processor works great, just do quick pulses until it looks right.
Start with cold ingredients.
Cold vegetable shortening can be hard to work with, but it is worth it in the end. Flakes in pie crust occur when the little pieces of fat melt and leave air pockets as the crust bakes. (Check out Food Lab for the real story)
Measuring is not exact, go by look and feel.
The consistency of the crust will change based on the type and brand of flour, and how you measure your ingredients. A scale is much more exact, I don’t use one so my measurements are a place to start. Check out this video to see each stage.
If your crust just isn’t working, put the broken mess on a baking sheet, sprinkle with cinnamon and sugar, bake for about 10 minutes at 375 until the crust is golden brown, and eat them right up. Start a new crust while these are baking
Never make crust when you are in a hurry.
It just won’t work. One of those things. Take your time, at least until you have it down.
You can use fats other than vegetable shortening, but my mom says it’s the best, so why even go there?
Cutting the shortening in. This is how it should look right before adding water.The dough with water, before rolling it out.Vegan Pie CrustPerfect Homemade Pie Crust