Breakfast These Days *** Pumpkin Muffins – Dairy Free, Grain Free, Paleo***

My girls wake up early.  For us, 6am is sleeping in. Not only do they wake up early, they wake up HUNGRY! Unfortunately my older daughter has my quirk of only wanting to eat if something sounds like the perfect food at a given time. I will often skip eating if we don’t have exactly what I want, and so will my daughter. Also unfortunate is she has my tendency to get hangry. If she doesn’t eat within 15 minutes of waking she turns into, well, it isn’t pretty. To make it more difficult, she goes through phases eating the same thing day after day, until one day, that will no longer be acceptable. We just when through a tough couple of weeks where nothing sounded good to her, so getting her breakfast was a challenge. Then I remembered these little gems and we have been on easy street again.

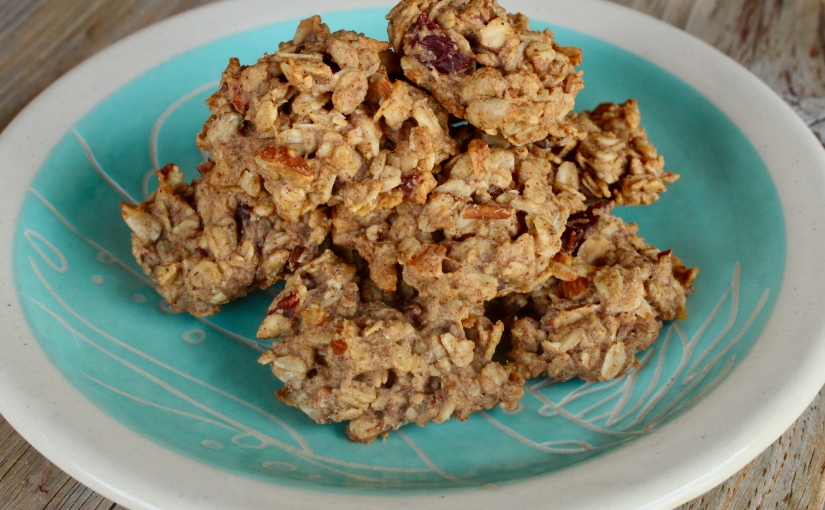
This are paleo muffins packed with yummy ingredients that scream fall. They taste quite similar to pumpkin pie; bursting with warm baking spices, and hints of pumpkin. As far as nutrition goes I’m fairly picky about what my girls eat, and I’m ok with these. They have no grains and use almond flour instead, which is nice as they won’t eat a lot of nuts on the daily. It also has pumpkin so we get the touch of vegetables that makes me smile.

Ingredients

  • 1 1/4 cups almond flour
  • 1 1/4 teaspoons baking soda
  • 2 tsp ground cinnamon
  • 1/4 tsp ground cloves
  • 1/4 tsp ground nutmeg
  • 1/4 tsp ground ginger
  • 1/4 teaspoon salt
  • 4 large eggs, room temperature
  • 1/2 cup neutral oil (coconut oil is good, but melt it first)
  • 1/2 cup maple syrup
  • 1/2 cup canned pumpkin puree (not pumpkin pie filling)
  • 2 teaspoons vanilla extract

Instructions

  1. Preheat the oven to 350 °F. Line a mini muffin pan with 24 muffin liners.
  2. In a large bowl, mix together the dry ingredients (almond flour through salt).
  3. In a separate medium bowl, mix together the wet ingredients (eggs through vanilla).
  4. Add the dry mixture to the wet mixture and stir just until combined.
  5. Pour the batter evenly into the muffin liners, filling each liner until almost completely full. You’ll likely have enough batter for two large muffins, or a second batch of 6 little guys.
  6. Bake for 11-13 minutes or until a toothpick inserted in the middle comes out clean.
  7. Cool for 10 minutes in the pan, then turn out onto a wire rack to cool completely.
  8. These need to cool for at least an hour before serving, both because of taste and texture.
  9. Store in an airtight container for up to 5 days.


Advertisement

Zucchini Date Oatmeal – vegan and gluten free

I haven’t written a post about oatmeal in a while. I’m sure you have been dying for a new version of oatmeal the whole time. This should do the trick. This is a favorite of both by girls and they love to help make it. They can both eat dates while I chop, then my 3 year old helps me shred the zucchini. They take turns dumping in the ingredients, and impatiently wait as it cooks, and cools enough for them to eat. We rarely eat this for breakfast, but often make it for our mid-morning snack, or lunch. The girls also like it cold and room temperature so it is a stable in our snack bag. This oatmeal is sweet, cinnamony, and filled with vegetables! Everything you could ask for in an oatmeal. If you are serving it to a green vegetable averse person you can peel the zucchini before shredding.


Ingredients

  • 2 medjool dates, pitted and finely chopped
  • 1 cup shredded zucchini, one small
  • 11/4 cups water
  • pinch of salt
  • heaping 1/2 cup rolled oats
  • 2 TBL hemp seeds (optional)
  • cinnamon to taste (optional)

Instructions

  1. In a small saucepan combine dates, zucchini, water, and salt. Cover and bring to a boil over medium high heat.
  2. Once boiling stir in the rolled oats, hemp seeds, and cinnamon. Cook, stirring frequently until the water is absorbed and the oatmeal is the consistency you prefer.
  3. Serve warm.


Fresh Strawberry Pie for the 4th of July

The summer is flying by! I cant believe it is already the weekend before the 4th of July! We have already done lots of summery things – the beach about a 1000 times, biking, walking on the bike path, picnics, and strawberry picking. My girls loved picking strawberries and we picked WAY too many. I had plans to make pie, jam, and freeze some. I forgot that I have small children and those are all time consuming activities. I did make a pie, this pie specifically and it was glorious. I also froze a bunch. The jam will have to wait until next year. Or maybe we’ll do raspberry or blueberry when that time comes. For now, make and enjoy a fresh strawberry pie for your 4th of July.

Ingredients

  • ¾ C. unbleached flour
  • ¼ c. whole-wheat flour
  • ¾ tsp. salt (divided)
  • 6 TBL solid vegetable shortening
  • 6TBL. Plus ¼ C. cold water (divided)
  • ¼ c. cornstarch
  • ¾ c. boiling water
  • 1 c. sugar
  • 2.5 lbs fresh strawberries (about 7 cups hulled and haved)
  • 1 TBL. fresh lemon juice
  • 1 TBL Earth Balance or other margarine

Instructions

To make crust:

  1. preheat oven to 350.
  2. In bowl, combine flours and ½ tsp salt.
  3. Cut shortening into mixture until it resembles coarse meal.
  4. Add 4 TBL cold water while stiffing with a fork, and mix lightly to form a ball.
  5. Let dough rest at least 5 minutes at room temperature, then roll out to fit a 9-inch pan.
  6. Slip into pan, trimming as needed and crimping edges.
  7. Fill crust with dry beans, rice or pie weights and back 30 minutes or until light brown.
  8. Remove from oven and cool.

To make filling:

  1. Mix cornstarch thoroughly with remaining ¼ cold water.
  2. Add boiling water, stirring until smooth.
  3. Place in a 1-quart saucepan over medium heat.
  4. Add sugar, remaining ¼ tsp. salt and ½ cup of the strawberries, stirring constantly and crushing berries against sides of pan as liquid comes to a low boil, thickens and clears, about 10 minutes.
  5. Reduce heat and cook 3-4 minutes.
  6. Add lemon juice and margarine and mix gently.
  7. Remove mixture from heat, add remaining berries, mix gently and pour into prepared shell. Refrigerate pit at least 2 hours before serving.
  8. Serve with coconut whipped cream if desired.

Almond Cherry Breakfast Cookies – Vegan Gluten Free

I’ve been working out a lot lately. It’s been a few years, you know with having babies back to back and then not sleeping for three years. However, finally, life seems to be settling in. Both my girls are starting to sleep and I finally have the energy to work out again! It’s pretty awesome. I finally feel like myself again after three years! I’m so lucky to have such a supportive husband who is willing to do the early morning wake ups while I go work out. We also decided to train for our first triathlon together. We’re going to do a sprint triathlon at the end of June. All very exciting, but it all makes be EXTREMELY hungry!

When I get so hungry and I don’t have a plan I end up eating junk. I’m secretly a doughnut fiend and will find a way to work one into my week if I’m not careful. These little gems help a lot. I like to make them super small and eat one before my early morning workouts, and will often snack on one later if I’m searching for food but don’t know what to eat.

This is a super adaptable recipe. You can use any combination of nuts, seeds, and dried fruit, switch out the nut butter, add spices, you name it. This is a simple tasty version that I’m really digging right now.

 Adapted from Leelalicious

Ingredients

  • 2 ripe bananas mashed
  • 3/4 cup almond butter – I used homemade salted, other nut butters also work great
  • 1/4 cup refined coconut oil melted (unrefined is also great, but will give more coconut taste)
  • 2 TBL agave nectar, warmed
  • 2 cups rolled oats
  • 1/3 cup dried cherries, chopped
  • 1/3 cup salted sunflower seeds
  • 1/3 cup chopped nuts – I like a mix of salted pecans and almonds
  • If you are using unsalted nut butter and nuts add some salt 1/4-/12 tsp

Instructions

  1. Preheat oven to 325F.
  2. Mash banana in a bowl and add nut butter, coconut oil and agave mixing until smooth. It helps to warm the nut butter, honey, and melt the coconut oil if you are doing this by hand.
  3. Add the oats, dried cherries, sunflower sees, and nuts mixing to combine.
  4. Prepare a baking sheet. I like to use a silicone mat here which keeps the cookies softer. If you want them crispy use parchment paper or leave cookie sheet bare. No oil needed.
  5. Drop 2 TBL sized scoops of the mixture onto a cookie sheet and flatten (cookies won’t spread while baking).
  6. Bake for about 13-16 minutes until edges are lightly browned.
  7. Let cookies cool on baking sheet before moving to an air-tight storage container.
  8. I store my in the freezer and pull them out one at a time when needed.


Easy 3 Ingredient Vegan Mother’s Day Crêpe -Gluten Free Vegan

Being a mom I think Mother’s Day is great. I get to sit around while someone else cooks and cleans for a day. Sounds like perfection. I know if you’re the one doing the cooking and cleaning for a day it might seem a little overwhelming. I’m here to help. These three ingredient Crêpes are incredibly simply, yet sure to wow. Pictured is simple the Crêpe with some store-bought raspberry jam and a little powdered sugar sprinkled over the top. Beautiful right? You could also find some vegan chocolate hazelnut butter . Perhaps a mimosa and some breakfast potatoes or scrambled tofu and you are good to go!

Happy Mother’s Day to all!

Ingredients

  • 1 1/2 cups (165 grams) chickpea (Besan) flour -You can find this in any good grocery store by the gluten free foods or specialty flour section.
  • 1 1/2 cups (350 grams) water
  • 1/2 tsp fine sea salt
  • Cooking spray or Oil for cooking

Instructions

  1. Whisk together flour, water and salt. Set aside for 30 minutes for flour to absorb water.
  2. Once batter has hydrated heat a 11″ non-stick skillet over medium heat.
  3. Spray with cooking spray, or add a small amount of oil to the pan and swirl to coat the bottom of the pan.
  4. Add 1/3 cup of the batter and swirl the pan so the batter coats the bottom of the pan in a thin layer.
  5. Cook over medium heat until bottom is golden brown, flip the crepe and cook on the second side until it is also golden brown.
  6. Continue cooking crepes one at a time until batter is gone.
  7. Serve with toppings of choice or use for dipping.

Vegan Sourdough Bagels New York Style

I didn’t really know what a bagel was until moving to the East Coast. I mean, I had eaten plenty of bagels, but I had never really, truly, had a bagel. The difference is incredible. A true bagel has chew, but still remains light and fluffy, has a crust, but can easily be eaten. There were two places that made amazing bagels in Cambridge, MA Bagelsaurus and Forge Baking Co . What was even better about these bagels than other East Coast bagels, or even my own jalapeño bagels (which are still amazing), is that they are sourdough, and have been fermented for a few days. The slightly sour taste and incredible chewy but light texture take these bagels to the next level. Problem is when we moved to the West Coast I couldn’t find good bagels. So I learned to make them myself. These rock. Try the and fall in love with bagels all over again.

There is a ton that goes into sourdough and I am not an expert by any means. I just started my own sourdough starter a few months ago. I used this tutorial from The Kitchn. 

A few other notes:

  • I used volume measurements for some of the ingredients because my scale does not seem to be accurate for such small quantities.
  • Non-diastatic malt powder is for flavor, you can omit it if you don’t have it, though I think it adds something special.
  • I tried several times to make these without added yeast, but they did not reach the heights I was hoping for (literally they didn’t poof like I wanted them to).  You can omit the yeast, but be warned, as written, this recipe will create a pretty dense bagel. It is still pretty good, but I like to poof.
  • I start on Wednesday to have bagels for Saturday morning.
  • This recipe was adapted from Honest Cooking. 

Ingredients

For the Sponge

  • 500 g (4 cups) bread flour
  • 500 ml (2 cups) water
  • 160 g 100% hydration wheat sourdough starter

For the Dough

  • 1000 g (5 cups) of sourdough sponge (above)
  • 480 g (4 cups) bread flour, divided
  • 3 tsp non-diastatic barley malt powder
  • 3 tsp fine sea salt
  • 1 tsp dry yeast

Instructions

  1. Make the sponge:
  2. Mix your starter with the water and whisk until foamy. Add 500 g flour. Mix thoroughly until all lumps are gone. Scrape the sides of the bowl with a spatula. Cover loosely with plastic or lid and leave for at room temperature least 6-8 hours.
  3. Make the dough:
  4. Measure 1000g of the starter sponge. You can use the rest to refresh your starter, throw it in some pancakes, or compost it.
  5. To the starter add the salt, malt, yeast and 480 grams of flour in a bowl of a stand mixer and mix together with the dough hook until they form a ball. – if you are measuring by volume not weight start with 3 cups of flour and add more a 1/4 cup at a time mixing until it is incorporated before adding more.
  6. Continue kneading the dough with the dough hook until smooth and elastic, about 10 minutes. You can do this by hand, but you are way stronger than me if you do!
  7. Immediately divide the dough into 12 equal parts. I weigh mine and go about 4.5 oz per bagel for 12 bagels.
  8. Line a half sheet pan with parchment paper.
  9. Roll each portion of dough to form a log about 10″ long, then shape into a bagel by bringing the ends together and folding one over the other. Set formed bagels on baking sheet with a little room in-between.
  10. Once all bagels have been formed cover tightly with plastic wrap and place in the refrigerator at least overnight, and up to 3 days. I like them best after 2-3 days, but sometimes I don’t plan far enough ahead and I just let them go overnight.
  11. It is super important to let the bagels rest for a bit. It creates the taste and texture you are looking for in these delightfully perfect bagels.
  12. On the day you are planning to bake remove the bagels from the refrigerator 1-2 hours before you plan to boil them. It is possible to boil right from the refrigerator, but I think the texture improves if you let them warm up a bit.
  13. Preheat your oven to 500F.
  14. Bring a large pot of water to a boil over high heat. I use a 3qt wide saucepan. It is about 5″ deep and has a large flat bottom. Any wide saucepan will do.
  15. I also have my cooling rack out and ready to go.
  16. Once the water has reached a rolling boil carefully add as many bagels as will comfortably fit into your pot. 4 fit into mine. I have to nudge mine a bit to make sure they don’t stick to the bottom.
  17. Once you have placed your bagels in the pot set a timer for 30 seconds. When it goes off flip all the bagels and set the timer for 30 more seconds. After the second timer remove the bagels from the pot and place them on the cooling rack. If you are going to add toppings now is the time to do it while they are sticky with water.
  18. Bring the pot of water back to a rolling boil before boiling another batch of bagels.
  19. Continue with above steps until all bagels are boiled and resting on the cooling rack.
  20. Transfer bagels onto the parchment lined baking sheet.
  21. Bake for 20-25 minutes until perfectly golden all over. Use the rack in your oven that is the hottest. For me it is the bottom rack.
  22. Once baked place bagels on the cooling rack and allow to cool until you can easily hold them.
  23. Store cooled, uneaten bagels in plastic on the counter for up to 3 days, or in the freezer if you can manage to keep them that long.
Bagel After fermentation, before boiling
After fermentation, before boiling
Bagel While Boiling
While Boiling
Bagel After boiling before baking
After boiling before baking

Valentine’s Day Vegan Date Caramel Sticky Buns -refined sugar free

Date Caramel Sticky Bun

If you love someone you make them sticky buns. If they are your one and only you make them healthier sticky buns because you want them to *stick* around longer.  These take my already delicious cinnamon roll recipe and turn it into a sticky mess of a bun. I took out all the refined sugar, replaced some of the butter with pumpkin, and covered it all with date caramel. These are still sweet, and sticky, and fragrant, and soft, and shout love. They are also great to make the night before and throw in the oven while you sit around sipping coffee. Or rush around getting ready for work and then sit together at the table for a few minutes eating a special breakfast showing your partner you love them because you took extra time to just be with them. Oh, love.

Happy Valentine’s Day!

Vegan Date Caramel Sticky Buns

Ingredients

  • For the date caramel
  • 12 oz medjool dates
  • 1 3/4 cup boiling water
  • 2 tsp pure vanilla extract
  • 1/4 tsp (4grams) fine sea salt
  • For the sticky buns
  • 4 1/2 tsp.(14 grams) Ener-G Egg Replacer powder (equivalent of 3 eggs)
  • 6 TBL water
  • 600 grams (4 1/2-5 cups) unbleached all-purpose flour- divided
  • 2 1/4 tsp. (8 grams) active dry yeast (one packet)
  • 1 cup non-dairy milk
  • 1/4 lb (1/2 cup) Earth Balance Buttery spread or sticks
  • 1/4 pure maple syrup
  • 1/2 tsp. salt
  • Filling
  • 1/2 cup (144 grams) date caramel
  • 1 1/2 TBL (15 grams) cinnamon
  • 1/4 lb (1/2 cup) Earth Balance Buttery Spread or sticks
  • 1/4 cup ( 68 grams) pumpkin puree (or more butter)
  • Topping
  • The rest of the date caramel
  • 1 tsp cinnamon
  • 1/4 cup Earth Balance buttery spread or sticks softened to room temperature
  • 2 tsp bourbon (optional)
  • 1/4 cup nondairy milk

Instructions

  1. In the bowl of your stand mixer whisk the egg replacer and water until smooth- set aside
  2. In a small saucepan heat together the milk, Earth Balance, sugar and salt until the butter is almost melted.
  3. Remove from heat and stir until butter is melted. Make sure this mixture is warm, not hot or it will kill the yeast.
  4. Add 260 grams (3 cups) of the flour and yeast to the egg replacer/water mixture.
  5. Add the warm milk mixture and mix with the paddle attachment for 2 minutes. If you don’t have a stand mixer you can do this by hand.
  6. Switch to the dough hook add the rest of the flour and mix until the dough forms a ball and no longer sticks to the sides of the bowl. If you are measuring by cups instead of weight add the flour a half cup at a time and mix until the flour is incorporated before adding more. The dough should be firm with slight resistance when you push on it and should just stick to the sides of the bowl, but not your fingers.
  7. Remove the dough hook and drizzle olive oil over the ball of dough, cover with a damp towel and set aside to rise for 1-2 hours.
  8. White your dough is rising make the date caramel and filling.
  9. For the date caramel place pitted dates in a heatproof bowl and cover with boiling water. Let them sit for about 10 minutes to soften.
  10. Drain dates reserving the liquid.
  11. Place dates, vanilla, sea salt, and 1/2 cup of the reserved date water in a blender or food processor and blend until smooth. If you are finishing the rolls in the morning cover and refrigerate the unused date caramel until the morning.
  12. To make the filling cream together 1/2 cup of the date caramel, 1/2 cup Earth Balance, and cinnamon until uniformly brown. Set aside.
  13. Once dough has doubled in size, punch it down then allow it to rest for 10 minutes.
  14. While dough is resting combine the filling ingredients and set aside.
  15. Place dough on a lightly floured surface and roll dough into a rectangle about 18″ by 15″.
  16. Spread the filling mixture evenly over the dough, all the way to the edges.
  17. Roll dough into a log and slice into buns, as large as you like. I like mine to be about 1 1/2″ thick and I usually cut between 10-12 rolls.
  18. Place buns on a rimmed baking sheet or pan close enough to touch each other. I use my 9×13 pan. I like to line the baking sheet with parchment paper (for easier cleanup).
  19. If baking right away: Let the the rolls rise until almost doubled in size, about and hour.
  20. If baking the next morning: cover the rolls tightly and let them rise in the refrigerator overnight. In the morning set the on the counter as your oven preheats and proceed as usual.
  21. Preheat oven to 350 degrees.
  22. Bake rolls for 25-30 minutes depending on their size, until golden brown.
  23. While the rolls are cooking combine the topping ingredients except for the walnuts, and just heat through on the stove.
  24. When rolls are done pour the topping over the hot rolls, and sprinkle with the nuts.
  25. Serve warm.

Chocolate Overnight Oats with Chia Seeds

Chocolate Overnight Oats with Chia Seeds

Never underestimate the power of chocolate. My lovely 3 year old, who has had chocolate only a handful of times but was not only willing to try this, but begging for a bite; and she kept eating. This is a fun treat, super easy to throw together the night before, and perfect for a quick breakfast, or in our case, a mid-morning snack. The toppings you use are totally up to you and what you have in your pantry. I love some sort of tart fruit, I usually use frozen raspberries, and the extra crunch of the almonds and coconut. Wolfie loved the bananas and Fox loved the coconut and freeze dried strawberries.

Makes 2 large servings

Ingredients

  • 2 cups non-dairy milk
  • 3 TBL pure maple syrup
  • 1 tsp pure vanilla extract
  • 1/2 tsp almond extract
  • 2 TBL cocoa powder – I used a mixture of dutch and natural
  • 1 cup rolled oats
  • 1/4 cup chia seeds
  • Toppings of choice, this time I used: 1/2 a banana, sliced, 1 TBL sliced almonds, 2 TBL coconut chips, 2 TBL freeze dried strawberries, and a few chocolate chips. Other ideas are nut butter, coco nibs, frozen fruit, fresh fruit, other chopped nuts, whatevs.

Instructions

  1. Whisk together the milk, maple syrup, vanilla, almond, and cocoa powder in a bowl that has a lid.
  2. Stir in oats and chia seeds, cover, and refrigerate overnight, at least 6 hours.
  3. If you’re using frozen fruit you can toss it on top the night before and it will be thawed and lovely when you get to it in the morning.
  4. In the morning top with anything you desire.


Vegetarian Tater Tot Hot Dish or as I like to call it “Careful, your Midwest is showing”

Tater Tot Breakfast Hot Dish

I blame Pinterest for this one, and the short days, and just feeling a little homesick after the move. Not that this dish would be found anywhere near Cambridge, MA, but it would be found in Wisconsin where I’m originally from. All I can think when I look at this is “careful, your midwest is showing.”  That being said it is everything a midwest dish should be; homey, salty, comforting, easy, cheesy, serves a crowd, and topped with tater tots. It is truly perfect for New Year’s Day because you can make it ahead of time, and just hang out drinking coffee while it bakes in the morning. You can start your New Years resolution eating at lunch.

This is a perfect dish for when you have overnight guests as it feeds a crowd with minimal effort, and will make most anyone happy if they are ok with tater tots for breakfast. And if they aren’t, well, you might want to decide if you need that kind of negativity in your life. If you really want to make it minimal effort in the morning just sauté your vegetables the night before and assemble the morning of.

Happy Midwestern Breakfast to you. I hope you’re holidays are merry and bright.

Vegan Frendsgiving/Thanksgiving Spice Cake

Vegan Spice Cake
Vegan Spice Cake

The recipe for this delightful morsel of a cake has been passed down from my great-grandmother. It was one of the first recipes I posted when I started my blog several years ago. I didn’t have a picture of it, and I never uploaded one, until today. Just in time to celebrate the start of the holiday season. This cake is ultra moist, full of warming spices, and somehow never too sweet. It is perfect for dessert, breakfast, or as an addition to a holiday brunch. It also takes about 5 minutes to make and makes a big impression with its amazing fall flavors. This is the cake to bake when you have company as the whole house smells like you’ve spent hours in the kitchen as the warm fragrance of fall baking spices waft through the air.

Makes 1 9×9 cake

Ingredients

  • 1 cup non-dairy milk, or dairy milk
  • 1 tsp. vinegar (apple cider or white, but I’ve also used rice in a pinch)
  • 1 cup sugar
  • 1 TBL vegetable shortening
  • 1 TBL chia seeds mixed with 2 TBL water, or 1 egg, or equivalent of 1 egg in whatever form you like
  • 1 cup all purpose flour
  • 1 tsp. baking soda
  • 1 tsp. cinnamon
  • 1/2 tsp. nutmeg
  • 1/2 tsp. cloves
  • 1/2 tsp. salt

Instructions

  1. Preheat oven to 370F.
  2. Add vinegar to milk and set aside.
  3. Cream together sugar and shortening until smooth.
  4. Add the chia seed/water mixture to sugar and mix together.
  5. In a separate bowl mix together the flour, baking soda, cinnamon, nutmeg, cloves, and salt.
  6. Alternate between adding flour mixture and soy milk to the shortening, mixing thoroughly between additions.
  7. Pour batter into a greased 9×9 cake pan and bake for 30-35 minutes, or until cake pulls away from the edges of the pan and a cake tester comes out mostly clean.
  8. Allow to cool for at least 20 minutes if you can.