Vegan Sourdough Bagels New York Style

I didn’t really know what a bagel was until moving to the East Coast. I mean, I had eaten plenty of bagels, but I had never really, truly, had a bagel. The difference is incredible. A true bagel has chew, but still remains light and fluffy, has a crust, but can easily be eaten. There were two places that made amazing bagels in Cambridge, MA Bagelsaurus and Forge Baking Co . What was even better about these bagels than other East Coast bagels, or even my own jalapeño bagels (which are still amazing), is that they are sourdough, and have been fermented for a few days. The slightly sour taste and incredible chewy but light texture take these bagels to the next level. Problem is when we moved to the West Coast I couldn’t find good bagels. So I learned to make them myself. These rock. Try the and fall in love with bagels all over again.

There is a ton that goes into sourdough and I am not an expert by any means. I just started my own sourdough starter a few months ago. I used this tutorial from The Kitchn. 

A few other notes:

  • I used volume measurements for some of the ingredients because my scale does not seem to be accurate for such small quantities.
  • Non-diastatic malt powder is for flavor, you can omit it if you don’t have it, though I think it adds something special.
  • I tried several times to make these without added yeast, but they did not reach the heights I was hoping for (literally they didn’t poof like I wanted them to).  You can omit the yeast, but be warned, as written, this recipe will create a pretty dense bagel. It is still pretty good, but I like to poof.
  • I start on Wednesday to have bagels for Saturday morning.
  • This recipe was adapted from Honest Cooking. 

Ingredients

For the Sponge

  • 500 g (4 cups) bread flour
  • 500 ml (2 cups) water
  • 160 g 100% hydration wheat sourdough starter

For the Dough

  • 1000 g (5 cups) of sourdough sponge (above)
  • 480 g (4 cups) bread flour, divided
  • 3 tsp non-diastatic barley malt powder
  • 3 tsp fine sea salt
  • 1 tsp dry yeast

Instructions

  1. Make the sponge:
  2. Mix your starter with the water and whisk until foamy. Add 500 g flour. Mix thoroughly until all lumps are gone. Scrape the sides of the bowl with a spatula. Cover loosely with plastic or lid and leave for at room temperature least 6-8 hours.
  3. Make the dough:
  4. Measure 1000g of the starter sponge. You can use the rest to refresh your starter, throw it in some pancakes, or compost it.
  5. To the starter add the salt, malt, yeast and 480 grams of flour in a bowl of a stand mixer and mix together with the dough hook until they form a ball. – if you are measuring by volume not weight start with 3 cups of flour and add more a 1/4 cup at a time mixing until it is incorporated before adding more.
  6. Continue kneading the dough with the dough hook until smooth and elastic, about 10 minutes. You can do this by hand, but you are way stronger than me if you do!
  7. Immediately divide the dough into 12 equal parts. I weigh mine and go about 4.5 oz per bagel for 12 bagels.
  8. Line a half sheet pan with parchment paper.
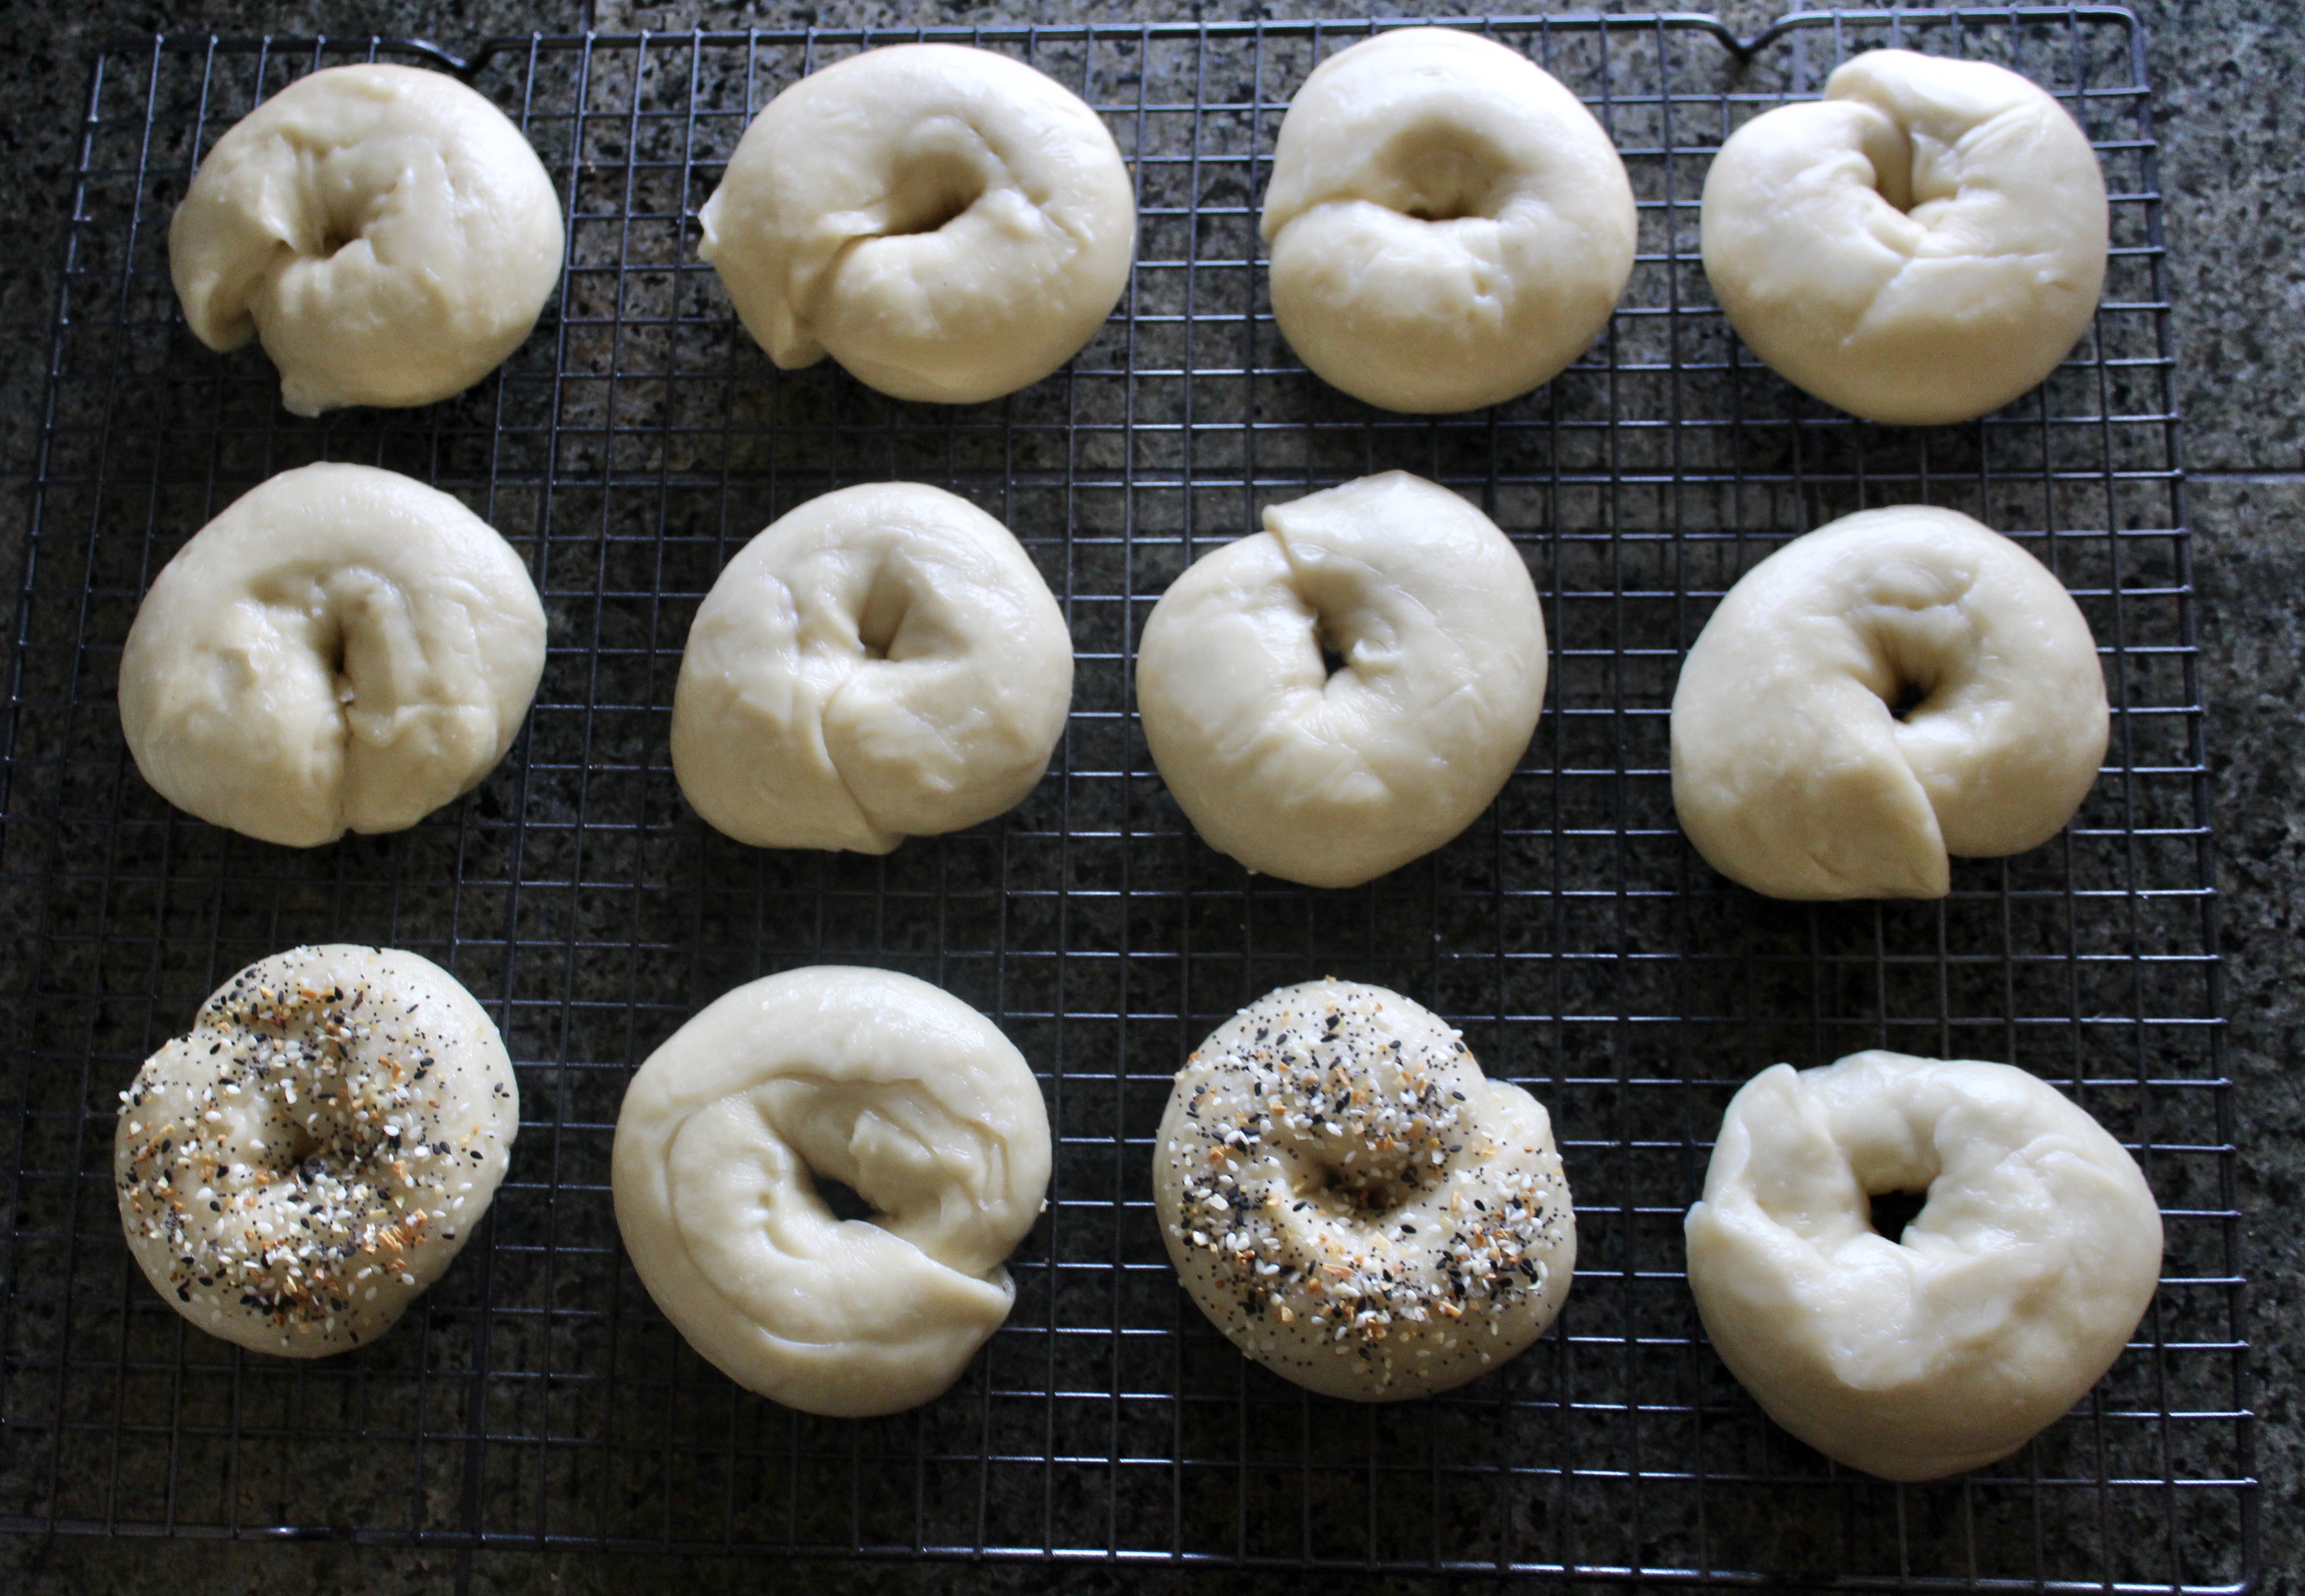
  9. Roll each portion of dough to form a log about 10″ long, then shape into a bagel by bringing the ends together and folding one over the other. Set formed bagels on baking sheet with a little room in-between.
  10. Once all bagels have been formed cover tightly with plastic wrap and place in the refrigerator at least overnight, and up to 3 days. I like them best after 2-3 days, but sometimes I don’t plan far enough ahead and I just let them go overnight.
  11. It is super important to let the bagels rest for a bit. It creates the taste and texture you are looking for in these delightfully perfect bagels.
  12. On the day you are planning to bake remove the bagels from the refrigerator 1-2 hours before you plan to boil them. It is possible to boil right from the refrigerator, but I think the texture improves if you let them warm up a bit.
  13. Preheat your oven to 500F.
  14. Bring a large pot of water to a boil over high heat. I use a 3qt wide saucepan. It is about 5″ deep and has a large flat bottom. Any wide saucepan will do.
  15. I also have my cooling rack out and ready to go.
  16. Once the water has reached a rolling boil carefully add as many bagels as will comfortably fit into your pot. 4 fit into mine. I have to nudge mine a bit to make sure they don’t stick to the bottom.
  17. Once you have placed your bagels in the pot set a timer for 30 seconds. When it goes off flip all the bagels and set the timer for 30 more seconds. After the second timer remove the bagels from the pot and place them on the cooling rack. If you are going to add toppings now is the time to do it while they are sticky with water.
  18. Bring the pot of water back to a rolling boil before boiling another batch of bagels.
  19. Continue with above steps until all bagels are boiled and resting on the cooling rack.
  20. Transfer bagels onto the parchment lined baking sheet.
  21. Bake for 20-25 minutes until perfectly golden all over. Use the rack in your oven that is the hottest. For me it is the bottom rack.
  22. Once baked place bagels on the cooling rack and allow to cool until you can easily hold them.
  23. Store cooled, uneaten bagels in plastic on the counter for up to 3 days, or in the freezer if you can manage to keep them that long.
Bagel After fermentation, before boiling
After fermentation, before boiling
Bagel While Boiling
While Boiling
Bagel After boiling before baking
After boiling before baking
Advertisement

Valentine’s Day Vegan Date Caramel Sticky Buns -refined sugar free

Date Caramel Sticky Bun

If you love someone you make them sticky buns. If they are your one and only you make them healthier sticky buns because you want them to *stick* around longer.  These take my already delicious cinnamon roll recipe and turn it into a sticky mess of a bun. I took out all the refined sugar, replaced some of the butter with pumpkin, and covered it all with date caramel. These are still sweet, and sticky, and fragrant, and soft, and shout love. They are also great to make the night before and throw in the oven while you sit around sipping coffee. Or rush around getting ready for work and then sit together at the table for a few minutes eating a special breakfast showing your partner you love them because you took extra time to just be with them. Oh, love.

Happy Valentine’s Day!

Vegan Date Caramel Sticky Buns

Ingredients

  • For the date caramel
  • 12 oz medjool dates
  • 1 3/4 cup boiling water
  • 2 tsp pure vanilla extract
  • 1/4 tsp (4grams) fine sea salt
  • For the sticky buns
  • 4 1/2 tsp.(14 grams) Ener-G Egg Replacer powder (equivalent of 3 eggs)
  • 6 TBL water
  • 600 grams (4 1/2-5 cups) unbleached all-purpose flour- divided
  • 2 1/4 tsp. (8 grams) active dry yeast (one packet)
  • 1 cup non-dairy milk
  • 1/4 lb (1/2 cup) Earth Balance Buttery spread or sticks
  • 1/4 pure maple syrup
  • 1/2 tsp. salt
  • Filling
  • 1/2 cup (144 grams) date caramel
  • 1 1/2 TBL (15 grams) cinnamon
  • 1/4 lb (1/2 cup) Earth Balance Buttery Spread or sticks
  • 1/4 cup ( 68 grams) pumpkin puree (or more butter)
  • Topping
  • The rest of the date caramel
  • 1 tsp cinnamon
  • 1/4 cup Earth Balance buttery spread or sticks softened to room temperature
  • 2 tsp bourbon (optional)
  • 1/4 cup nondairy milk

Instructions

  1. In the bowl of your stand mixer whisk the egg replacer and water until smooth- set aside
  2. In a small saucepan heat together the milk, Earth Balance, sugar and salt until the butter is almost melted.
  3. Remove from heat and stir until butter is melted. Make sure this mixture is warm, not hot or it will kill the yeast.
  4. Add 260 grams (3 cups) of the flour and yeast to the egg replacer/water mixture.
  5. Add the warm milk mixture and mix with the paddle attachment for 2 minutes. If you don’t have a stand mixer you can do this by hand.
  6. Switch to the dough hook add the rest of the flour and mix until the dough forms a ball and no longer sticks to the sides of the bowl. If you are measuring by cups instead of weight add the flour a half cup at a time and mix until the flour is incorporated before adding more. The dough should be firm with slight resistance when you push on it and should just stick to the sides of the bowl, but not your fingers.
  7. Remove the dough hook and drizzle olive oil over the ball of dough, cover with a damp towel and set aside to rise for 1-2 hours.
  8. White your dough is rising make the date caramel and filling.
  9. For the date caramel place pitted dates in a heatproof bowl and cover with boiling water. Let them sit for about 10 minutes to soften.
  10. Drain dates reserving the liquid.
  11. Place dates, vanilla, sea salt, and 1/2 cup of the reserved date water in a blender or food processor and blend until smooth. If you are finishing the rolls in the morning cover and refrigerate the unused date caramel until the morning.
  12. To make the filling cream together 1/2 cup of the date caramel, 1/2 cup Earth Balance, and cinnamon until uniformly brown. Set aside.
  13. Once dough has doubled in size, punch it down then allow it to rest for 10 minutes.
  14. While dough is resting combine the filling ingredients and set aside.
  15. Place dough on a lightly floured surface and roll dough into a rectangle about 18″ by 15″.
  16. Spread the filling mixture evenly over the dough, all the way to the edges.
  17. Roll dough into a log and slice into buns, as large as you like. I like mine to be about 1 1/2″ thick and I usually cut between 10-12 rolls.
  18. Place buns on a rimmed baking sheet or pan close enough to touch each other. I use my 9×13 pan. I like to line the baking sheet with parchment paper (for easier cleanup).
  19. If baking right away: Let the the rolls rise until almost doubled in size, about and hour.
  20. If baking the next morning: cover the rolls tightly and let them rise in the refrigerator overnight. In the morning set the on the counter as your oven preheats and proceed as usual.
  21. Preheat oven to 350 degrees.
  22. Bake rolls for 25-30 minutes depending on their size, until golden brown.
  23. While the rolls are cooking combine the topping ingredients except for the walnuts, and just heat through on the stove.
  24. When rolls are done pour the topping over the hot rolls, and sprinkle with the nuts.
  25. Serve warm.

Vegan Nacho Cheese Sauce

Vegan Nacho Cheese Sauce

My new obsession is nachos. Well, it isn’t that new, I think it was spring when I started to make these. It is all the fault of my friend; we were talking about lunch one day and she said she had been on a nacho kick. It was all over at that point. I came home that very day and started making nachos. It switched to taco salad for the summer, but as soon as it started to cool down again I’ve been back to nachos. I think the ingenious thing she said that made me “have” to try nachos that day was she was putting refried beans in the BOTTOM of the pan, then the chips on top. This, of course, makes the most sense ever as the chips get all crispy and warm, the beans warm up, and they don’t make everything soggy.

This recipe is just for the cheese sauce, but I’ll give you a quick run down of the rest. I heat my cast iron on the stove, saute a few cups of sliced veggies with a little salt and pepper, then dump them in a bowl. In the still hot pan I swirl a tablespoon of oil, then spread refried beans on the bottom. Top the beans with chips and pop it under the broiler for a few minutes until the chips are toasty brown and perfect. I then dump it on a plate, and pile on the veggies, nacho cheese sauce, and salsa. I then eat it all for lunch while watching my husband work out.

The cheese sauce. It is a variation of my cheese sauce from my cashew mac n cheese with some spice added. I made a nice big batch and freeze any I don’t use within a few days.

 Ingredients

  • 3/4 cup peeled and cubed russet potato (1 small)
  • 2 TBL sliced carrot (1 very small)
  • 1 tsp white vinegar
  • 1 tsp salt
  • 1/4 cup raw cashews
  • 3/4-1 cup reserved cooking water
  • 3 TBL nutritional yeast
  • 2 TBL tahini
  • 2 tsp dijon mustard
  • 1 1/2 tsp tomato paste
  • additional salt to taste
  • 1 small can diced green chilis
  • 1/2 tsp ground chipotle powder or one chipotle in adobo sauce

Instructions

  1. Place potato and carrot in a small saucepan and cover with cold water.
  2. Add the vinegar and 1 tsp salt to water, bring everything to a boil partially covered, and boil for about 10 minutes.
  3. Add the cashews and continue to cook until the potatoes and carrots are completely tender, about 5 minutes more. They are done when they slide off a fork that is inserted into a piece of potato or carrot.
  4. Drain potatoes and carrots reserving at least 1 cup of the cooking water.
  5. Transfer potatoes, carrots, cashew, and 3/4 cup cooking water to a blender.
  6. Add nutritional yeast, tahini, mustard, and tomato paste and blend until smooth.
  7. Add more cooking water if you want the sauce to thin out a bit.
  8. Add green chilis and chipotle and pulse to combine.
  9. Taste, and adjust salt as needed.

Pickled Red Onions

Pickled Red Onions
Pickled Red Onions

As I’ve been exploring balancing flavors, and trying new food combinations I have truly come to love pickled red onions. Pickled everything really, but these are one of my favorites. It is not one of those ingredients that brings and item into focus when I see it on a menu. I feel it pairs particularly well with things that are sweet. Think sandwiches with roasted vegetables and their inherent sweetness that needs a bit of acidity for balance. Yummy. I made this particular batch to go with harissa roasted sweet potatoes. I also threw on some roasted salted pecans, and some candied pine nuts. It was yummy.  This recipe is adapted from Bobby Flay, one if his 3000 recipes for pickled red onions.

 Ingredients

  • 1 1/2 cups white vinegar
  • 1/4 cup water
  • 2 TBL granulated sugar
  • 1 TBL kosher salt
  • 1 large red onion, thinly sliced

Instructions

  1. Combine vinegar, water, sugar, and salt in a small saucepan and bring to a boil.
  2. Remove from heat, stir, and allow to cool for about 10 minutes.
  3. Place the onion in a heat safe container with a lid, then poor the hot vinegar mixture over the onions.
  4. Cover and allow onions to sit for at least an hour, up to 4 days
  5. Remove from liquid and use to top everything from sandwiches to sweet potatoes.

Vegan Date Caramel Carmelita Bars

Vegan Date Caramel Carmelitas

I’m from the Midwest, you know, land of “hot dish” (casserole), and cookie bars. Yet, somehow I never had carmelitas until my sister-in-law made them when visiting over a year ago. I have only had them that one time, yet they stuck in my brain. This very comforting combination of caramel, chocolate, and almost and oatmeal cookie crust. I attempted one other time to make them vegan and failed miserably. I didn’t try again until recently, after I had found date caramel . This version of carmelitas are vegan, and much lower sugar than your average bar. They are still sweet, very sweet. In fact they are perfect for breakfast dessert with a cup of coffee. mmm, or mid-afternoon snack with a cup of coffee, Be right back…

 Ingredients

For the Oat Base and Crumble

  • 3/4 cup butter or margarine, melted (I used Earth Balance)
  • 1/2 cup packed coconut sugar (or brown sugar if that’s what you have)
  • 1 tablespoon vanilla extract
  • 1 cup all-purpose flour
  • 1 cup whole-rolled old fashioned oats (not instant or quick cook)
  • 1 teaspoon baking soda

For the Date Caramel

  • 8 oz pitted medjool dates (about 2 cups)
  • 1/4 cup coconut milk
  • 1/4 cup water that the dates were soaking in
  • 1 TBL bourbon (or more date water)
  • 1 tsp pure vanilla extract
  • pinch of salt
  • 3/4 cup semi-sweet chocolate chips or chunks (vegan if that’s your jam)

Instructions

  1. Preheat oven to 350F. Grease an 8×8-inch pan and set aside.
  2. Cover dates with boiling water in a heat proof bowl or measuring cup and set aside for 10 minutes.
  3. Combine the melted “butter”, coconut sugar, and vanilla whisking until smooth.
  4. Add the flour, oats, baking soda, and stir until combined.
  5. Add roughly half of the mixture to the prepared pan and smooth it to form an even layer.
  6. Bake for 10 minutes. While it bakes make the date caramel.
  7. 7.Combine the soaked dates, coconut milk, soaking water, vanilla, and salt in a food processor and blend until smooth. This will take a few minutes and you will have to stop and scrape the sides a few times.
  8. After the oat base has cooked for 10 minutes remove it from the oven and dollop the date caramel over the base. Smooth with a spoon or spatula to form one even layer. This is delicate work.
  9. Sprinkle the chocolate chips over the date caramel in an even layer.
  10. Evenly crumble reserved oatmeal-sugar mixture over the top.
  11. Return pan to oven and bake for about 15 to 18 minutes, or until edges are lightly browned and center appears to be set.
  12. Allow bars to cool for a few hours in the pan before slicing and serving.
  13. These are best stored in the refrigerator and are delightful cold or at room temperature.

Vegetarian Crustless Quiche

 Ingredients

  • 2 TBL olive oil
  • 1 large yellow or white onion, sliced
  • 1 teaspoon salt, plus more to taste
  • 1/2 teaspoon pepper, plus more to taste
  • A few tablespoons chopped fresh herbs, or a few teaspoons dried herbs
  • 3 to 4 cups chopped vegetables (I used Kale, Mushrooms, and zucchini)
  • 6 large eggs
  • 1 1/2 cups milk (I used unsweetened plain almond milk)
  • 1 cup grated cheese (I used goat guda)

Instructions

  1. Preheat the oven to 400°F.
  2. Heat a cast iron skillet over medium heat.
  3. Add the olive oil and swirl to coat the bottom and sides of the skillet.
  4. Add the onion slices and sprinkle a bit of salt and pepper over them. Cook the onions until they are golden-brown and starting to caramelize, about 10 minutes.
  5. Add the other vegetables and cook until liquid has been released and evaporated, 5 more minutes or so.
  6. Remove the pan from the heat and spread the vegetables evenly across the bottom of the skillet.
  7. In a bowl whisk the eggs and milk together until everything is uniformly yellow.
  8. Add remaining salt, pepper, and any herbs you are using and whisk to combine.
  9. Pour the egg mixture over the vegetable.
  10. Sprinkle with grated cheese in an even layer over the top.
  11. Transfer the quiche to the oven and bake for 45 minutes to 1 hour. Once the surface is lightly brown all the way across and it is firm in the middle, it’s fully cooked.
  12. Let the quiche cool for about 20 minutes, then slice into wedges.

Vegan Kale Stem and Sun-dried Tomato Pesto

Ingredients

  • 2 cups roughly chopped kale stems, about 4oz
  • 1 cup toasted walnuts, about 3.5 oz
  • 2 medium cloves garlic
  • 1/4 cup sun dried tomatoes in oil
  • 1 tsp salt

Instructions

  1. Combine ingredients in a food processor and blend until a smooth paste forms.
  2. Store in a covered container in the refrigerator until you are ready to use.

Father’s Day Roundup

Vegan Chocolate Peanut Butter Cup Ice Cream

I took a poll for my husband’s and my father’s favorite recipes on the website. I’ll share in case you are in need of some inspiration for Father’s Day, and you don’t feel like making the chocolate cake from last week.

My Husband’s top picks are:

Chocolate Peanutbutter Cup/Swirl Vanilla Ice Cream

Mexican Food with These Refried Beans 

Pot Pie

Chocolate Chip Cookies

My Dad said:

Lasagna

Quiche

and Chocolate Cake 

Happy Father’s Day Chocolate Cake

vegan blackout chocolate cake

My dad loves chocolate, I mean really loves chocolate. He isn’t going to be with me this Father’s Day since we live a few states apart, but since he generously passed on his love of chocolate, I will generously eat this cake in his honor. Love you daddy!

I did think about making something for my husband and father of my children, but I make things for him all the time. I’ll make sure to make some of his favorites for him, and I’ll even share the cake.

This is a lovely combination of several recipes on my blog, and comes together into a delightful blackout chocolate cake topped with chocolate mousse.

 Ingredients

Instructions

  1. Cut the top off one cake to make it flat. Frost it and stack the second cake on top. Frost top and sides of cake and pat chocolate chips into sides and top.
  2. Top the cake with chocolate mousse, serve, eat, and then take a nap. Happy Father’s Day!!

BBQ Tofu Tacos with Honey Mustard Slaw – Vegan and Gluten Free

BBQ Tofu Tacos With Honey Mustard Slaw

I first made these tacos while we were staying with some friends. We don’t get to see them often and I honestly didn’t know what they liked to eat, but wanted to surprise them with dinner after work. I saw several bottles of honey mustard in their refrigerator and decided to make something that would go with that flavor. Thus the slaw was born, and the BBQ tacos soon followed to make a full meal. I think it’s a super fun combination. It also has the benefit of being fairly nutritious and tasting naughty; perfect for Father’s Day.

 Ingredients

  • 2 TBL olive oil
  • 1 LB extra firm tofu cut into strips
  • 1 TBL tamari or soy sauce -gluten free if needed
  • 1/3 cup of your favorite BBQ sauce -gluten free if needed
  • 6 small tortillas, I prefer corn tortillas -gluten free if needed
  • 1/2 recipe prepared honey mustard red cabbage and green apple slaw (vegan version if you are vegan)
  • 1 recipe guacamole (optional but delicious)

Instructions

  1. Heat a large skillet over medium high heat.
  2. Add olive oil, swirl to coat the bottom, and add the tofu in a single layer.
  3. Cook until the first side of the tofu is golden brown, and it easily comes off the pan to be flipped. If you have to scrape at it, just let it cook a little longer.
  4. Flip/stir tofu and continue to cook until most sides are golden brown.
  5. Remove the pan from the heat and add the tamari stirring to coat the tofu.
  6. Add BBQ sauce and stir again to coat tofu.
  7. Divide tofu evenly between warmed tortillas, top with cabbage slaw and guacamole if using.
  8. Serve warm.