I haven’t written a post about oatmeal in a while. I’m sure you have been dying for a new version of oatmeal the whole time. This should do the trick. This is a favorite of both by girls and they love to help make it. They can both eat dates while I chop, then my 3 year old helps me shred the zucchini. They take turns dumping in the ingredients, and impatiently wait as it cooks, and cools enough for them to eat. We rarely eat this for breakfast, but often make it for our mid-morning snack, or lunch. The girls also like it cold and room temperature so it is a stable in our snack bag. This oatmeal is sweet, cinnamony, and filled with vegetables! Everything you could ask for in an oatmeal. If you are serving it to a green vegetable averse person you can peel the zucchini before shredding.
Zucchini Date Oatmeal
Ingredients
2 medjool dates, pitted and finely chopped
1 cup shredded zucchini, one small
11/4 cups water
pinch of salt
heaping 1/2 cup rolled oats
2 TBL hemp seeds (optional)
cinnamon to taste (optional)
Instructions
In a small saucepan combine dates, zucchini, water, and salt. Cover and bring to a boil over medium high heat.
Once boiling stir in the rolled oats, hemp seeds, and cinnamon. Cook, stirring frequently until the water is absorbed and the oatmeal is the consistency you prefer.
The summer is flying by! I cant believe it is already the weekend before the 4th of July! We have already done lots of summery things – the beach about a 1000 times, biking, walking on the bike path, picnics, and strawberry picking. My girls loved picking strawberries and we picked WAY too many. I had plans to make pie, jam, and freeze some. I forgot that I have small children and those are all time consuming activities. I did make a pie, this pie specifically and it was glorious. I also froze a bunch. The jam will have to wait until next year. Or maybe we’ll do raspberry or blueberry when that time comes. For now, make and enjoy a fresh strawberry pie for your 4th of July.
Fresh Strawberry Pie – Vegan
Ingredients
¾ C. unbleached flour
¼ c. whole-wheat flour
¾ tsp. salt (divided)
6 TBL solid vegetable shortening
6TBL. Plus ¼ C. cold water (divided)
¼ c. cornstarch
¾ c. boiling water
1 c. sugar
2.5 lbs fresh strawberries (about 7 cups hulled and haved)
1 TBL. fresh lemon juice
1 TBL Earth Balance or other margarine
Instructions
To make crust:
preheat oven to 350.
In bowl, combine flours and ½ tsp salt.
Cut shortening into mixture until it resembles coarse meal.
Add 4 TBL cold water while stiffing with a fork, and mix lightly to form a ball.
Let dough rest at least 5 minutes at room temperature, then roll out to fit a 9-inch pan.
Slip into pan, trimming as needed and crimping edges.
Fill crust with dry beans, rice or pie weights and back 30 minutes or until light brown.
Remove from oven and cool.
To make filling:
Mix cornstarch thoroughly with remaining ¼ cold water.
Add boiling water, stirring until smooth.
Place in a 1-quart saucepan over medium heat.
Add sugar, remaining ¼ tsp. salt and ½ cup of the strawberries, stirring constantly and crushing berries against sides of pan as liquid comes to a low boil, thickens and clears, about 10 minutes.
Reduce heat and cook 3-4 minutes.
Add lemon juice and margarine and mix gently.
Remove mixture from heat, add remaining berries, mix gently and pour into prepared shell. Refrigerate pit at least 2 hours before serving.
There is a newish trend of using Jackfruit for a meat substitute. It’s really rather brilliant. Texturally it is the closest thing I have tried to actual meat, but you get another vegetable into your diet! This is a super easy and delightful way to mix up your Memorial Day BBQ plans. I like this as is or with a little honey mustard coleslaw. It would also be good on a veggie burger or topped with a fried egg if vegan isn’t your thing.
BBQ Jackfruit
Ingredients
1 20oz can green jackfruit, drained, rinsed, and dried (I used a clean kitchen towel to dry it)
1 TBL brown sugar
1/2 tsp garlic powder
1/2 tsp smoked paprika
1/2 tsp salt
1/4 tsp ground black pepper
oil for cooking
1 cup prepared BBQ sauce plus more for serving
Instructions
Drain, rinse, and dry your jackfruit. I used a clean kitchen towel to dry it.
Mix together the brown sugar, garlic, paprika, salt, and pepper in a small bowl and set aside.
a large skillet over medium high heat.
When pan is hot add a few tablespoons of oil and swirl to coat the bottom of the pan.
Add the dried jackfruit, sprinkle with brown sugar and spice mixture and stir to coat the jakefruit.
Cook 5-7 minutes stirring frequently until the jackfruit starts to brown.
Add 1 cup bbq sauce and stir to combine. Continue cooking over medium low heat for 7-10 minutes more until sauce is absorbed and jackfruit is flavorful.
Serve hot on buns topped with mustard slaw and more BBQ sauce as desired.
Happy soon to be St. Patrick’s Day! Let’s celebrate with some yumminess. In the past I’ve done green food like these pancakes, and these muffins, and vegan Irish cream. This year we’re focusing on the potato. Oh how I love a potato. I’m going to play up the awesomeness of the Yukon Gold potato in this variation of Colcannon, or mashed potatoes with green stuff if you aren’t Irish.
Traditionally Colcannon is as Irish dish made from mashed potatoes with kale or cabbage folded in. It is often perked up with scallions or leeks. For this vegan variation I am sautéing leeks and folding them in, and garnishing with kale chips. It’s pretty, yummy, and my girls love to pick the kale chips off the top. Honestly, that’s the only part they eat. I think I have the only kids in the world who won’t eat mashed potatoes.
Kale chips are a huge hit in our house, but they shatter and always leave tiny little pieces at the bottom of the container. This is a perfect way to use them up. And a perfect excuse to try making kale chips if you haven’t yet.
The twist in this recipe is adding the salt and vinegar to the cooking water for the potatoes. When you do this the potatoes are flavored from the inside out and each and every bite becomes a perfectly seasoned flavor bomb.
Vegan Colcannon
Ingredients
1 1/2 lbs yukon gold potatoes cut into 1/4 cubes
2 tsp kosher salt
2 tsp white vinegar
1 large leek cut lengthwise, and then into 1/4 half moons
Place potatoes in a 3qt pot and cover with cold water to 1″ above the potatoes.
Add salt and vinegar to the pot and bring to a boil.
Continue boiling until potatoes are tender, 10-12 min.
While potatoes are cooking heat a large skillet over medium heat. Once hot add olive oil and swirl to coat the bottom of the pan. Add leeks and sauté until leeks are tender, about 7 minutes.
Remove from heat if potatoes are not yet cooked.
Once potatoes are cooked drain them and return to the cooking pot. Add butter, milk, and nutritional yeast and mash to your desired consistency.
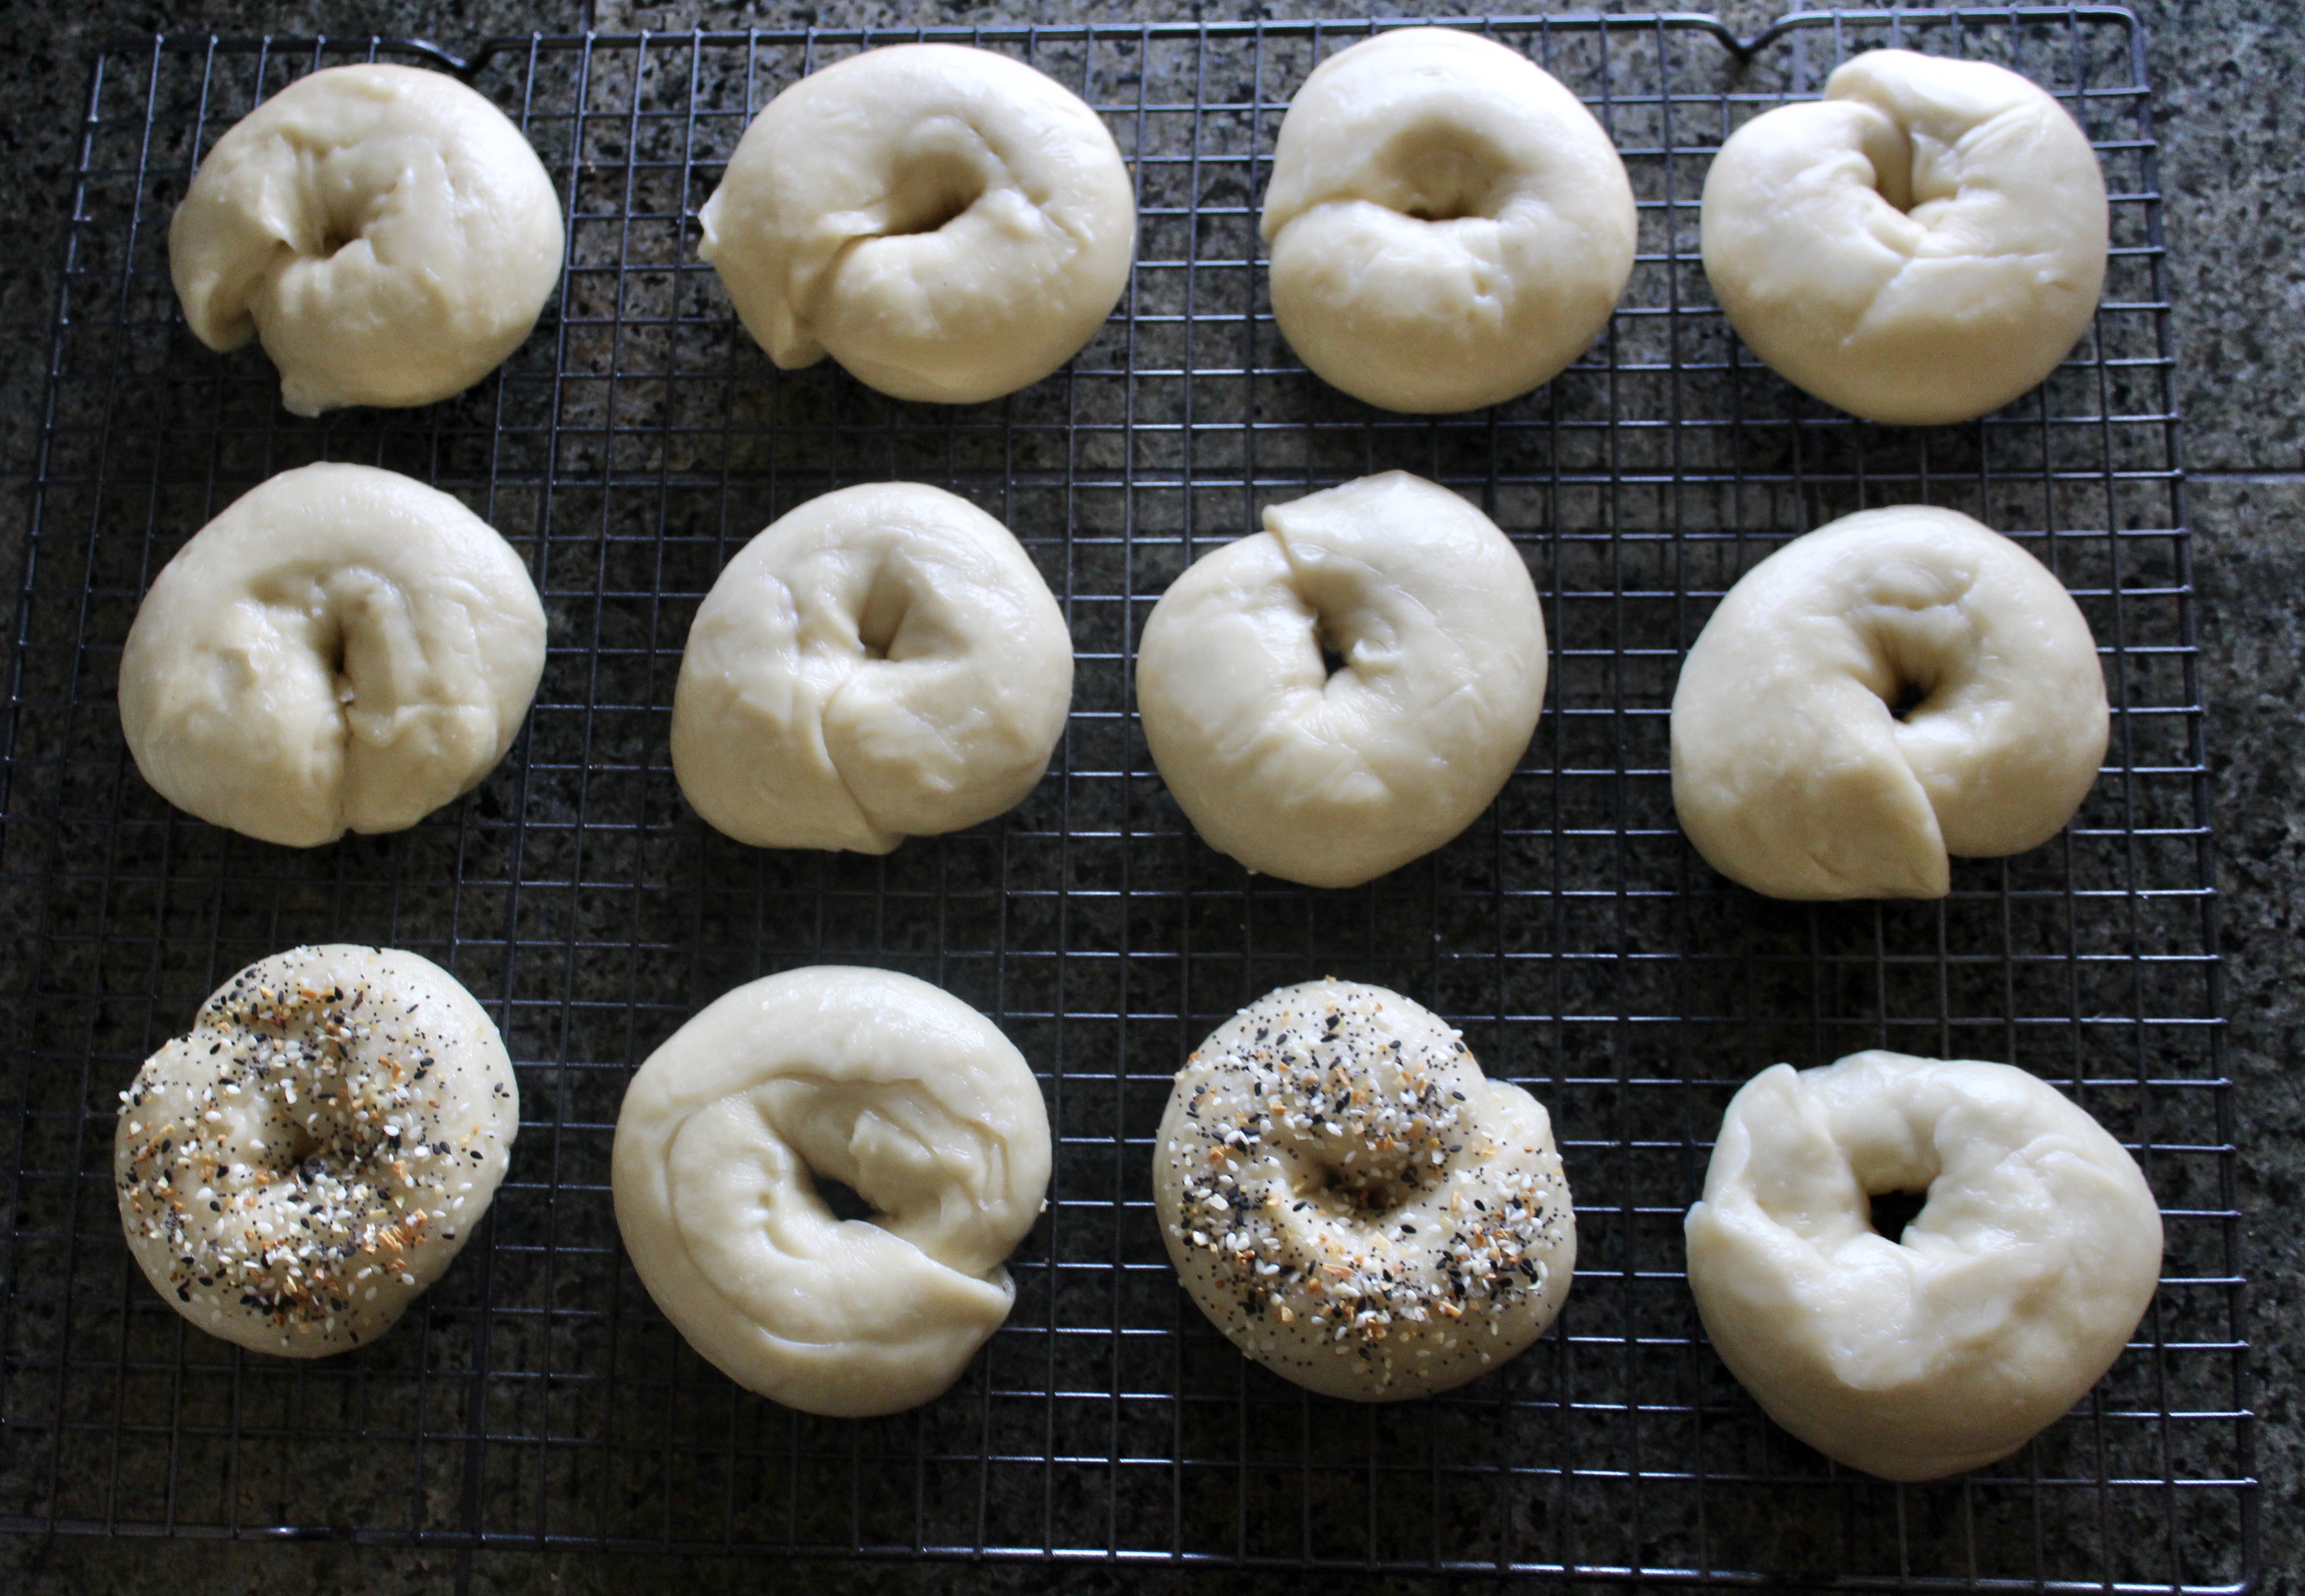
I didn’t really know what a bagel was until moving to the East Coast. I mean, I had eaten plenty of bagels, but I had never really, truly, had a bagel. The difference is incredible. A true bagel has chew, but still remains light and fluffy, has a crust, but can easily be eaten. There were two places that made amazing bagels in Cambridge, MA Bagelsaurus and Forge Baking Co . What was even better about these bagels than other East Coast bagels, or even my own jalapeño bagels (which are still amazing), is that they are sourdough, and have been fermented for a few days. The slightly sour taste and incredible chewy but light texture take these bagels to the next level. Problem is when we moved to the West Coast I couldn’t find good bagels. So I learned to make them myself. These rock. Try the and fall in love with bagels all over again.
There is a ton that goes into sourdough and I am not an expert by any means. I just started my own sourdough starter a few months ago. I used this tutorial from The Kitchn.
A few other notes:
I used volume measurements for some of the ingredients because my scale does not seem to be accurate for such small quantities.
Non-diastatic malt powder is for flavor, you can omit it if you don’t have it, though I think it adds something special.
I tried several times to make these without added yeast, but they did not reach the heights I was hoping for (literally they didn’t poof like I wanted them to). You can omit the yeast, but be warned, as written, this recipe will create a pretty dense bagel. It is still pretty good, but I like to poof.
I start on Wednesday to have bagels for Saturday morning.
Mix your starter with the water and whisk until foamy. Add 500 g flour. Mix thoroughly until all lumps are gone. Scrape the sides of the bowl with a spatula. Cover loosely with plastic or lid and leave for at room temperature least 6-8 hours.
Make the dough:
Measure 1000g of the starter sponge. You can use the rest to refresh your starter, throw it in some pancakes, or compost it.
To the starter add the salt, malt, yeast and 480 grams of flour in a bowl of a stand mixer and mix together with the dough hook until they form a ball. – if you are measuring by volume not weight start with 3 cups of flour and add more a 1/4 cup at a time mixing until it is incorporated before adding more.
Continue kneading the dough with the dough hook until smooth and elastic, about 10 minutes. You can do this by hand, but you are way stronger than me if you do!
Immediately divide the dough into 12 equal parts. I weigh mine and go about 4.5 oz per bagel for 12 bagels.
Line a half sheet pan with parchment paper.
Roll each portion of dough to form a log about 10″ long, then shape into a bagel by bringing the ends together and folding one over the other. Set formed bagels on baking sheet with a little room in-between.
Once all bagels have been formed cover tightly with plastic wrap and place in the refrigerator at least overnight, and up to 3 days. I like them best after 2-3 days, but sometimes I don’t plan far enough ahead and I just let them go overnight.
It is super important to let the bagels rest for a bit. It creates the taste and texture you are looking for in these delightfully perfect bagels.
On the day you are planning to bake remove the bagels from the refrigerator 1-2 hours before you plan to boil them. It is possible to boil right from the refrigerator, but I think the texture improves if you let them warm up a bit.
Preheat your oven to 500F.
Bring a large pot of water to a boil over high heat. I use a 3qt wide saucepan. It is about 5″ deep and has a large flat bottom. Any wide saucepan will do.
I also have my cooling rack out and ready to go.
Once the water has reached a rolling boil carefully add as many bagels as will comfortably fit into your pot. 4 fit into mine. I have to nudge mine a bit to make sure they don’t stick to the bottom.
Once you have placed your bagels in the pot set a timer for 30 seconds. When it goes off flip all the bagels and set the timer for 30 more seconds. After the second timer remove the bagels from the pot and place them on the cooling rack. If you are going to add toppings now is the time to do it while they are sticky with water.
Bring the pot of water back to a rolling boil before boiling another batch of bagels.
Continue with above steps until all bagels are boiled and resting on the cooling rack.
Transfer bagels onto the parchment lined baking sheet.
Bake for 20-25 minutes until perfectly golden all over. Use the rack in your oven that is the hottest. For me it is the bottom rack.
Once baked place bagels on the cooling rack and allow to cool until you can easily hold them.
Store cooled, uneaten bagels in plastic on the counter for up to 3 days, or in the freezer if you can manage to keep them that long.
If you love someone you make them sticky buns. If they are your one and only you make them healthier sticky buns because you want them to *stick* around longer. These take my already delicious cinnamon roll recipe and turn it into a sticky mess of a bun. I took out all the refined sugar, replaced some of the butter with pumpkin, and covered it all with date caramel. These are still sweet, and sticky, and fragrant, and soft, and shout love. They are also great to make the night before and throw in the oven while you sit around sipping coffee. Or rush around getting ready for work and then sit together at the table for a few minutes eating a special breakfast showing your partner you love them because you took extra time to just be with them. Oh, love.
2 1/4 tsp. (8 grams) active dry yeast (one packet)
1 cup non-dairy milk
1/4 lb (1/2 cup) Earth Balance Buttery spread or sticks
1/4 pure maple syrup
1/2 tsp. salt
Filling
1/2 cup (144 grams) date caramel
1 1/2 TBL (15 grams) cinnamon
1/4 lb (1/2 cup) Earth Balance Buttery Spread or sticks
1/4 cup ( 68 grams) pumpkin puree (or more butter)
Topping
The rest of the date caramel
1 tsp cinnamon
1/4 cup Earth Balance buttery spread or sticks softened to room temperature
2 tsp bourbon (optional)
1/4 cup nondairy milk
Instructions
In the bowl of your stand mixer whisk the egg replacer and water until smooth- set aside
In a small saucepan heat together the milk, Earth Balance, sugar and salt until the butter is almost melted.
Remove from heat and stir until butter is melted. Make sure this mixture is warm, not hot or it will kill the yeast.
Add 260 grams (3 cups) of the flour and yeast to the egg replacer/water mixture.
Add the warm milk mixture and mix with the paddle attachment for 2 minutes. If you don’t have a stand mixer you can do this by hand.
Switch to the dough hook add the rest of the flour and mix until the dough forms a ball and no longer sticks to the sides of the bowl. If you are measuring by cups instead of weight add the flour a half cup at a time and mix until the flour is incorporated before adding more. The dough should be firm with slight resistance when you push on it and should just stick to the sides of the bowl, but not your fingers.
Remove the dough hook and drizzle olive oil over the ball of dough, cover with a damp towel and set aside to rise for 1-2 hours.
White your dough is rising make the date caramel and filling.
For the date caramel place pitted dates in a heatproof bowl and cover with boiling water. Let them sit for about 10 minutes to soften.
Drain dates reserving the liquid.
Place dates, vanilla, sea salt, and 1/2 cup of the reserved date water in a blender or food processor and blend until smooth. If you are finishing the rolls in the morning cover and refrigerate the unused date caramel until the morning.
To make the filling cream together 1/2 cup of the date caramel, 1/2 cup Earth Balance, and cinnamon until uniformly brown. Set aside.
Once dough has doubled in size, punch it down then allow it to rest for 10 minutes.
While dough is resting combine the filling ingredients and set aside.
Place dough on a lightly floured surface and roll dough into a rectangle about 18″ by 15″.
Spread the filling mixture evenly over the dough, all the way to the edges.
Roll dough into a log and slice into buns, as large as you like. I like mine to be about 1 1/2″ thick and I usually cut between 10-12 rolls.
Place buns on a rimmed baking sheet or pan close enough to touch each other. I use my 9×13 pan. I like to line the baking sheet with parchment paper (for easier cleanup).
If baking right away: Let the the rolls rise until almost doubled in size, about and hour.
If baking the next morning: cover the rolls tightly and let them rise in the refrigerator overnight. In the morning set the on the counter as your oven preheats and proceed as usual.
Preheat oven to 350 degrees.
Bake rolls for 25-30 minutes depending on their size, until golden brown.
While the rolls are cooking combine the topping ingredients except for the walnuts, and just heat through on the stove.
When rolls are done pour the topping over the hot rolls, and sprinkle with the nuts.
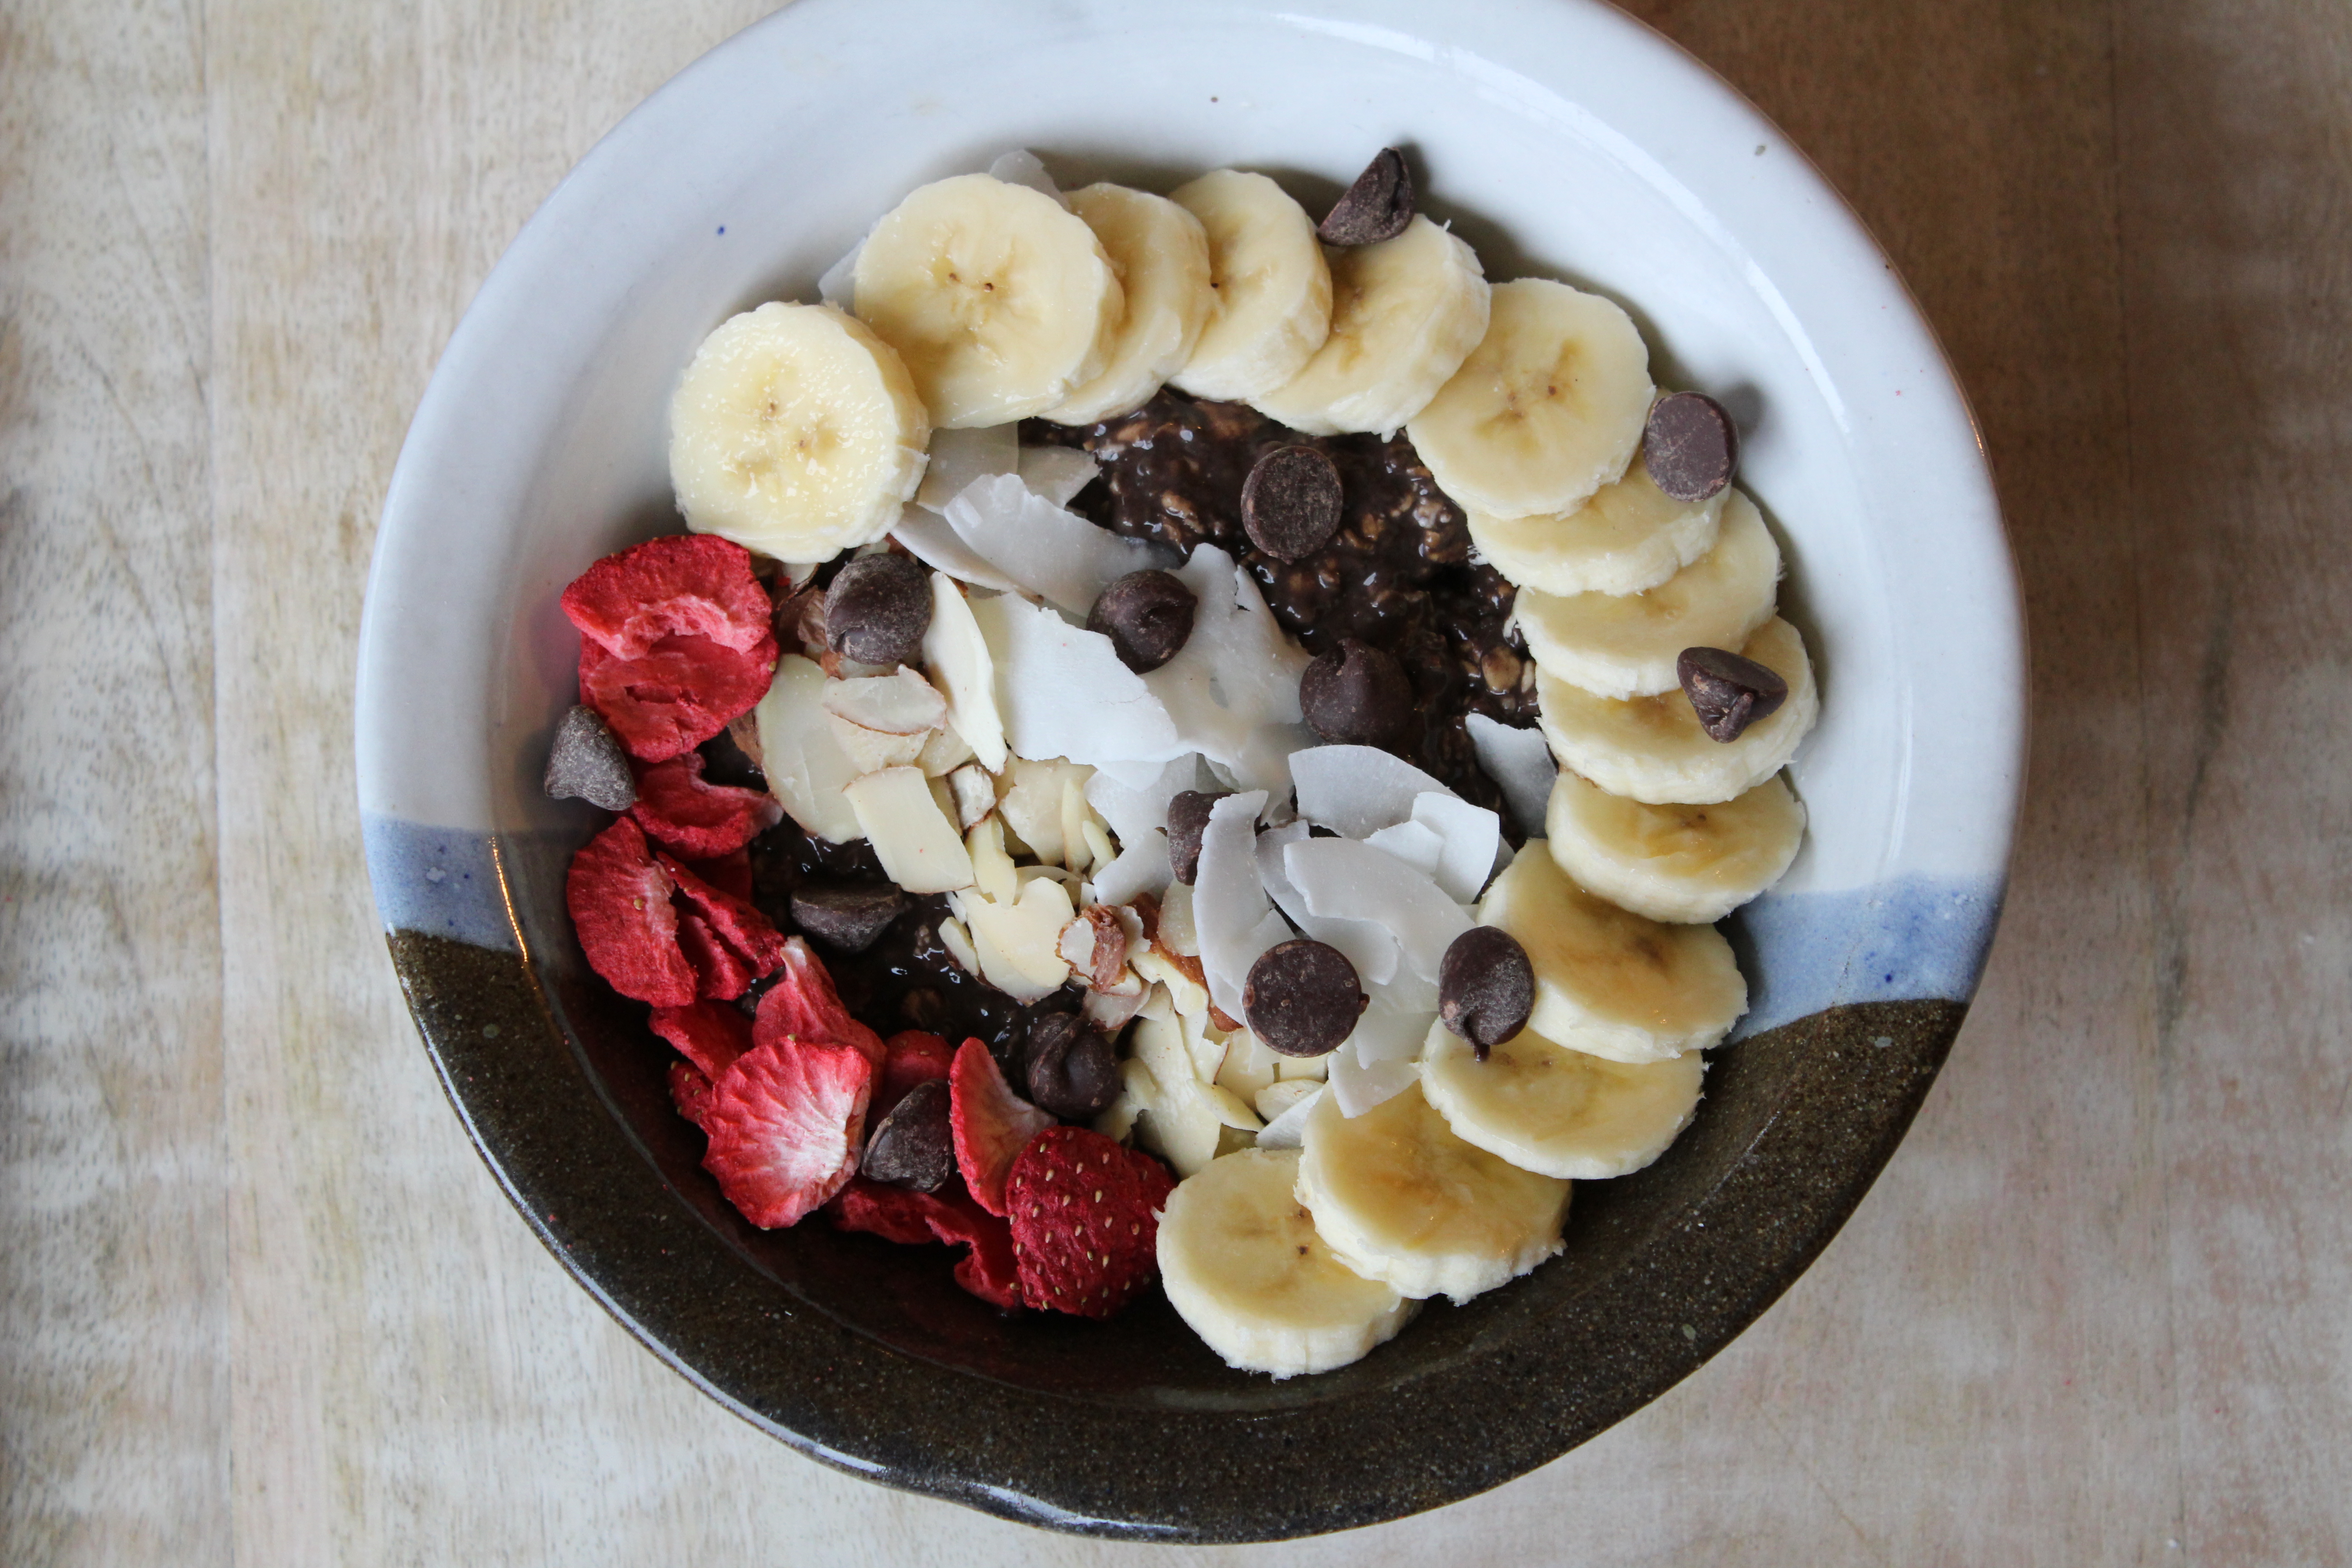
Never underestimate the power of chocolate. My lovely 3 year old, who has had chocolate only a handful of times but was not only willing to try this, but begging for a bite; and she kept eating. This is a fun treat, super easy to throw together the night before, and perfect for a quick breakfast, or in our case, a mid-morning snack. The toppings you use are totally up to you and what you have in your pantry. I love some sort of tart fruit, I usually use frozen raspberries, and the extra crunch of the almonds and coconut. Wolfie loved the bananas and Fox loved the coconut and freeze dried strawberries.
Chocolate Overnight Oats with Chia Seeds
Makes 2 large servings
Ingredients
2 cups non-dairy milk
3 TBL pure maple syrup
1 tsp pure vanilla extract
1/2 tsp almond extract
2 TBL cocoa powder – I used a mixture of dutch and natural
1 cup rolled oats
1/4 cup chia seeds
Toppings of choice, this time I used: 1/2 a banana, sliced, 1 TBL sliced almonds, 2 TBL coconut chips, 2 TBL freeze dried strawberries, and a few chocolate chips. Other ideas are nut butter, coco nibs, frozen fruit, fresh fruit, other chopped nuts, whatevs.
Instructions
Whisk together the milk, maple syrup, vanilla, almond, and cocoa powder in a bowl that has a lid.
Stir in oats and chia seeds, cover, and refrigerate overnight, at least 6 hours.
If you’re using frozen fruit you can toss it on top the night before and it will be thawed and lovely when you get to it in the morning.
The recipe for this delightful morsel of a cake has been passed down from my great-grandmother. It was one of the first recipes I posted when I started my blog several years ago. I didn’t have a picture of it, and I never uploaded one, until today. Just in time to celebrate the start of the holiday season. This cake is ultra moist, full of warming spices, and somehow never too sweet. It is perfect for dessert, breakfast, or as an addition to a holiday brunch. It also takes about 5 minutes to make and makes a big impression with its amazing fall flavors. This is the cake to bake when you have company as the whole house smells like you’ve spent hours in the kitchen as the warm fragrance of fall baking spices waft through the air.
Gramma’s Spice Cake
Makes 1 9×9 cake
Ingredients
1 cup non-dairy milk, or dairy milk
1 tsp. vinegar (apple cider or white, but I’ve also used rice in a pinch)
1 cup sugar
1 TBL vegetable shortening
1 TBL chia seeds mixed with 2 TBL water, or 1 egg, or equivalent of 1 egg in whatever form you like
1 cup all purpose flour
1 tsp. baking soda
1 tsp. cinnamon
1/2 tsp. nutmeg
1/2 tsp. cloves
1/2 tsp. salt
Instructions
Preheat oven to 370F.
Add vinegar to milk and set aside.
Cream together sugar and shortening until smooth.
Add the chia seed/water mixture to sugar and mix together.
In a separate bowl mix together the flour, baking soda, cinnamon, nutmeg, cloves, and salt.
Alternate between adding flour mixture and soy milk to the shortening, mixing thoroughly between additions.
Pour batter into a greased 9×9 cake pan and bake for 30-35 minutes, or until cake pulls away from the edges of the pan and a cake tester comes out mostly clean.
My new obsession is nachos. Well, it isn’t that new, I think it was spring when I started to make these. It is all the fault of my friend; we were talking about lunch one day and she said she had been on a nacho kick. It was all over at that point. I came home that very day and started making nachos. It switched to taco salad for the summer, but as soon as it started to cool down again I’ve been back to nachos. I think the ingenious thing she said that made me “have” to try nachos that day was she was putting refried beans in the BOTTOM of the pan, then the chips on top. This, of course, makes the most sense ever as the chips get all crispy and warm, the beans warm up, and they don’t make everything soggy.
This recipe is just for the cheese sauce, but I’ll give you a quick run down of the rest. I heat my cast iron on the stove, saute a few cups of sliced veggies with a little salt and pepper, then dump them in a bowl. In the still hot pan I swirl a tablespoon of oil, then spread refried beans on the bottom. Top the beans with chips and pop it under the broiler for a few minutes until the chips are toasty brown and perfect. I then dump it on a plate, and pile on the veggies, nacho cheese sauce, and salsa. I then eat it all for lunch while watching my husband work out.
The cheese sauce. It is a variation of my cheese sauce from my cashew mac n cheese with some spice added. I made a nice big batch and freeze any I don’t use within a few days.
Vegan Nacho Cheese Sauce
Ingredients
3/4 cup peeled and cubed russet potato (1 small)
2 TBL sliced carrot (1 very small)
1 tsp white vinegar
1 tsp salt
1/4 cup raw cashews
3/4-1 cup reserved cooking water
3 TBL nutritional yeast
2 TBL tahini
2 tsp dijon mustard
1 1/2 tsp tomato paste
additional salt to taste
1 small can diced green chilis
1/2 tsp ground chipotle powder or one chipotle in adobo sauce
Instructions
Place potato and carrot in a small saucepan and cover with cold water.
Add the vinegar and 1 tsp salt to water, bring everything to a boil partially covered, and boil for about 10 minutes.
Add the cashews and continue to cook until the potatoes and carrots are completely tender, about 5 minutes more. They are done when they slide off a fork that is inserted into a piece of potato or carrot.
Drain potatoes and carrots reserving at least 1 cup of the cooking water.
Transfer potatoes, carrots, cashew, and 3/4 cup cooking water to a blender.
Add nutritional yeast, tahini, mustard, and tomato paste and blend until smooth.
Add more cooking water if you want the sauce to thin out a bit.
Add green chilis and chipotle and pulse to combine.
As I’ve been exploring balancing flavors, and trying new food combinations I have truly come to love pickled red onions. Pickled everything really, but these are one of my favorites. It is not one of those ingredients that brings and item into focus when I see it on a menu. I feel it pairs particularly well with things that are sweet. Think sandwiches with roasted vegetables and their inherent sweetness that needs a bit of acidity for balance. Yummy. I made this particular batch to go with harissa roasted sweet potatoes. I also threw on some roasted salted pecans, and some candied pine nuts. It was yummy. This recipe is adapted from Bobby Flay, one if his 3000 recipes for pickled red onions.
Pickled Red Onions
Ingredients
1 1/2 cups white vinegar
1/4 cup water
2 TBL granulated sugar
1 TBL kosher salt
1 large red onion, thinly sliced
Instructions
Combine vinegar, water, sugar, and salt in a small saucepan and bring to a boil.
Remove from heat, stir, and allow to cool for about 10 minutes.
Place the onion in a heat safe container with a lid, then poor the hot vinegar mixture over the onions.
Cover and allow onions to sit for at least an hour, up to 4 days
Remove from liquid and use to top everything from sandwiches to sweet potatoes.