Tomorrow is my 6th anniversary, which means my husband and I have been together about 10.5 years! In that time we have lived in 6 different states, countless houses, tents, and trailers, bought and sold one house, changed jobs about a million times, had two children, and are now preparing to move across the country again! It’s been fun, and I can’t wait to keep living the dream with my amazing, thoughtful, compassionate, hard working, incredible father of a husband. I love you Aspen Gone Wild.
To celebrate I’m making a short list of my husband’s favorites, and maybe, if he’s lucky, I’ll make one for him in the next few weeks:) This year my husband and I will be spending our anniversary celebrating with my sister-in-law for some of her pre-wedding festivities. I wish her the same love, kindness, and respect that I find in my own marriage. Love you J-dazzle!
My new obsession is nachos. Well, it isn’t that new, I think it was spring when I started to make these. It is all the fault of my friend; we were talking about lunch one day and she said she had been on a nacho kick. It was all over at that point. I came home that very day and started making nachos. It switched to taco salad for the summer, but as soon as it started to cool down again I’ve been back to nachos. I think the ingenious thing she said that made me “have” to try nachos that day was she was putting refried beans in the BOTTOM of the pan, then the chips on top. This, of course, makes the most sense ever as the chips get all crispy and warm, the beans warm up, and they don’t make everything soggy.
This recipe is just for the cheese sauce, but I’ll give you a quick run down of the rest. I heat my cast iron on the stove, saute a few cups of sliced veggies with a little salt and pepper, then dump them in a bowl. In the still hot pan I swirl a tablespoon of oil, then spread refried beans on the bottom. Top the beans with chips and pop it under the broiler for a few minutes until the chips are toasty brown and perfect. I then dump it on a plate, and pile on the veggies, nacho cheese sauce, and salsa. I then eat it all for lunch while watching my husband work out.
The cheese sauce. It is a variation of my cheese sauce from my cashew mac n cheese with some spice added. I made a nice big batch and freeze any I don’t use within a few days.
Vegan Nacho Cheese Sauce
Ingredients
3/4 cup peeled and cubed russet potato (1 small)
2 TBL sliced carrot (1 very small)
1 tsp white vinegar
1 tsp salt
1/4 cup raw cashews
3/4-1 cup reserved cooking water
3 TBL nutritional yeast
2 TBL tahini
2 tsp dijon mustard
1 1/2 tsp tomato paste
additional salt to taste
1 small can diced green chilis
1/2 tsp ground chipotle powder or one chipotle in adobo sauce
Instructions
Place potato and carrot in a small saucepan and cover with cold water.
Add the vinegar and 1 tsp salt to water, bring everything to a boil partially covered, and boil for about 10 minutes.
Add the cashews and continue to cook until the potatoes and carrots are completely tender, about 5 minutes more. They are done when they slide off a fork that is inserted into a piece of potato or carrot.
Drain potatoes and carrots reserving at least 1 cup of the cooking water.
Transfer potatoes, carrots, cashew, and 3/4 cup cooking water to a blender.
Add nutritional yeast, tahini, mustard, and tomato paste and blend until smooth.
Add more cooking water if you want the sauce to thin out a bit.
Add green chilis and chipotle and pulse to combine.
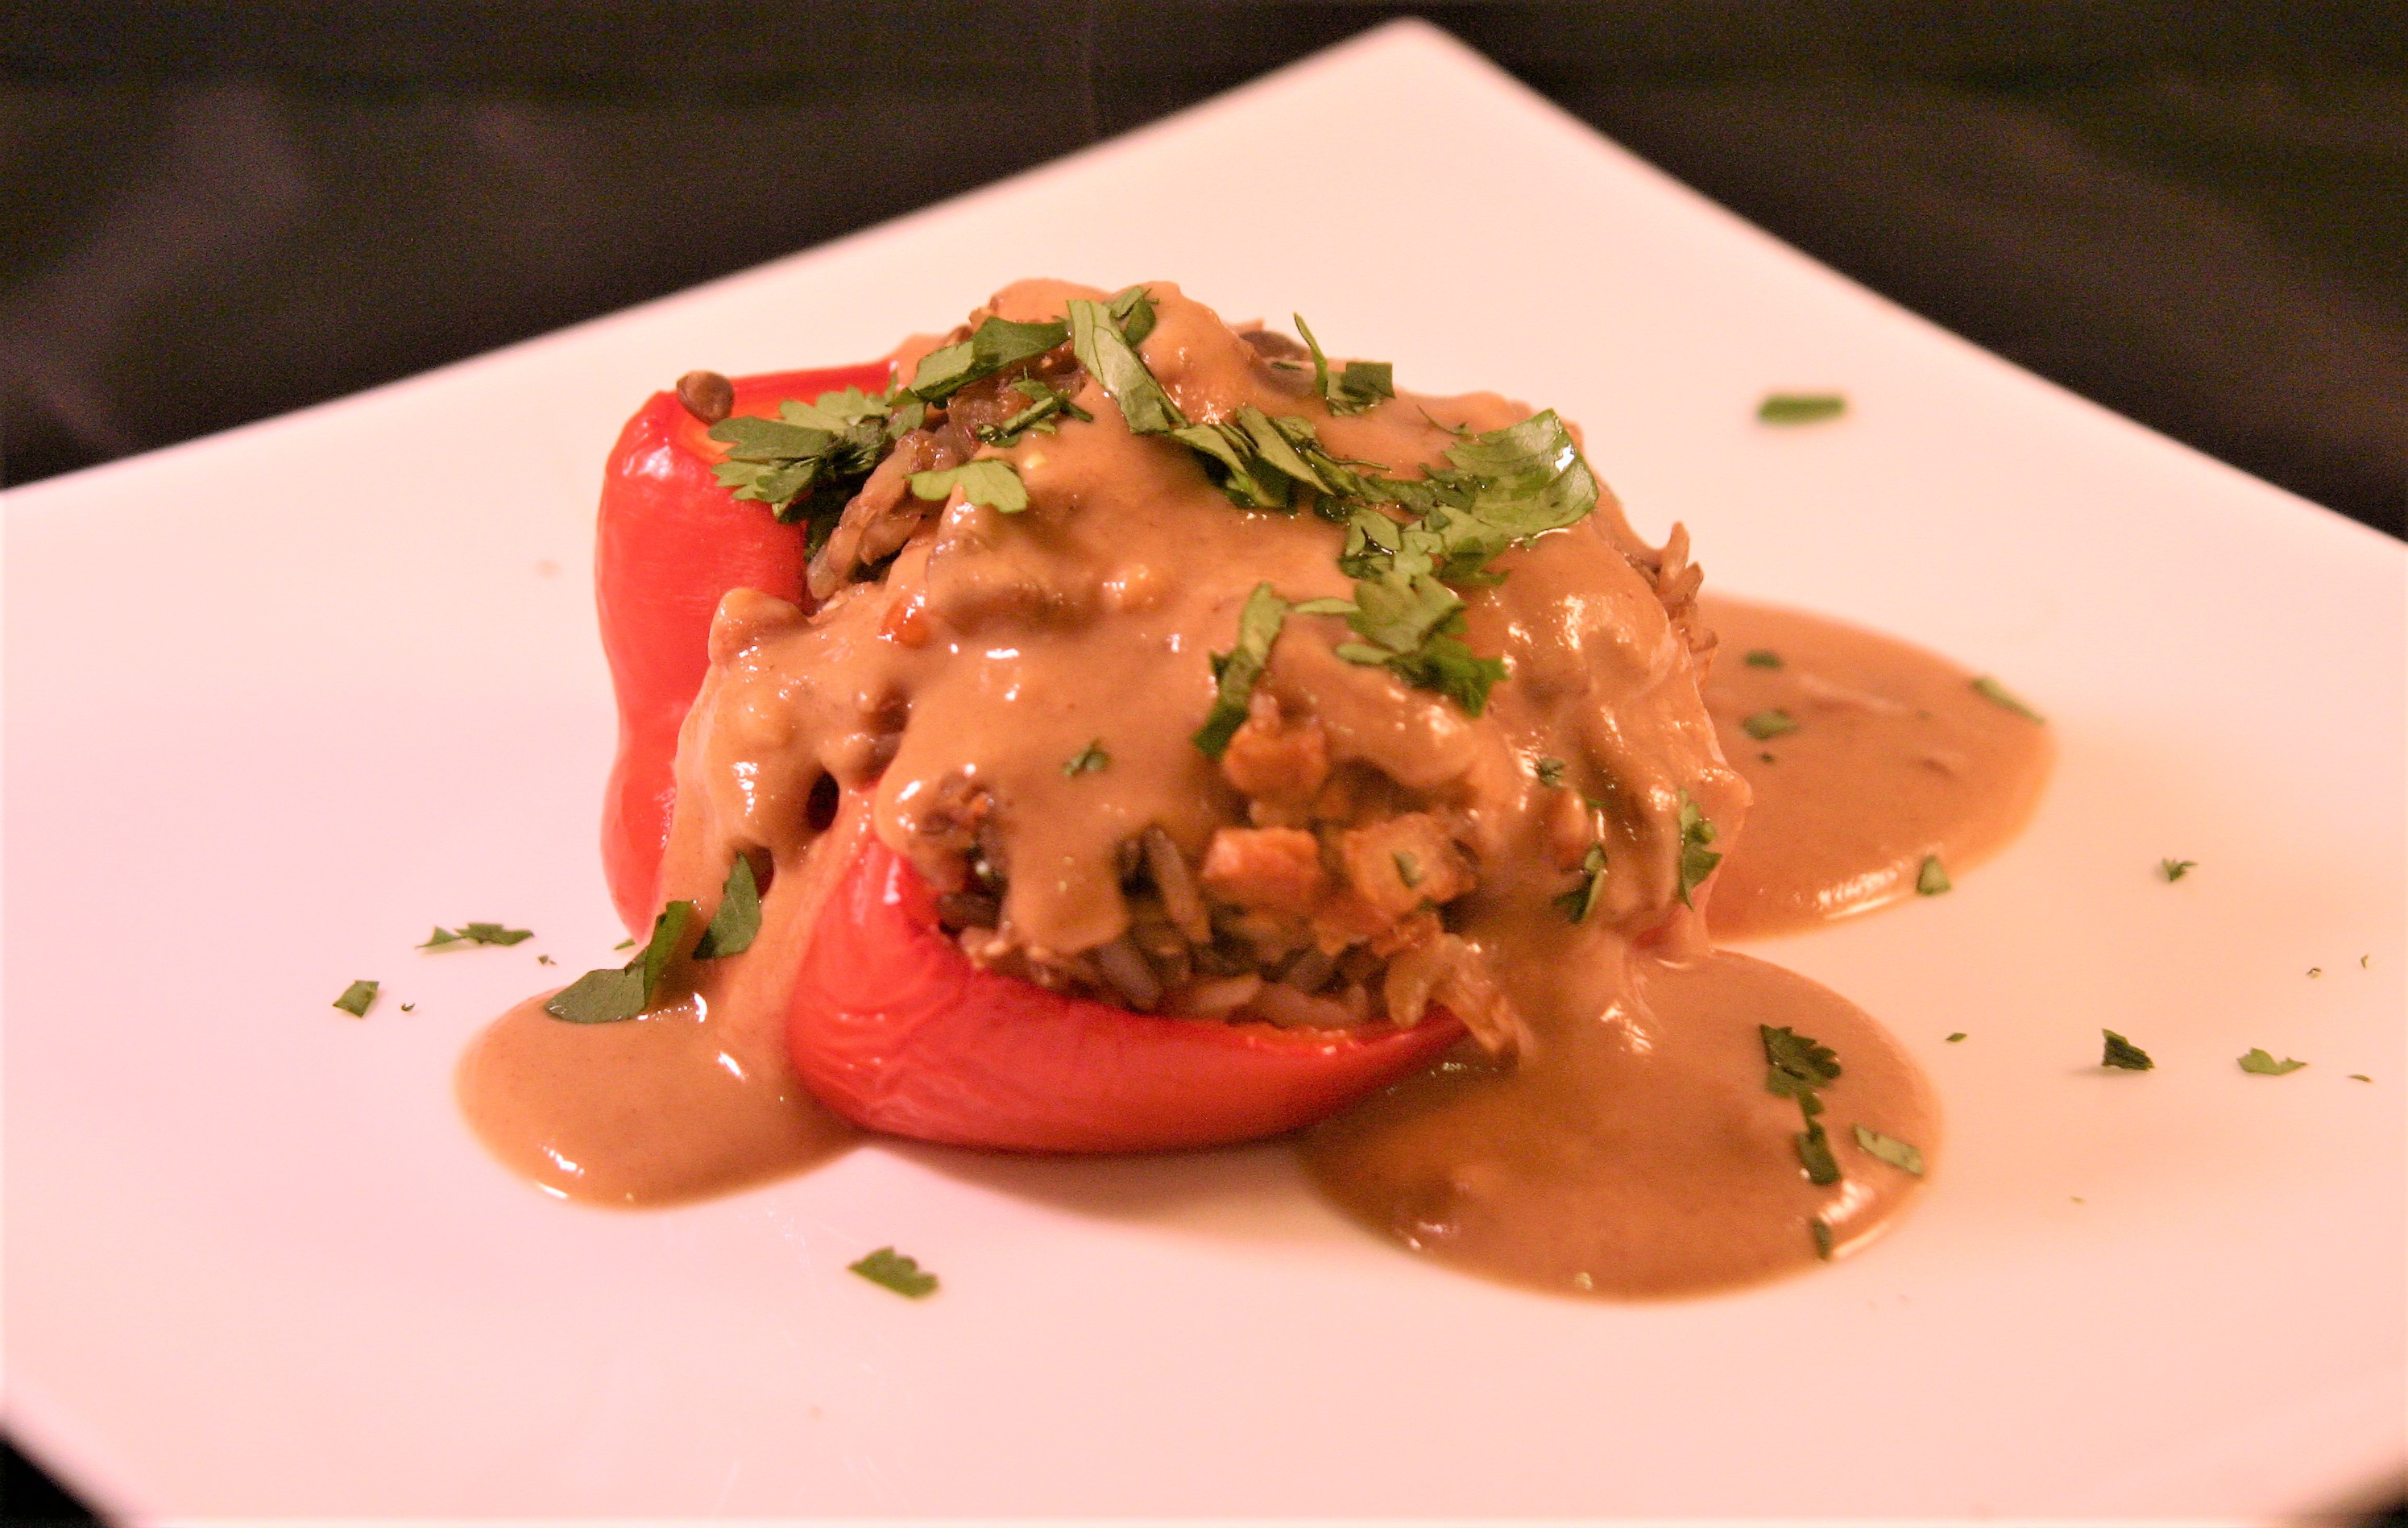
So this is not authentic Thai food, but there are some delightful Thai flavors going on. These stuffed peppers have a mixture of rice, lentils, and vegetables set off with some Thai red curry paste, and topped with a comforting peanut sauce. Super tasty, gluten free, vegan, easy, and comforting.
This recipe was developed in my quest to try new things and was inspired by my wonderful mother-in-law makes super yummy stuffed peppers (and has made me vegan ones because she’s awesome). I wanted to do a stuffed pepper, but take it outside the box a bit.
Thai Stuffed Peppers With Peanut Sauce
Ingredients
1/2 cup brown rice
1/4 cup brown lentils
2 cups mushroom or vegetable broth
4 red, yellow, or orange bell peppers cut in half lengthwise and seeded
2 TBL olive oil
1 medium onion diced, about 1 cup
1 cup diced yellow squash of zucchini
1 cup diced mushrooms
juice from half a lime, about 1 TBL
salt to taste
2 cloves garlic, minced
2 TBL minced fresh cilantro
2-4 tsp red curry paste
Instructions
Mix rice, lentils, and mushroom broth in a medium pan. Cover and bring to a boil over medium heat.
Reduce heat to low and cook, covered, until rice and lentils are tender, about 30 minutes.
Meanwhile, preheat oven to 375.
Prepare a large baking sheet by lining it with a silicone mat, parchment paper, or aluminium foil. Place peppers on baking sheet cut side up and bake for 20 minutes until starting to soften.
While peppers are cooking cut your vegetables.
Heat a large skillet over medium heat.
Add olive oil, onion, squash, and mushrooms sauteing until tender, about 7 minutes.
Add lime juice, salt, and garlic cooking 1 additional minute and remove from heat.
Stir together the cooked rice and lentils, the vegetable mixture, cilantro, and the red curry paste. Add the curry past a teaspoon at a time and taste adjusting to your preference.
Once peppers have cooked remove them from the oven and fill with rice mixture to overflowing.
Cover with aluminum foil and bake 20 minutes until cooked through.
While peppers are cooking make peanut sauce.
Serve hot with peanut sauce and garnished with cilantro.
Peanut Sauce
Ingredients
2 cups water
1 cup peanut butter
2 TBL brown sugar
2 TBL tamari -Gluten free if needed
2 tsp lime juice
2 cloves garlic, minced
1/4 tsp red pepper flakes
1/4 chopped cilantro (optional)
Instructions
Boil water in a small saucepan.
Once boiling whisk in peanut butter until smooth and remove from heat.
Stir in brown sugar, tamari, lime juice, garlic, and red pepper flakes.
In need of some comfort food? I feel I am most of the time in the winter. I just want warm, filling, soul satisfying food. These delightful little nuggets fit the bill perfectly, especially when paired with whole wheat pasta and either your favorite sauce, or my favorite sauce.
Wolfie loved to help with these. She does everything from mashing the tofu to help form the balls. She also ate them! I mean, why wouldn’t you? They are a bit crisp on the outside, a bit salty, faintly “cheesy”, and heavy with Italian seasonings. These also freeze well if you feel like making a double batch.
Tofu Balls
Ingredients
1 lb water packed extra firm tofu
1 TBL Italian seasoning
1/4 tsp salt
1/4 tsp granulated garlic
1 cup grated zucchini (optional)
freshly ground black pepper to taste
red pepper flakes to taste
2 TBL nutritional yeast
1/4-1/3 cup vegan bread crumbs
Neutral flavored oil for cooking
Instructions
Mash tofu in a large bowl with your hands of a potato masher.
Add Italian seasoning, salt, garlic, zucchini, pepper, red pepper, and nutritional yeast and stir together.
Add bread crumbs a few tablespoons at a time stirring to combine. The mixture should start to stick together.
Taste the mixture and adjust seasonings to taste.
Heat about a 1/4″ of oil in a large heavy bottomed skillet to about 350 degrees. I never actually check this with a thermometer, but you should. It should be hot, but not smoking, and when you flick a few drops of water into the oil it should sizzle and pop.
Form the tofu mixture into walnut sized balls with your hands. Pack them a bit, but don’t worry if they feel loose as long as they hold their shape in your hand. If they don’t add more breadcrumbs until they do.
Carefully place the tofu balls in the hot oil, and cook until one side is golden brown (3-4minutes), flip them and cook on the other side another 3 minutes or so until golden brown.
Unless you have a super huge skillet you will need to work in batches. You might need to add more oil between batches. If this happens don’t forget to reheat the oil before frying.
Once cooked remove the tofu balls and place on a plate lined with paper towel to drain.
Serve hot with pasta and sauce.
You could also bake these on an oiled baking sheet at 375 for about 20 minutes. Still good, but not quite the same.
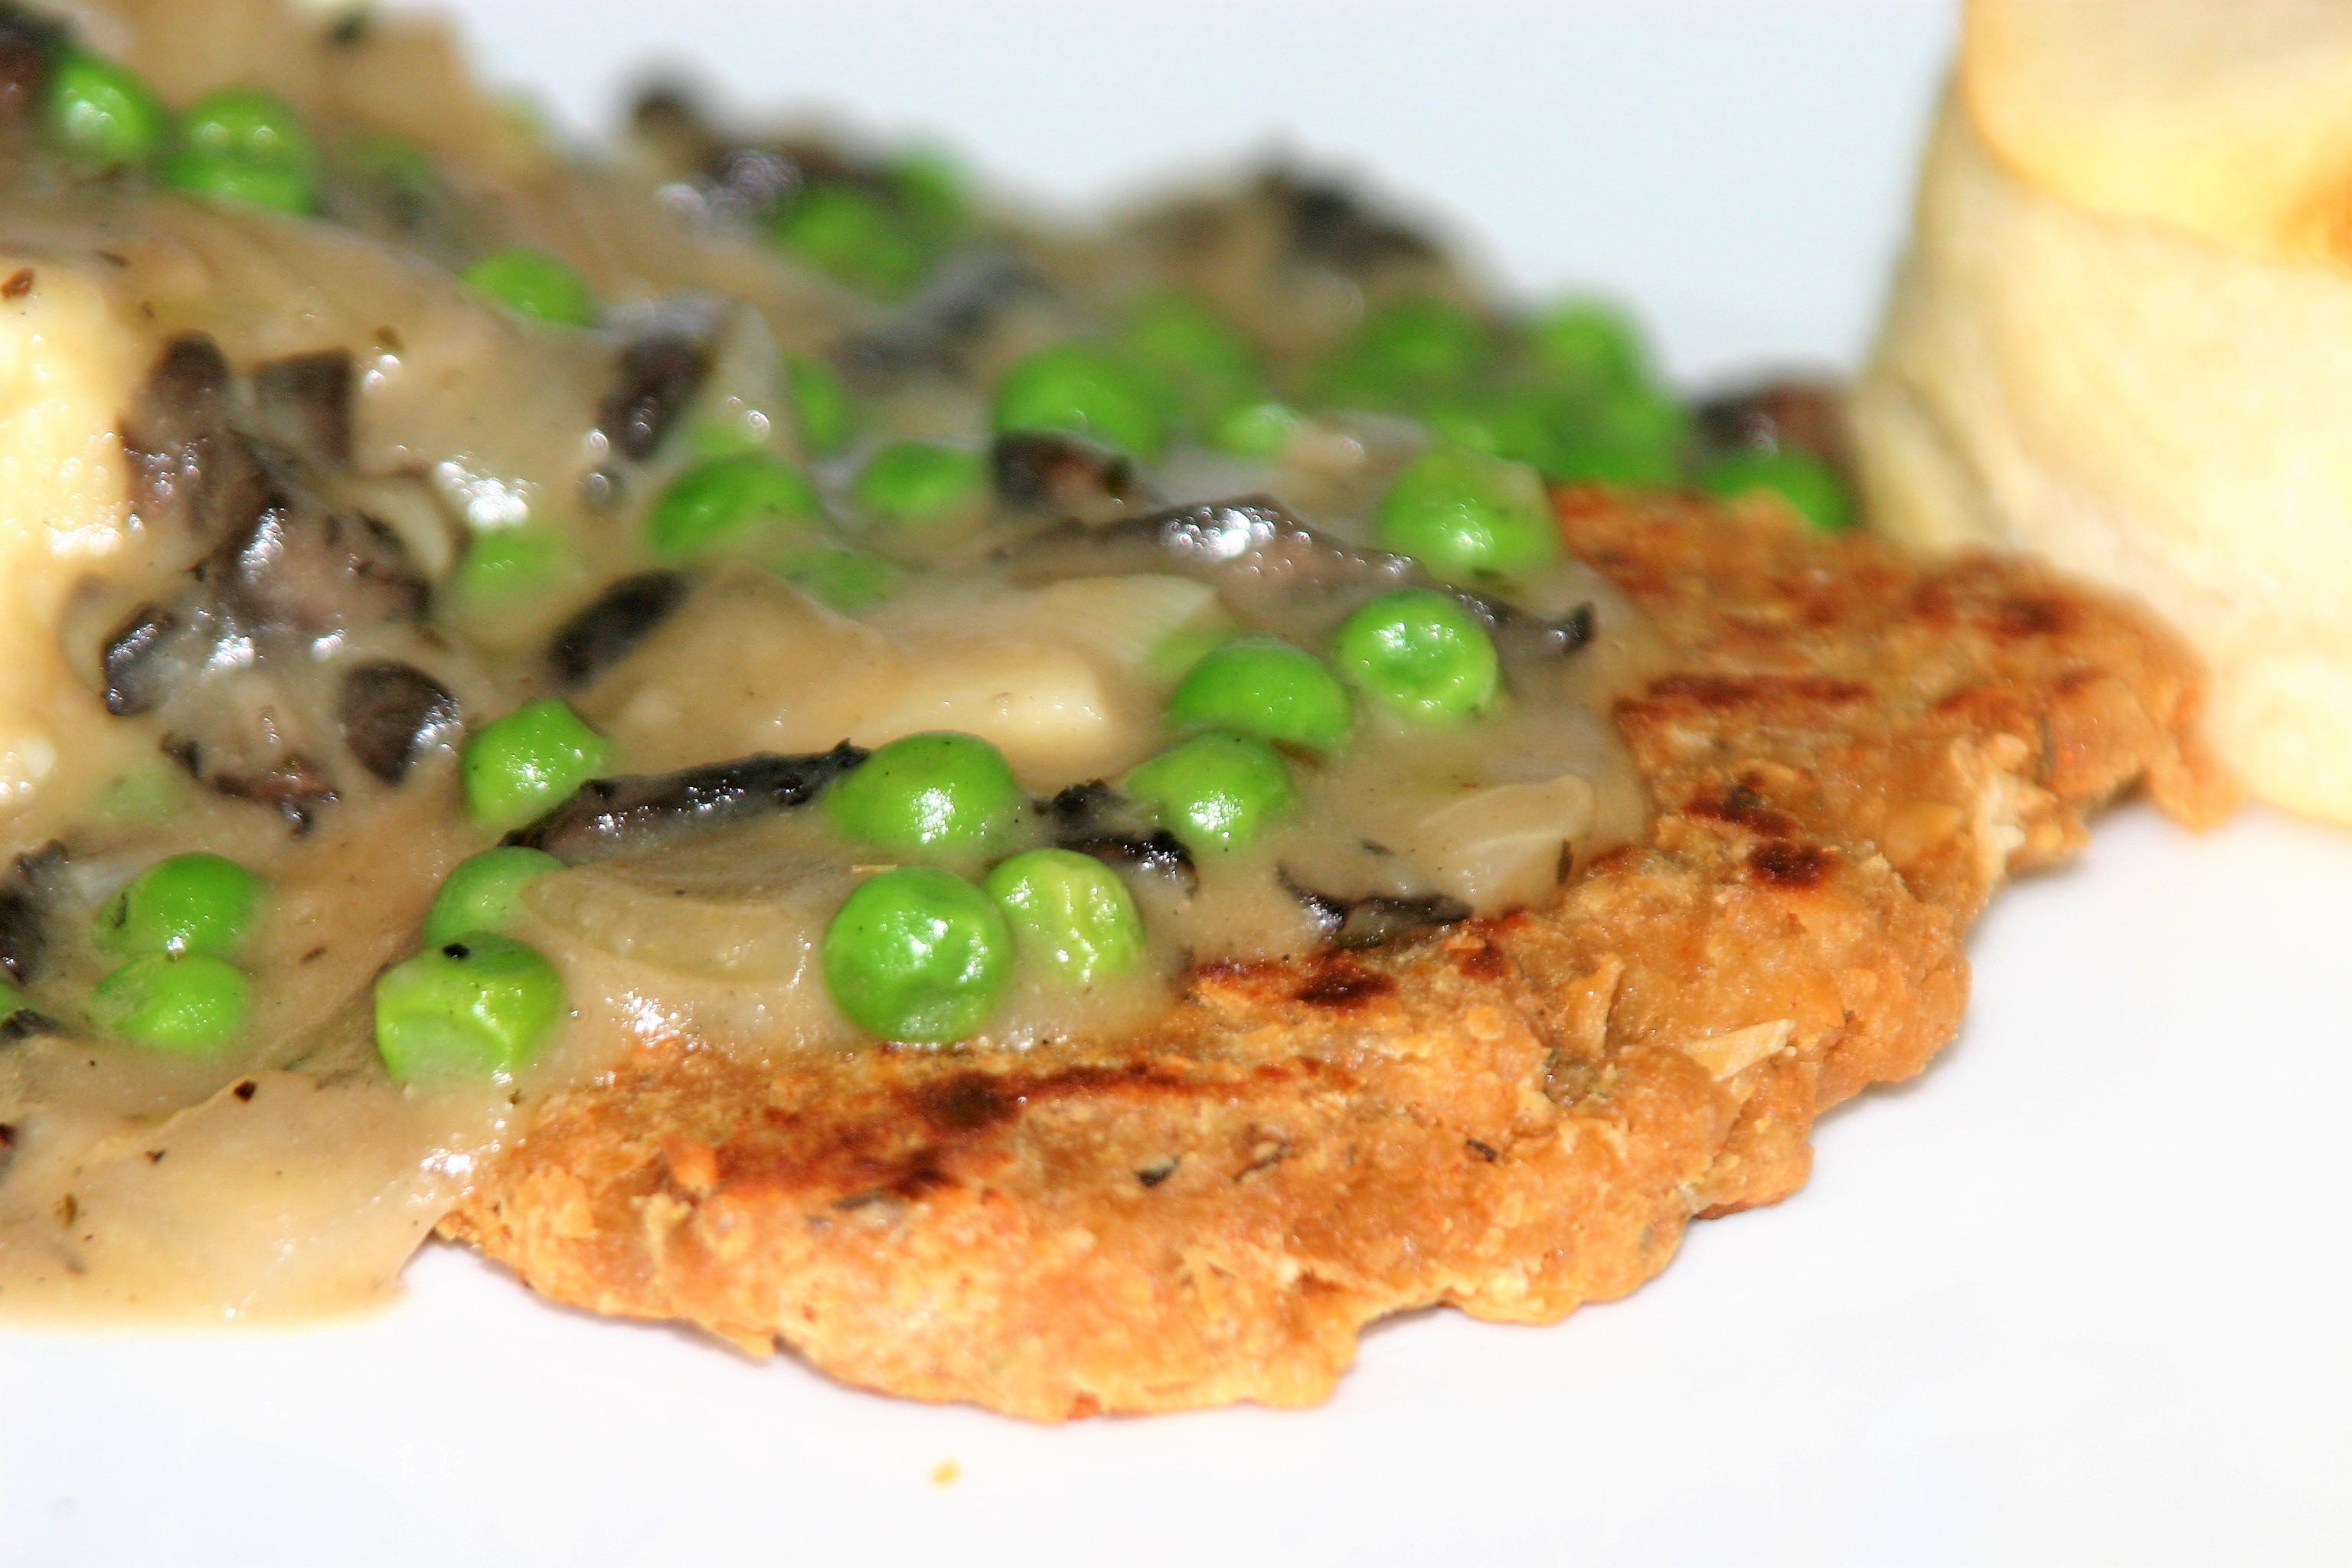
These amazing, delicious, soul satisfying chickpea cutlets are from the Veganomicon , which is, incidentally, my favorite cookbook. I’m on a short weekend getaway and I brought it with me for inspiration. I’m feeling a little routine in the kitchen these days and needed some amazing recipes to give me a kickstart. So thank you Isa Chandra Moskowitz and Terry Hope Romero for being amazing vegan cooks and delightful inspirations.
These chickpea patties are packed with flavor, chewy, and perfect for a heaping helping of gravy and a side of mashed potatoes. My daughter also loved helping with this recipe as it requires some kneading and she thought that was pretty much the best. If you are in the mood for comfort food this will fit the bill. I made this recipe before Thanksgiving and used a few of the cutlets in my one dish masterpiece. Really, it was so I got to eat all the leftovers without having to share with my husband. Don’t tell him.
4 cloves garlic, finely minced or grated with a Microplane grater
Olive oil for pan frying
Instructions
In a mixing bowl, mash the chickpeas together with the oil until no whole chickpeas are left. Use an avocado masher or a strong fork.
Add the remaining ingredients and knead together for about 3 minutes, until strings of gluten have formed.
Preheat a large heavy-bottomed skillet over low-medium heat. I like to use my cast iron pans for this.
Divide the cutlet dough into 2 equal pieces. Then divide each of those pieces into 4 separate pieces (so you’ll have 8 all together). To form cutlets, knead each piece in your hand for a few moments and then flatten and stretch each one into a roughly 6 by 4 inch rectangular cutlet shape.
Add a moderately thin layer of olive oil to the bottom of the pan. Place the cutlets in the pan and cook on each side for 6 to 7 minutes. Add more oil, if needed, when you flip the cutlets. They’re ready when lightly browned and firm to the touch. You will have to work in batches to cook all the cutlets unless you have a bigger pan that I have ever seen.
Today is my 5th wedding anniversary! I can’t believe time has gone so fast! So many things have happened in the last five years, and there is no way we would have pictured ourselves in Cambridge, MA with two kids on our wedding day! Holy Cow! To honor this momentous occasion I am compiling a list of my husband’s favorites from the blog. All of them are delightful vegan comfort foods.
The featured recipe is one of the easiest things to make, and one of my husband’s favorites. I say that a lot; it must mean that whatever I’m making is his favorite. This is simply frozen tater tots that are baked, then topped with cheese and tofu smothered in BBQ sauce. Oh, so good! If you’re looking for a different kind of comfort see below.
Wondering what to do with the other half of the package of soyrizo? This is one delicious option. A savory, satisfying stew that comes together in minutes. It can be made in the slow cooker or on the stove, with canned beans or homemade. Serve with some salad or a nice cabbage slaw and you have yourself a quick, easy, delicious meal. This recipe is from “The Vegan Slow Cooker”, a super fun cookbook with lots of pictures- My husband loves it. In fact, he was the first in our family one to make this stew; it is now a regular feature for busy weeks.
If you missed the previous week and are wondering, what the heck do I do with half a package of leftover soyrizo? Check out these baked potatoes with soyrizo and kale, and look for another recipe next week for a quick pasta dish using the leftover soyrizo. Just freeze the half package until then, it will be fine.
Soyrizo and Black Bean Stew
Ingredients
1 TBL olive oil
1 small onion, diced
1 clove garlic, minced
1/2 green or red bell pepper, diced
1/2 package (6oz) soyrizo
2 15 oz cans, or 3 cups cooked black beans
2 cups water
1/2 tsp cumin
1/2 tsp chili powder
salt and pepper to taste
Instructions
Heat oil in a large saucepan over medium heat.
Saute the onions over medium heat until translucent, 3-5 minutes.
Add the garlic and bell pepper and cook about 3 more minutes until starting to soften.
Combine cooked vegetables, and the rest of the ingredients in a slow cooker, or in a large pot on the stove.
For the slow cooker cook on low for 6-8 hours.
On the stove cook 20-40 minutes over low heat, stirring regularly. You may need to add more water if the stew begins to look dry.
Top with whatever looks good to you. I like some fresh cilantro, bell peppers, and sometimes cucumber. It adds a nice crunch and some freshness to the dish.
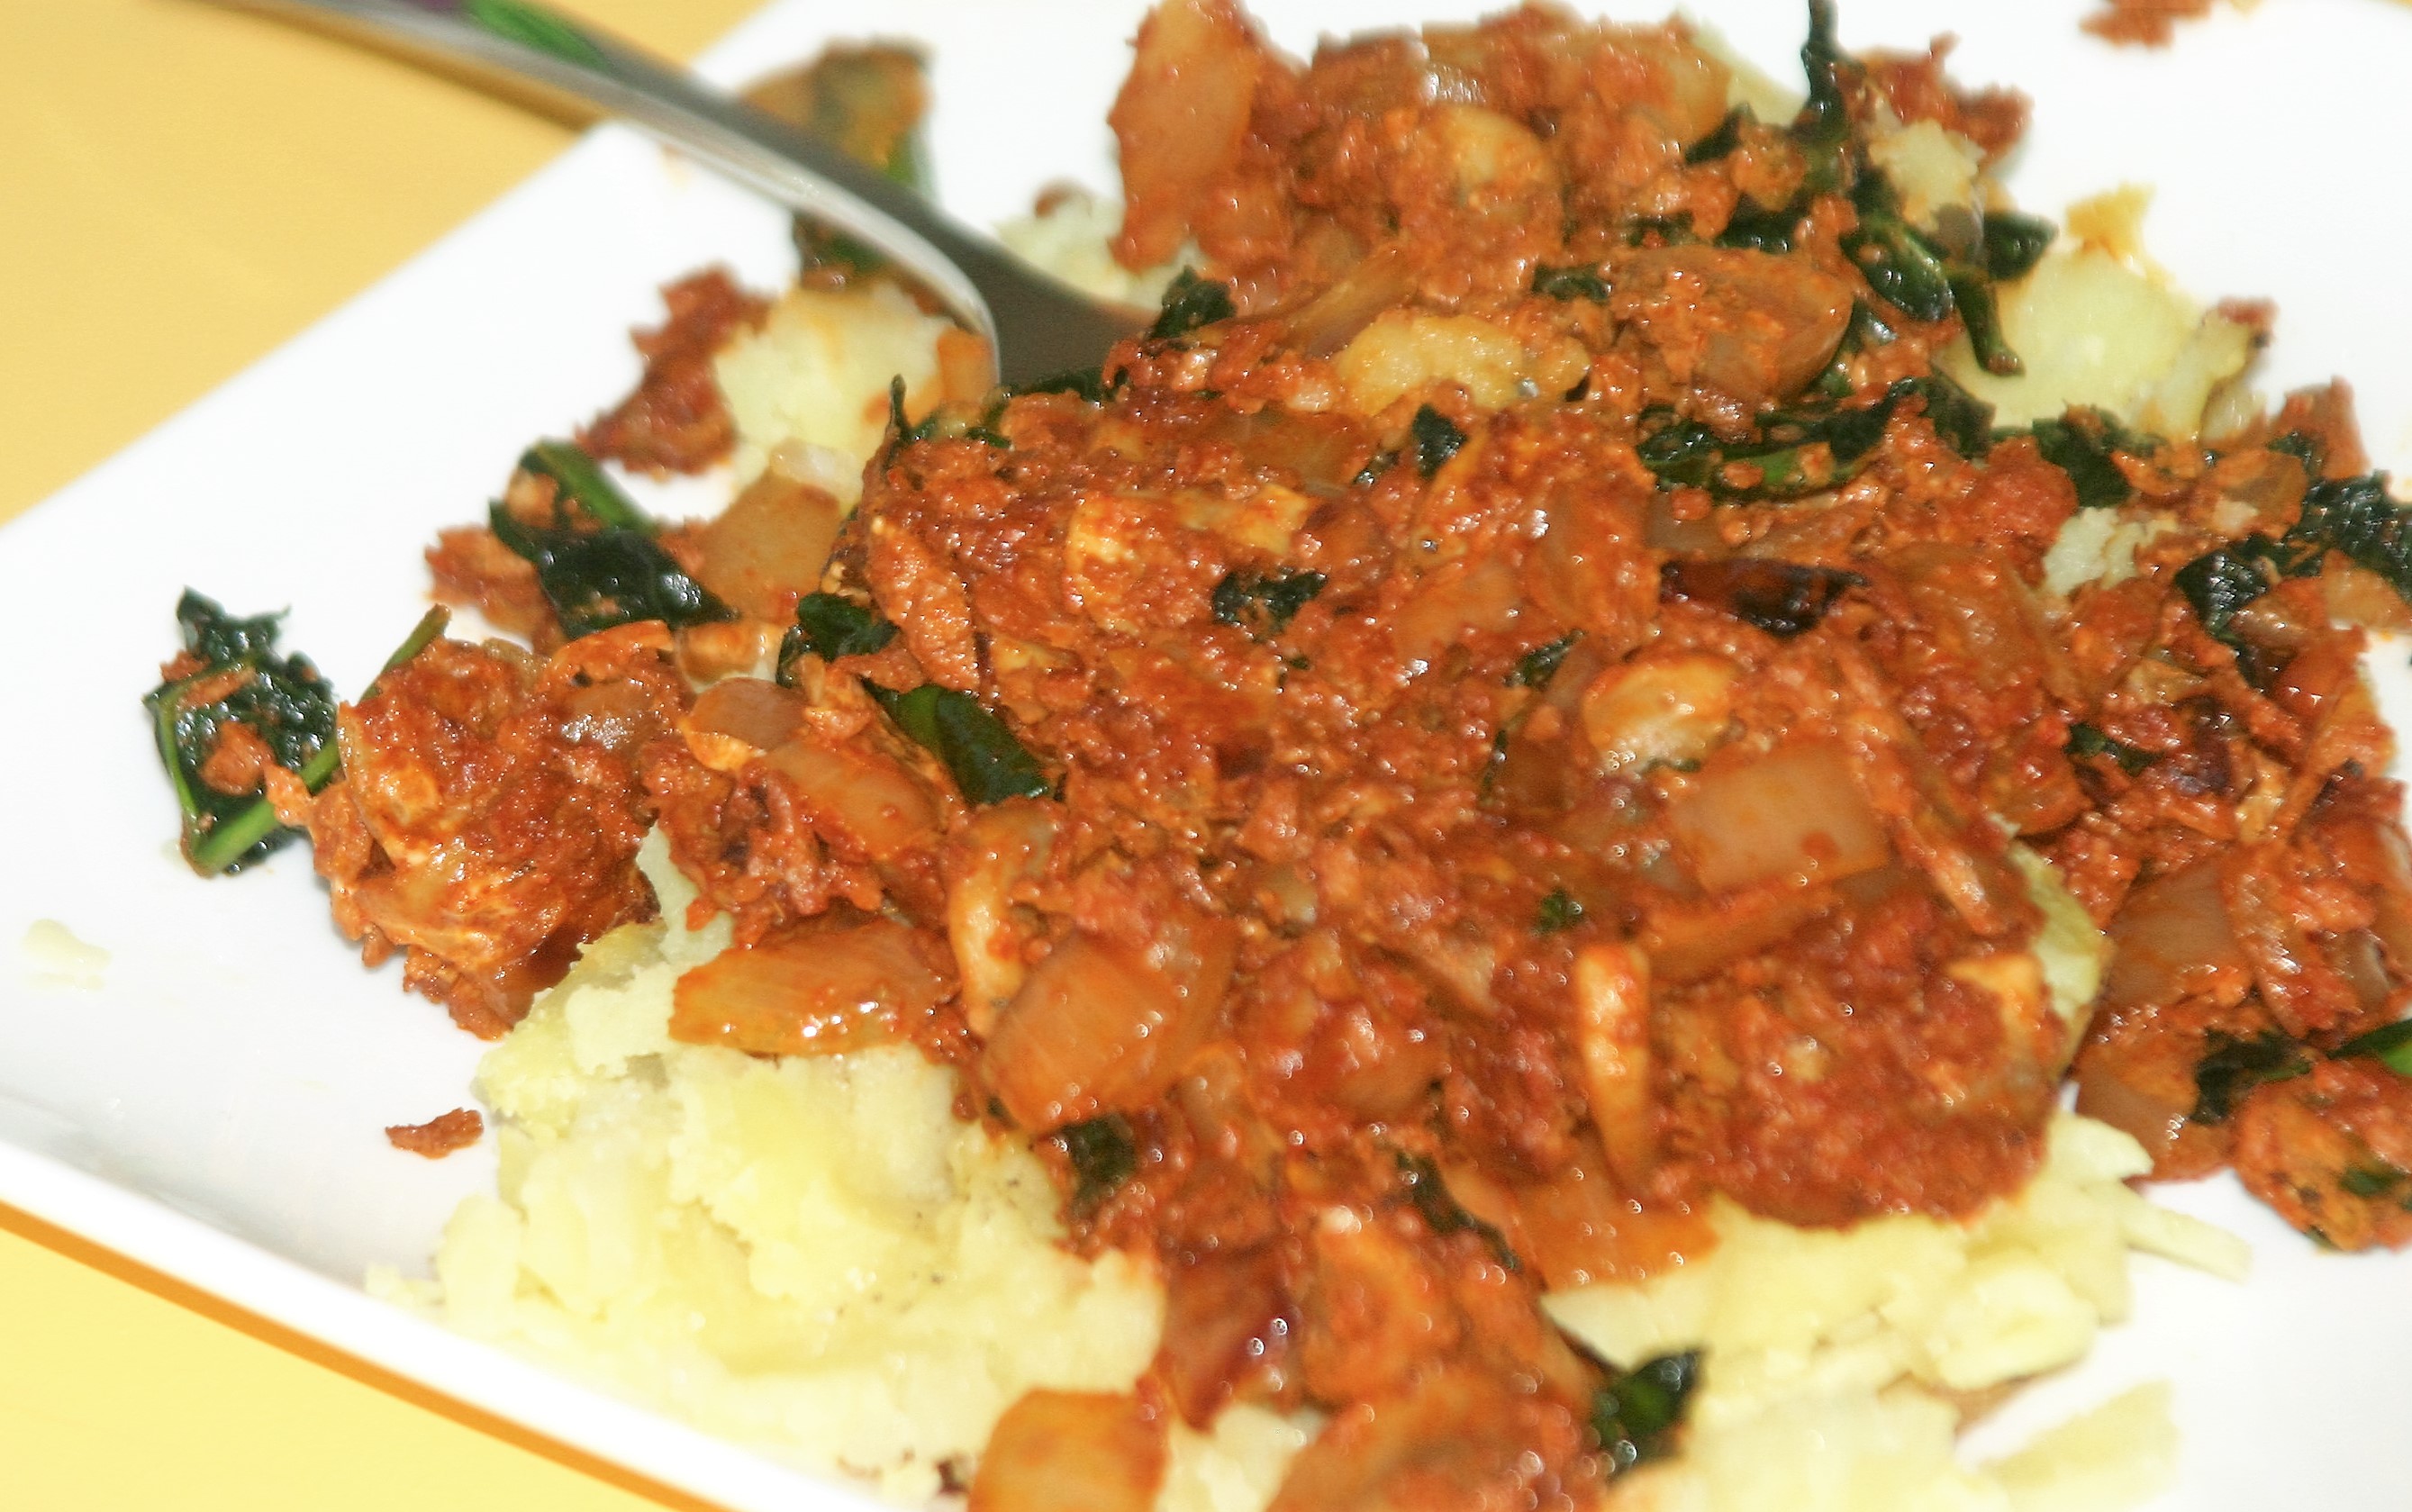
Some nights I just need to eat a potato, and spend less that 15 minutes cooking. This is one of my go-to recipes for those nights. Super easy, filling, nutritious, and delicious. I know some people area all like “potatoes are bad”, but they aren’t. They are delicious, less than 2o0 calories a potato, full of vitamin C, B-6, and potassium. And they’re yummy. If you’re still worried this recipe would also be good with a baked sweet potato, or squash, or smashed parsnips, cauliflower, or turnips. Choose your yummy fall/winter vegetable and go to town.
You might notice in the next few weeks that I am slightly obsessed with soyrizo. It is so richly flavored you can totally get past the fake meat thing. I really don’t like the taste of fake meat, but soyrizo is just swimming in spices and savory goodness. So, the next few weeks will highlight quick and easy meals, but also meals made with soyrizo. Forgive me if you don’t share my obsession. However, if you haven’t tried it, go out and get some. -Do read the package if you are vegan as some brands contain milk. For this week, after you make this baked potato happiness on a plate, you can either use the other half of the soyrizo package to make pizza burritos (this is what I recommend), or freeze it and wait for next week when I post another quick and easy recipe that uses soyrizo.
Baked Potato with Soyrizo and Kale (vegan)
Ingredients
4 large baking potatoes
2 TBL olive oil
1 medium yellow onion, sliced
2 cups chopped kale
3 cloves garlic, minced
1/2 package soyrizo
1/2 cup vegetable broth, beer, or water
2 TBL vegan cream cheese
2 TBL nutritional yeast
Instructions
Preheat oven to 400
Poke a few holes in the potatoes with a fork, place in the oven right on the rack, and bake until they are soft on the inside 45-60 min. I test them by squeezing them (with a potholder) and when you can feel the inside give they are ready.
Meanwhile (when you have about 15 minutes until the potatoes are done), heat a large skillet over medium heat.
Saute onions until just softened, about 3 minutes.
Add kale and continue to cook for 2 more minutes.
Add Garlic and cook briefly, about 30 seconds, then add soyrizo, vegetable broth, cream cheese, and nutritional yeast.
Stir frequently and cook until heated through, about 3 more minutes.
When potatoes are done, split them lengthwise and top with soyrizo mixture.
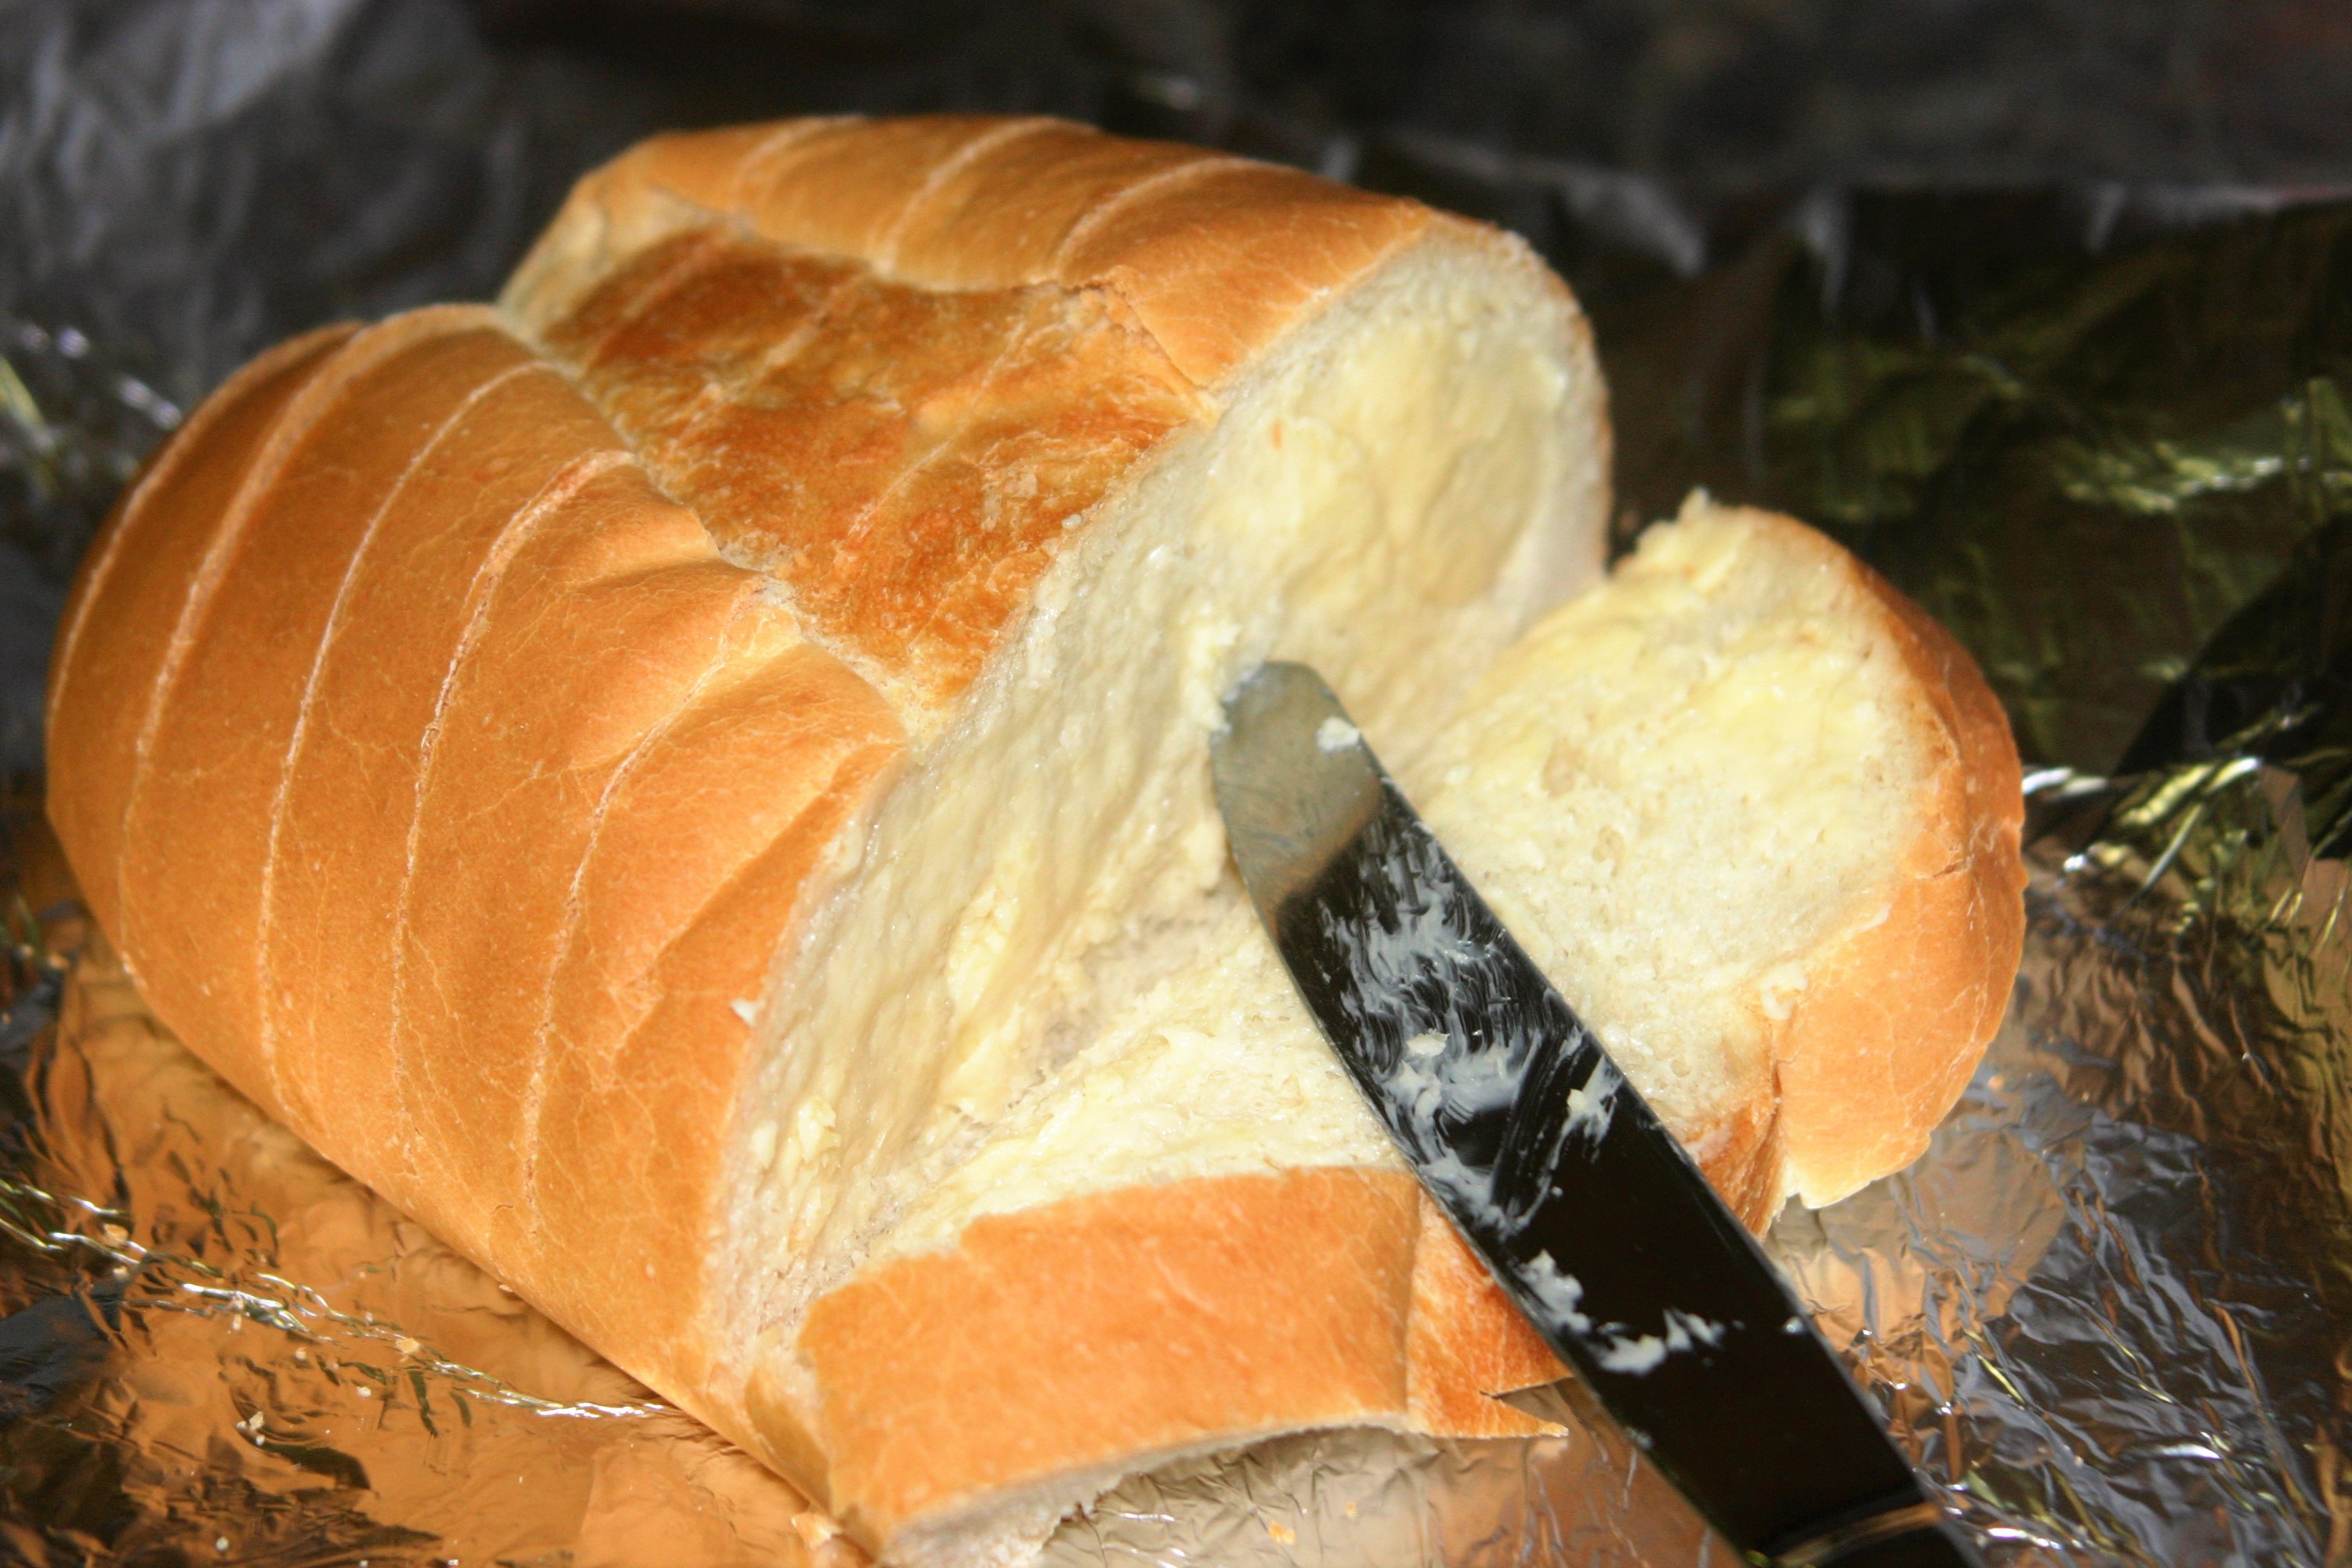
Thursday was my birthday. It was lovely. Wolfie slept longer than she ever has the night before and night after my birthday. Hours of sleep in a row. It was amazing! For my birthday dinner my amazing husband made me vegan eggplant Parmesan, and this delightful garlic bread. I was a happy lady.
Oh, how I love garlic bread. The soft pillowy bread, the creamy butter, the slight bite from the garlic. So delicious. This is one of those recipes we have been making so long that I always forget to post it, I just think I already have. You will probably want to make this tonight with some loaded pasta, or lasagna, or maybe ravioli with brown butter sage sauce. You never know what you might want to serve it with. Maybe you just want to eat it on its own. I won’t tell anyone.
Vegan Garlic Bread
Ingredients
1 loaf Italian bread
1/2 cup Earth Balance buttery spread at room temperature
8 small cloves garlic, finely minced
Instructions
Preheat oven to 375.
Cut bread into slices on the horizontal from top to bottom most of the way through the loaf leaving the bottom intact. (see picture below)
Mix the garlic into the buttery spread until combined.
Spread garlic butter on each side of each slice of bread.
Wrap in aluminum foil.
Bake for 20-30 minutes until the butter has melted and the crust is crispy.
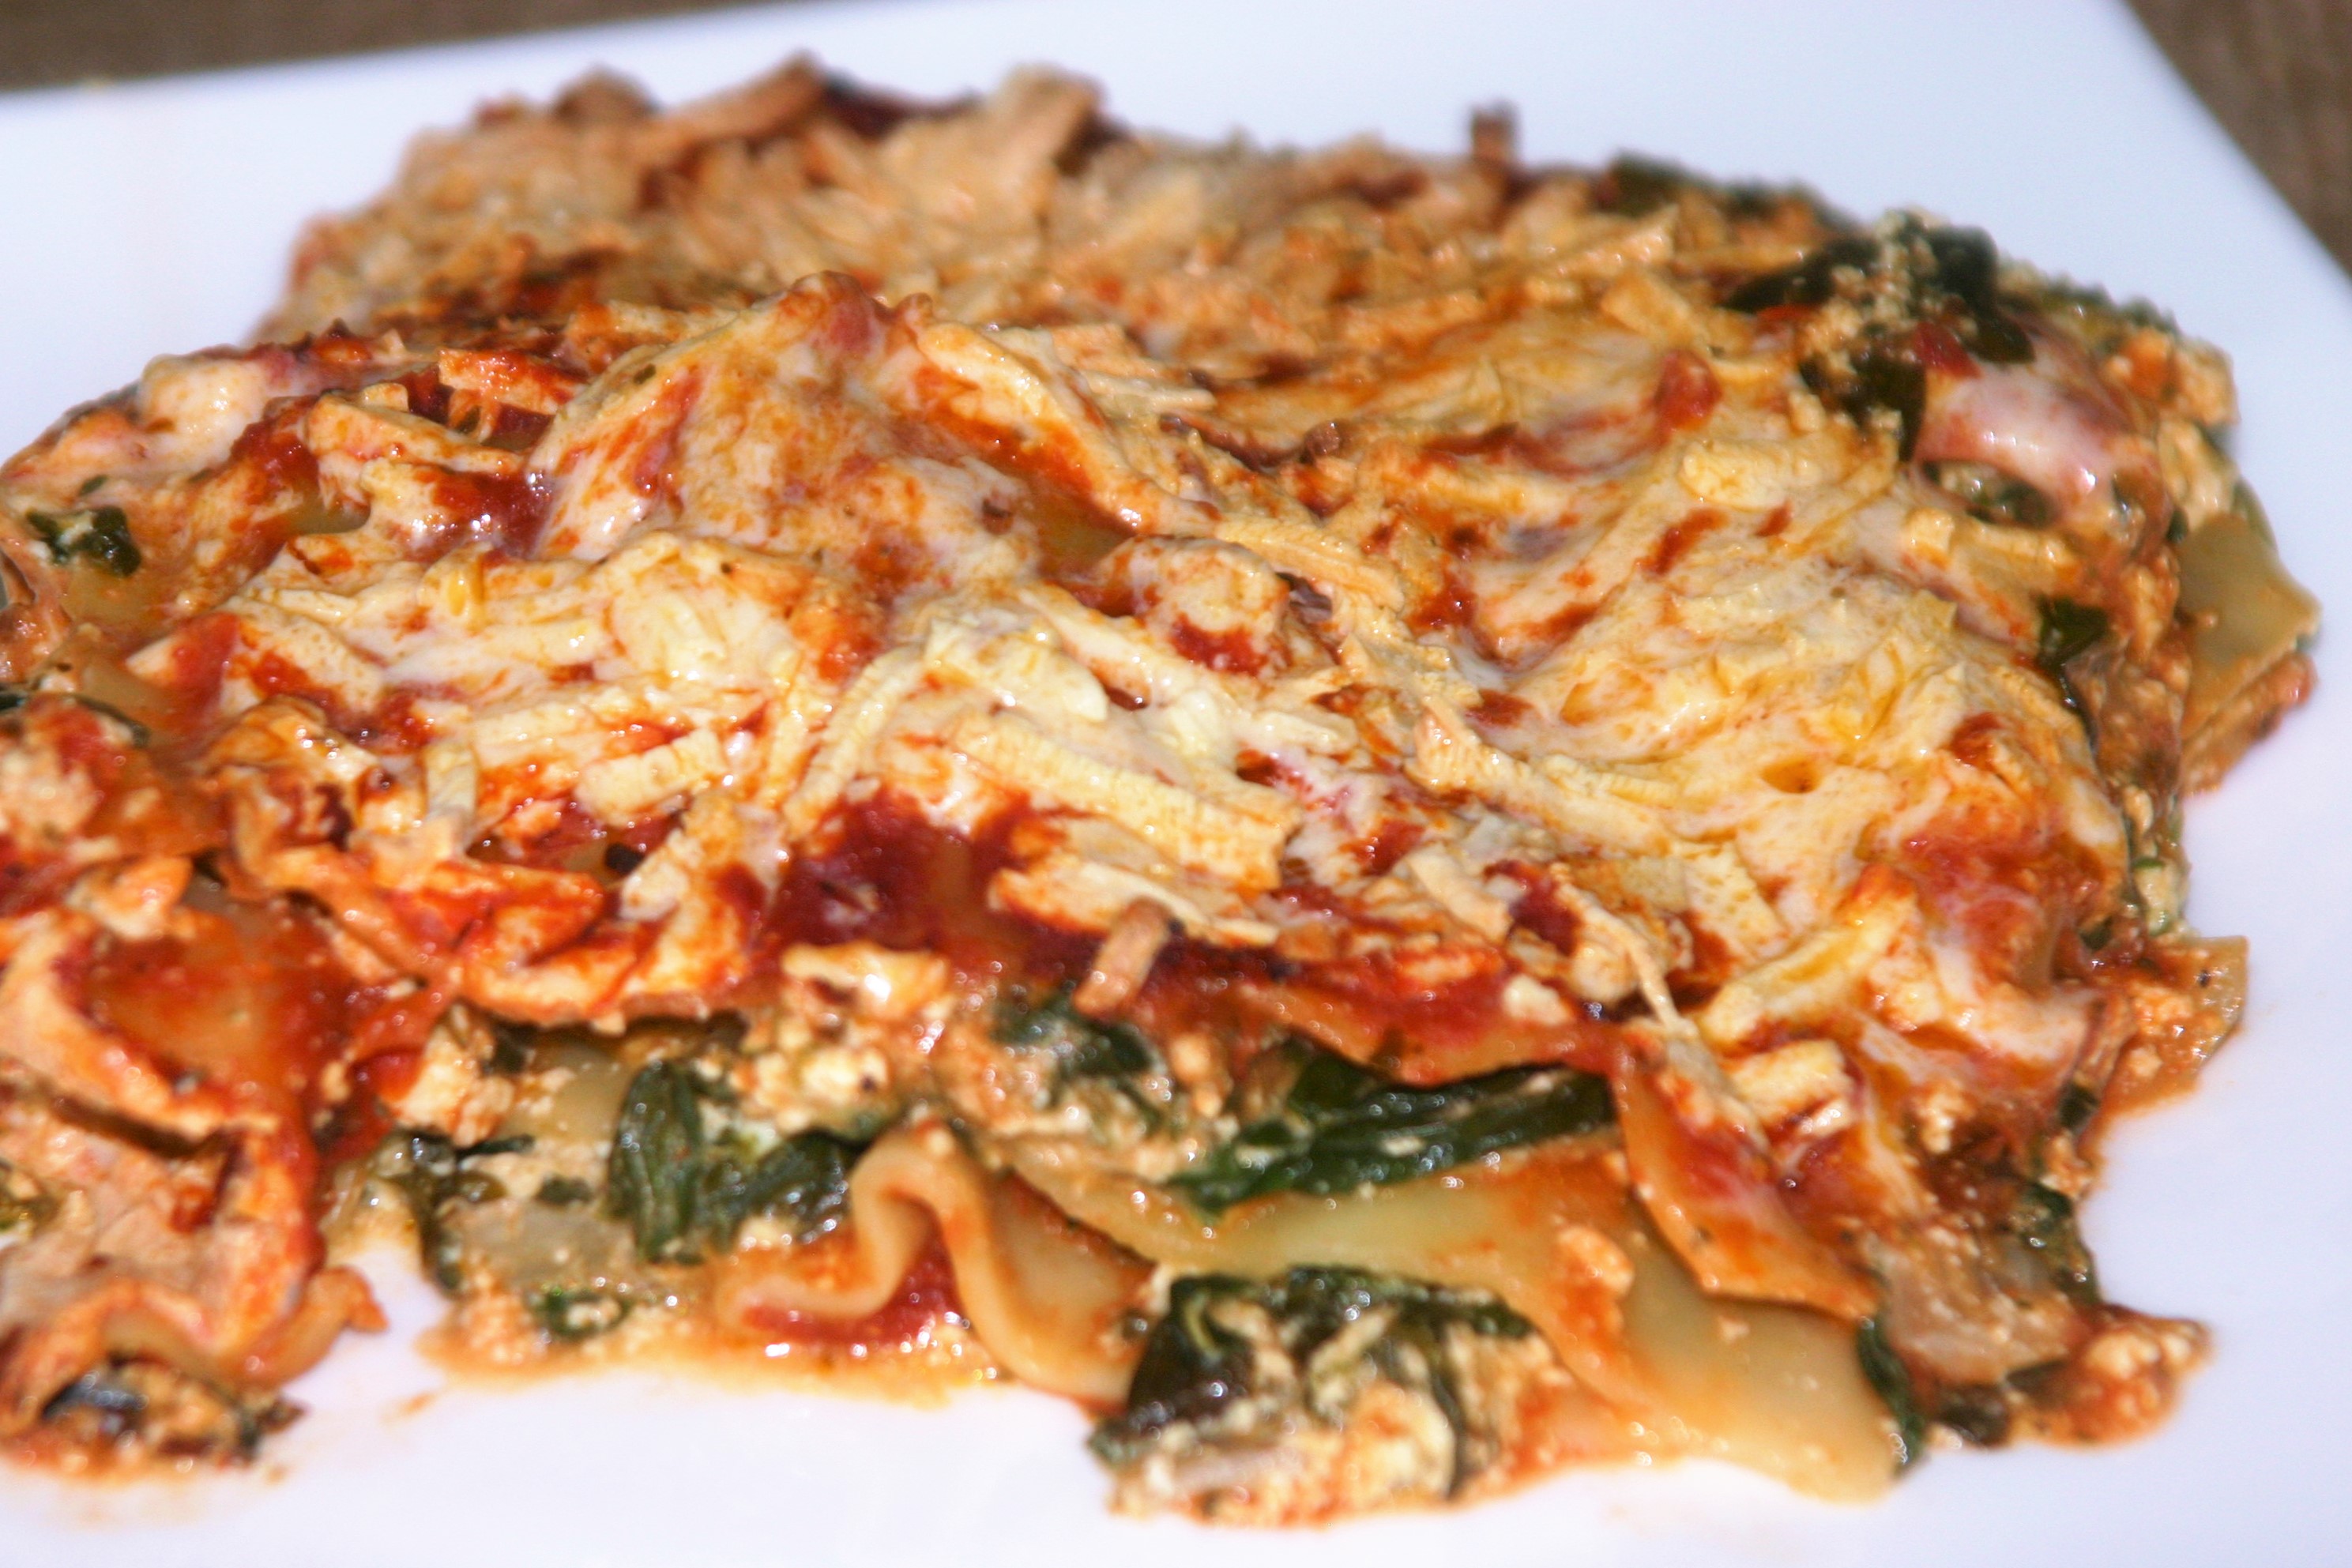
My birthday is next week and I’m already starting to prepare. I tend to celebrate my birthday all week long by pampering myself as much as possible. I feel like birthdays are a good time to take care of yourself and indulge a little. As you know, food is my favorite indulgence. One of my all-time favorite comfort foods is lasagna. I have published a recipe before, but I have updated and simplified it. Use this one, it’s delicious. Hot, saucy, cheesy, and even filled with vegetables. Preferably served with garlic bread and salad.
We all have an idea of what the perfect lasagna tastes like, and according to my research, the lasagna we prefer is directly related to the lasagna our mothers made growing up. My mother made one filled with tofu and veggies. I know this may not be how yours was, but trust me it’s amazing. I did have to take out some cheese to make it vegan, but it is still amazing. You can of course change or reduce the vegetables to make this recipe fit your perfect lasagna.
Vegan Lasagna
Ingredients
2 TBL Olive Oil
1 large onion, diced
8 oz mushrooms, sliced
One med zucchini, diced
10 oz frozen, chopped spinach
Tofu Mixture
1lb Firm Tofu, drained
8 oz Vegan Cream Cheese
3 TBL Italian Seasoning
½ tsp garlic powder
Salt and pepper to taste
¼ C. Nutritional yeast
2 26 oz Jars Spaghetti Sauce
1 box lasagna noodles (or make your own)
1-2 cups vegan mozzarella cheese (optional)
Instructions
Heat oil in skillet, add onion and mushrooms, sauté for about 3 minutes until they start to soften.
Add Zucchini and sauté one more minute.
Add spinach and cook until the water is absorbed, then remove from heat.
In a large bowl crumble the tofu, then add the Italian seasoning, garlic powder, salt, pepper and Nutritional yeast. Mix well.
Add Cream cheese and sautéed veggies and mix well.
In a 9×13 pan pour ½ a jar of sauce. Lay uncooked noodles in pan to cover the bottom.
Pour the rest of the jar of sauce on noodles.
Layer with 1/3 of the tofu and veggie mixture.
Place more noodles on top of this.
Pour on another ½ jar of sauce and spread around.
Layer with ½ the remaining tofu and veggie mixture.
Add another layer of noodles, sauce and tofu and veggies.
Finish with a layer of vegan mozzarella if using.
Cover with aluminum foil and bake 30 minutes.
Remove the foil and cook 20-30 minutes more until the noodles are soft.