Gluten Free Pumpkin Spiced Muffins – Paleo, grain free, dairy free

Gluten Free Pumpkin Spiced Muffins - Paleo, grain free, dairy free
Gluten Free Pumpkin Spiced Muffins – Paleo, grain free, dairy free

I’m so sorry I have skipped a few weeks lately. Things have been crazy around here. We are getting ready to move across the country, from the Boston area to the Seattle area.  With two kids under the age of 3. I’m very excited, but, as I said, it’s been a bit crazy. Please forgive me if this are a bit slow in the next few weeks, but I hope to back up to speed for the holidays. I hope.

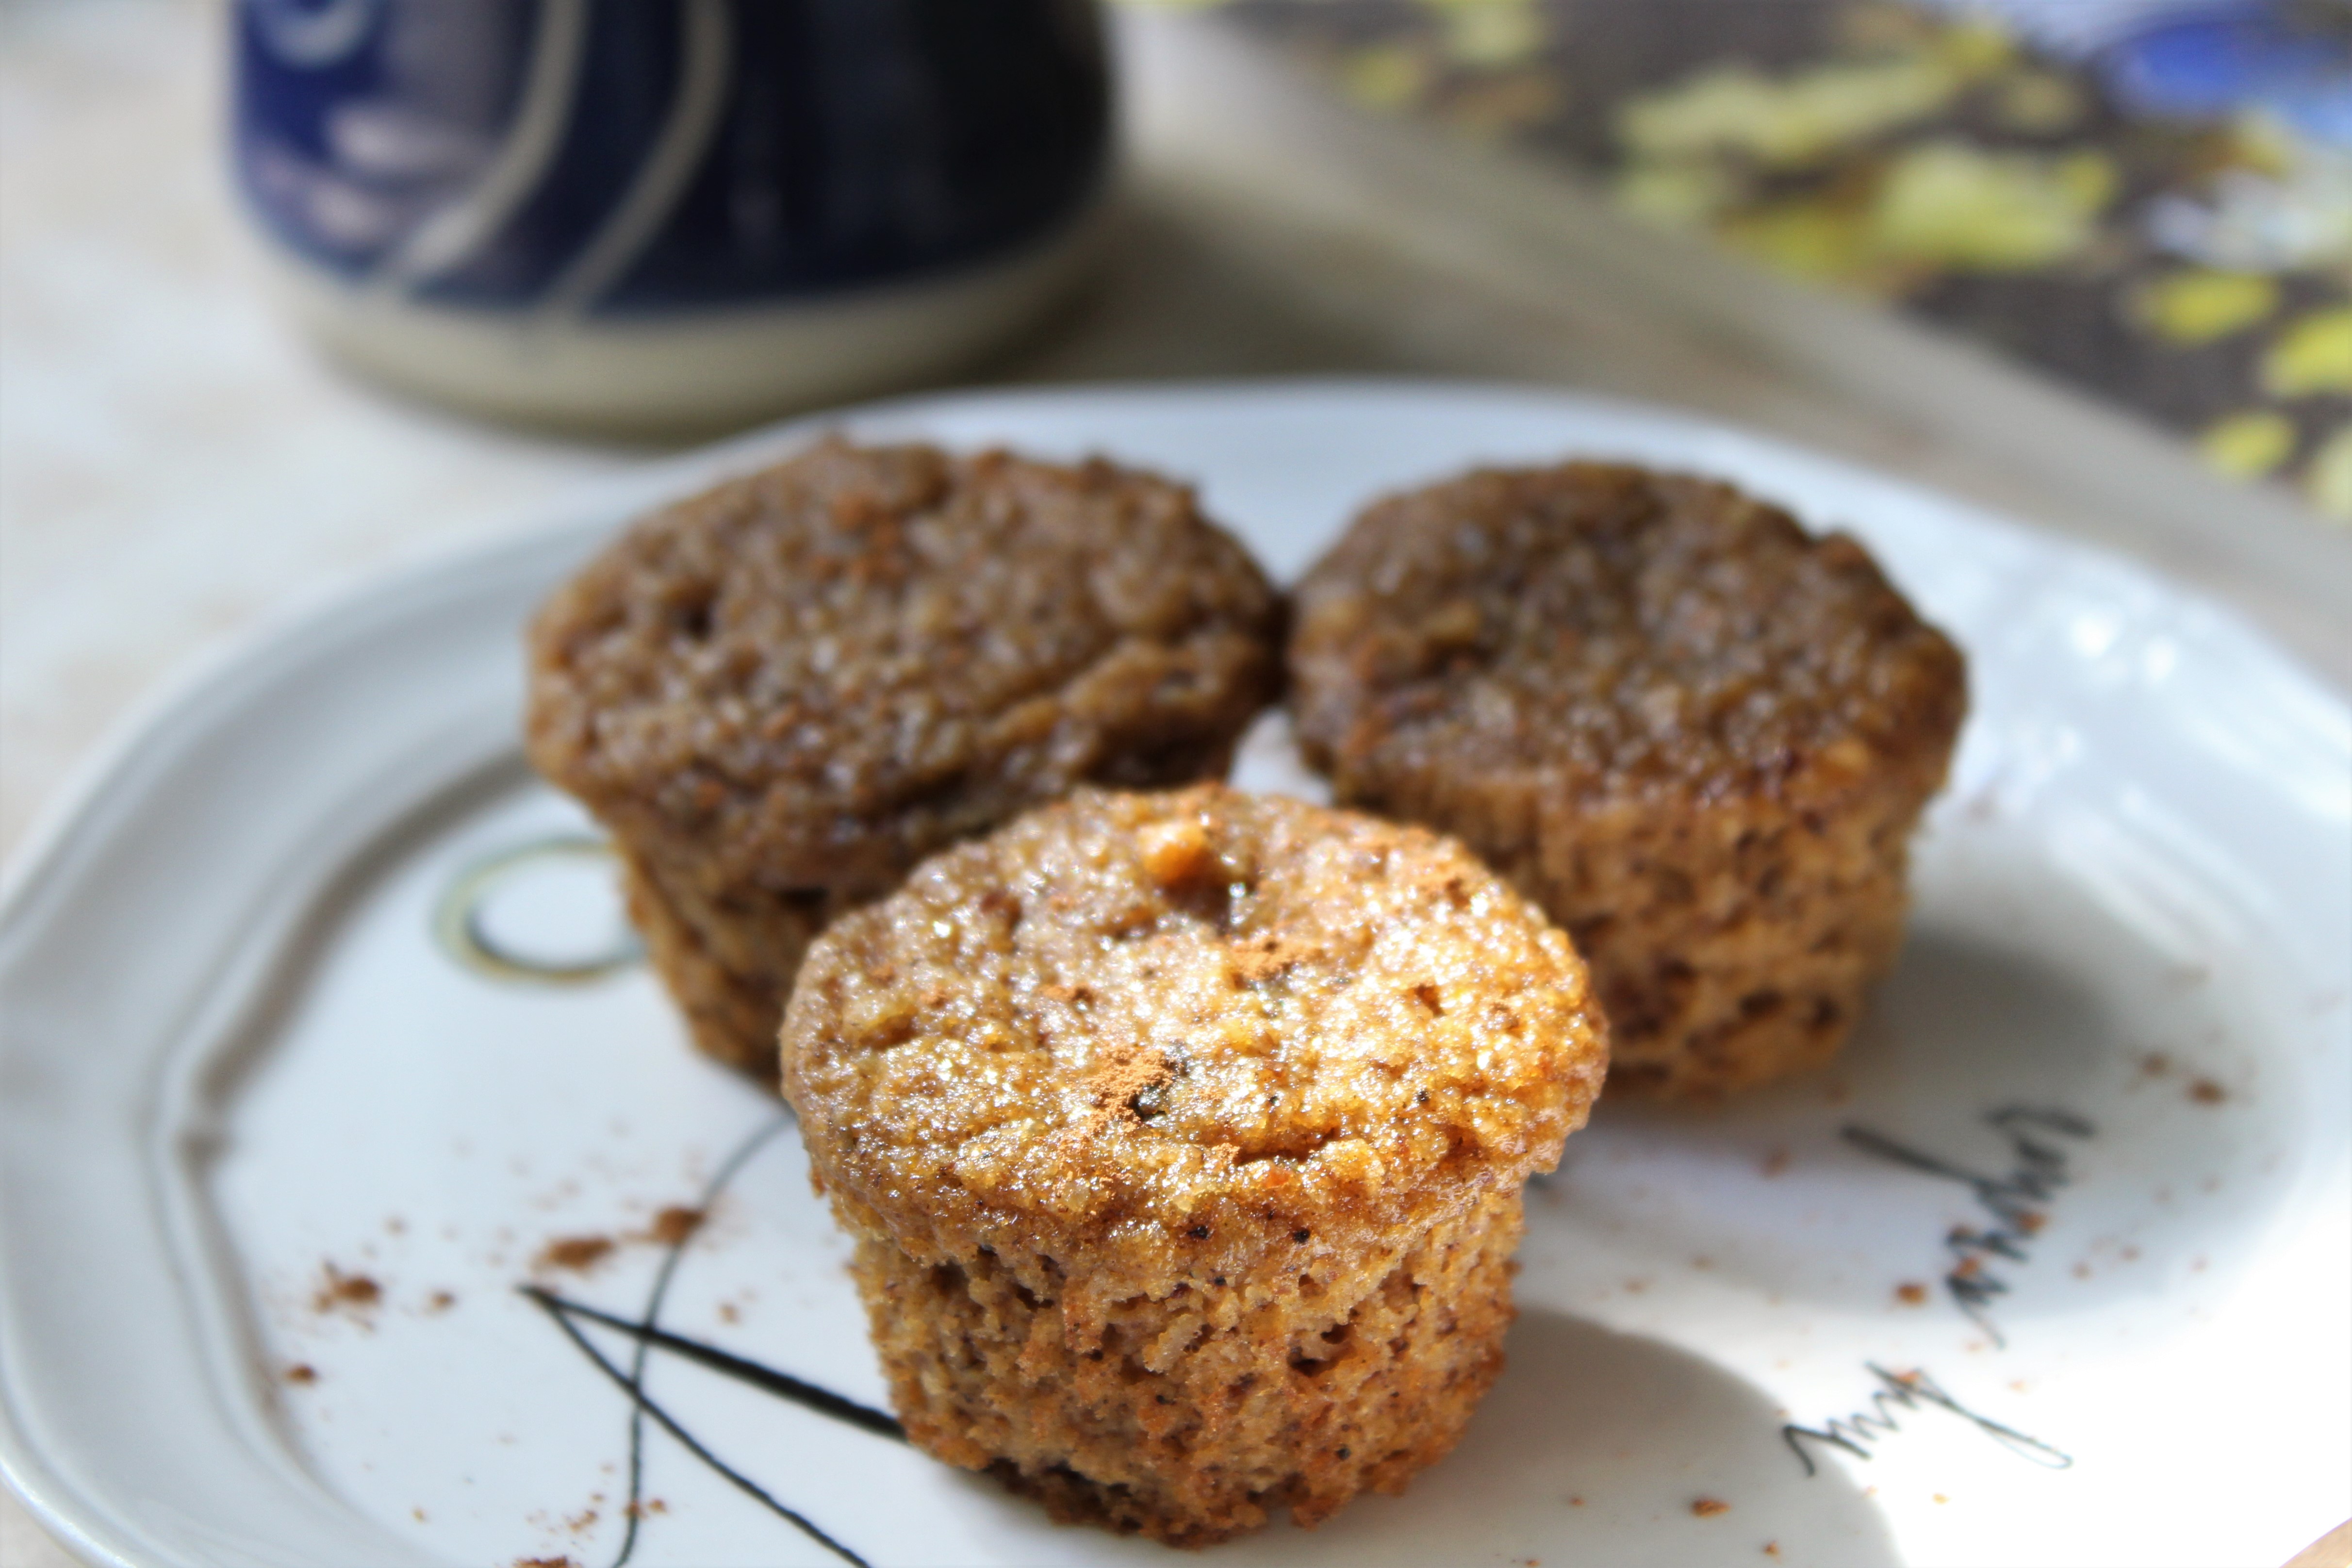
These delightful little nuggets of joy were a fun find from The Texanerian. I changed a few things but that was my inspiration.  These are perfect for fall and a wonderful, fairly healthy, way to start Halloween. full of actual pumpkin and lots of meat free sources of protein these guys will fill you up. My older daughter ate them one after another until I had to cut her off! Also a hit with the neighborhood kids, and adults. Yummy!

 Ingredients

  • 1/2 cup (66 grams) coconut flour
  • 3/4 cup (75 grams) almond flour
  • 1 1/4 teaspoons baking soda
  • 2 tsp ground cinnamon
  • 1 tsp ground cloves
  • 1/2 tsp ground nutmeg
  • 1/4 teaspoon salt
  • 4 large eggs, room temperature
  • 7 tablespoons (98 grams) coconut oil, melted
  • 1/2 cup (120 milliliters) maple syrup
  • 1/2 cup (120 grams) canned pumpkin puree (not pumpkin pie filling)
  • 2 teaspoons vanilla extract

Instructions

  1. Preheat the oven to 350 °F. Line a mini muffin pan with 24 muffin liners or oil pan.
  2. In a large bowl, mix together the coconut flour, almond flour, baking soda, cinnamon, cloves, nutmeg, and salt.
  3. In a separate medium bowl, mix together the eggs, coconut oil, maple syrup, pumpkin, and vanilla.
  4. Add the wet ingredients to the dry mxture and stir just until combined.
  5. Pour the batter evenly into the muffin liners, filling each liner until almost completely full. You’ll likely have enough batter for another six. I scooped them into a big muffin pan so I could cook them at the same time and they were flat but perfectly yummy.
  6. Bake for 11-13 minutes or until a toothpick inserted in the middle comes out clean. Turn out onto a wire rack to cool completely.
  7. These need to rest for at least an hour before serving, both because of taste and texture.
  8. Store in an airtight container in the refrigerator. Best in the first 2 days.
Advertisement

Pumpkin Spice French Toast

Pumpkin Spiced French Toast

It still feels like summer here on the East Coast, but fall is fast approaching. Fall is my favorite! I can’t wait for the cooler days and the leaves to change color, to be able to wear jeans without sweating to death, and sweatshirts. Who doesn’t love a cozy sweatshirt? There have been a few hints of fall this week with a couple of leaves falling and the nights becoming slightly cooler. It has gotten me in the mood. I make pumpkin muffins at the beginning of the week, and here we are making pumpkin spiced french toast. No, I do not drink Pumpkin Spiced Lattes, that’s yucky, too sweet, but I love the real stuff. Also, pumpkin is a vegetable, and, to be honest, I used butternut squash puree today so it’s another sneaky way for me to put veggies in everything. Toddler approved!

Top this fragrant french toast with maple syrup, coconut whipped cream, cinnamon roll topping, or anything else your heart desires.

 Ingredients

  • 2 happy eggs
  • 1/2 cup pumpkin puree or butternut squash puree
  • 1 tsp pure vanilla extract
  • 1/2 tsp ground cinnamon
  • 1/8 tsp ground cloves
  • few dashes nutmeg
  • 6 slices whole grain bread (I used a flourless sprouted bread)
  • Coconut oil for cooking

Instructions

  1. Whisk the eggs until uniformly yellow.
  2. Add pumpkin, vanilla, cinnamon, cloves, and nutmeg whisking to combine.
  3. Dip bread into batter one slice at a time, and allow to rest while your pan pre-heats. This lets the batter soak into the bread a bit which makes for a better texture.
  4. Heat a large skillet over medium heat.
  5. Once the pan is hot add oil and swirl to coat the bottom of the pan.
  6. Add bread in a single layer leaving room between the slices. I have to cook this in 2 batches.
  7. Cook on the first side until golden brown, 2-3 minutes, flip and cook until the second side is also golden brown, a few more minutes.
  8. Serve hot with topping of choice.

Sweet Potato Pancakes- toddler friendly

sweet potato pancakes

My little lovelies enjoy their pancakes. Traditional pancakes are not a nutritional powerhouse, but we can fix that! These are made with whole grains, add protein with the eggs, some vegetables, and pack in the flavor. All that, and they’re still light and fluffy! I can’t wait until my girls are old enough to be shocked by the fact that most pancakes don’t have vegetables in them (insert evil laugh here). I mix it up with the vegetables, but sweet potato, pumpkin puree, or spinach are the favorites in our house. This week will focus on the beautiful sweet potato.

For my girls I serve them plain, no butter or syrup, and then pack them to go. These also freeze extremely well and will thaw on the go if you like to do big batch cooking.

 Ingredients

  • 1 small very ripe banana or an additional 1/2 cup puree of choice, they just won’t be quite as sweet
  • 1 cup sweet potato puree, or pumpkin puree
  • 2 eggs
  • 1 tsp pure vanilla extract
  • 1 1/4 cups spelt or whole wheat flour
  • 1/4 cup all purpose flour or more whole grain flour
  • 2 tsp baking powder
  • 1/4 tsp baking soda
  • 1/4 tsp salt
  • 1/2 tsp ground cinnamon (optional)
  • 3/4 cup milk, kiefer, water, or a mixture of these – nondairy is fine

Instructions

  1. Mash banana in a medium bowl with the sweet potato puree.
  2. Add eggs and vanilla whisking to combine.
  3. Add flour, baking powder, baking soda, salt,spices, and milk and stir together. If mixture needs more liquid add it to your desired consistency. Thicker batter makes thicker pancakes, thinner batter makes thinner pancakes.
  4. Heat a large skillet, I use my biggest cast iron pan, over medium heat.
  5. Once pan is hot add a small amount of oil to prevent pancakes from sticking.
  6. Pour batter into the pan making sure to leave enough room between the pancakes to flip them!
  7. Cook on first side until bubbles that form on pancakes burst and edges start to dry out.
  8. Flip and cook until golden brown on second side.
  9. Serve hot.

Vegan Date Caramel Carmelita Bars

Vegan Date Caramel Carmelitas

I’m from the Midwest, you know, land of “hot dish” (casserole), and cookie bars. Yet, somehow I never had carmelitas until my sister-in-law made them when visiting over a year ago. I have only had them that one time, yet they stuck in my brain. This very comforting combination of caramel, chocolate, and almost and oatmeal cookie crust. I attempted one other time to make them vegan and failed miserably. I didn’t try again until recently, after I had found date caramel . This version of carmelitas are vegan, and much lower sugar than your average bar. They are still sweet, very sweet. In fact they are perfect for breakfast dessert with a cup of coffee. mmm, or mid-afternoon snack with a cup of coffee, Be right back…

 Ingredients

For the Oat Base and Crumble

  • 3/4 cup butter or margarine, melted (I used Earth Balance)
  • 1/2 cup packed coconut sugar (or brown sugar if that’s what you have)
  • 1 tablespoon vanilla extract
  • 1 cup all-purpose flour
  • 1 cup whole-rolled old fashioned oats (not instant or quick cook)
  • 1 teaspoon baking soda

For the Date Caramel

  • 8 oz pitted medjool dates (about 2 cups)
  • 1/4 cup coconut milk
  • 1/4 cup water that the dates were soaking in
  • 1 TBL bourbon (or more date water)
  • 1 tsp pure vanilla extract
  • pinch of salt
  • 3/4 cup semi-sweet chocolate chips or chunks (vegan if that’s your jam)

Instructions

  1. Preheat oven to 350F. Grease an 8×8-inch pan and set aside.
  2. Cover dates with boiling water in a heat proof bowl or measuring cup and set aside for 10 minutes.
  3. Combine the melted “butter”, coconut sugar, and vanilla whisking until smooth.
  4. Add the flour, oats, baking soda, and stir until combined.
  5. Add roughly half of the mixture to the prepared pan and smooth it to form an even layer.
  6. Bake for 10 minutes. While it bakes make the date caramel.
  7. 7.Combine the soaked dates, coconut milk, soaking water, vanilla, and salt in a food processor and blend until smooth. This will take a few minutes and you will have to stop and scrape the sides a few times.
  8. After the oat base has cooked for 10 minutes remove it from the oven and dollop the date caramel over the base. Smooth with a spoon or spatula to form one even layer. This is delicate work.
  9. Sprinkle the chocolate chips over the date caramel in an even layer.
  10. Evenly crumble reserved oatmeal-sugar mixture over the top.
  11. Return pan to oven and bake for about 15 to 18 minutes, or until edges are lightly browned and center appears to be set.
  12. Allow bars to cool for a few hours in the pan before slicing and serving.
  13. These are best stored in the refrigerator and are delightful cold or at room temperature.

Vegetarian Crustless Quiche

 Ingredients

  • 2 TBL olive oil
  • 1 large yellow or white onion, sliced
  • 1 teaspoon salt, plus more to taste
  • 1/2 teaspoon pepper, plus more to taste
  • A few tablespoons chopped fresh herbs, or a few teaspoons dried herbs
  • 3 to 4 cups chopped vegetables (I used Kale, Mushrooms, and zucchini)
  • 6 large eggs
  • 1 1/2 cups milk (I used unsweetened plain almond milk)
  • 1 cup grated cheese (I used goat guda)

Instructions

  1. Preheat the oven to 400°F.
  2. Heat a cast iron skillet over medium heat.
  3. Add the olive oil and swirl to coat the bottom and sides of the skillet.
  4. Add the onion slices and sprinkle a bit of salt and pepper over them. Cook the onions until they are golden-brown and starting to caramelize, about 10 minutes.
  5. Add the other vegetables and cook until liquid has been released and evaporated, 5 more minutes or so.
  6. Remove the pan from the heat and spread the vegetables evenly across the bottom of the skillet.
  7. In a bowl whisk the eggs and milk together until everything is uniformly yellow.
  8. Add remaining salt, pepper, and any herbs you are using and whisk to combine.
  9. Pour the egg mixture over the vegetable.
  10. Sprinkle with grated cheese in an even layer over the top.
  11. Transfer the quiche to the oven and bake for 45 minutes to 1 hour. Once the surface is lightly brown all the way across and it is firm in the middle, it’s fully cooked.
  12. Let the quiche cool for about 20 minutes, then slice into wedges.

Happy Mother’s Day 2017 Vegan Brunch Ideas

Vegan Benedict With Hollandaise

Tomorrow is Mother’s Day. there are so many ways to celebrate, but as you would imagine, my favorite way is with food. I’m traveling this weekends so I won’t be cooking, but I hope you are! I was lucky enough to celebrate Mother’s Day with my mom and 2/3 of my brothers a few weeks ago when I was visiting “home.” My brothers and I took my mom out without any of our spouses or children. It was a delightfully relaxed meal:)

If you are cooking a Mother’s Day Brunch I have a few suggestions for you, all that I would be more than happy to receive if someone were cooking for me.

I would do something savory:

Vegan Benedict With Hollandaise

Vegan Avocado “Eggs” Benedict

Vegan Breakfast Potatoes 

Vegetarian Quiche

Vegan Scrambled Tofu 

Something Sweet

Aquafaba chocolate french toast with bourbon date caramel

Vegan Chocolate Aquafaba French Toast

Vegan Pancakes of any kind

Vegan Chocolate Chip Zucchini Scones

Vegetarian Almond French Toast

Vegan Cinnamon Rolls

And don’t forget the:

Coconut Whipped Cream

Date Caramel and Coconut Whipped Cream for topping just about anything


If you’re looking for something else check out my baked goods and breakfast categories.

Aquafaba Chocolate French Toast with Bourbon Date Caramel

Aquafaba chocolate french toast with bourbon date caramel

I know I just posted yesterday, but this is worth it, I promise. A dark chocolate vegan french toast, topped with buttery bourbon date caramel and crunchy, salted pecans. Oh man, yes you want this. All components are surprisingly easy to make, you know, if you wanted to make someone special a Sunday brunch next weekend…

 Ingredients

  • 1/2 cup aquafaba (straight from the can)
  • 1/4 cup nondairy milk
  • 1 tsp pure vanilla extract
  • 1 tsp pure maple syrup
  • 2 TBL cocoa powder
  • 4 slices bread of choice, I recommend something on the rustic side
  • Coconut oil for cooking -or other oil

Instructions

  1. Whisk together the aquafaba, milk, maple syrup, and vanilla in a large shallow bowl until frothy.
  2. Add the cocoa powder and whisk until combined.
  3. Heat a large skillet over medium low heat. I use my cast iron, other’s have recommended a non-stick skillet if you don’t have cast iron.
  4. Dip bread into the aquafaba mixture and let it sit for about 30 seconds to soak up some deliciousness.
  5. Add oil and swirl to coat the bottom of the pan.
  6. Transfer bread to the hot pan (I can cook two pieces at a time in my pan), and cook until the first side is firm and starting to brown, about 3-5 minutes. Flip and cook on the second side until it is also starting to brown and has firmed up.
  7. Serve with bourbon date caramel and chopped pecans.

 Ingredients

  • 1/2 cup prepared date caramel
  • 2 TBL vegan butter ( I use Earth Balance)
  • 1/4 cup coconut milk (full fat from a can)
  • 1 TBL bourbon
  • 1/2 tsp pure vanilla extract

Instructions

  1. Heat ingredients together in a small pan over low heat stirring frequently.

Vegan Date Caramel -Perfect for Mother’s Day

sweet potato pancake with date caramel and coconut whipped cream

This perfect delightful, refined sugar free, vegan, paleo, and gluten free. This date caramel would be described as; rich, decadent, sweet, satisfying, and is made from very simple ingredients and comes together in a flash. I have been working on a few ways to use it, but highly recommend this as a start to your favorite dish featuring caramel. Pictured here it is served over sweet potato pancakes with coconut whipped cream. A dish to impress.

For my sweet potato pancakes I used this recipe, but substituted sweet potato puree for the pumpkin, and took out the spices. Your favorite pancakes would also be perfect here, or use this recipe for an guide to find your perfect pancake.

 Ingredients

  • 8oz (about 2 cups) dates pitted and halved
  • Boiling water to cover dates
  • 2 TBL coconut milk (full fat from a can)
  • 2-4 TBL hot water depending on how fresh and juicy your dates are
  • 1 tsp pure vanilla extract
  • pinch of salt

Instructions

  1. Pour boiling water over dates, just enough to cover them. Let them sit for 10 minutes or so until soft.
  2. Drain dates and reserve the water.
  3. Place drained dates, coconut milk, 2 TBL of the hot water, vanilla, and salt in a food processor or blender.
  4. Puree until smooth adding hot water a tablespoon at a time until it reaches the consistency you desire.
  5. Pour over just about anything for a delicious treat.

Chocolate Peanut Butter Nice Cream (vegan, gluten free)

Chocolate Peanut Butter Vegan Ice Cream Nice Cream
Chocolate Peanut Butter Vegan Ice Cream

In the mood for a rich and decadent ice cream, but feel like you should be avoiding dairy, sugar, and really trying to eat better overall? Or, perhaps need a quick dessert for Easter? Well, here you are my friends. A delightful, quick, easy, sugar free, healthy treat that is surprisingly close to ice cream in taste and mouthfeel. It is heavy on the banana flavor, but the chocolate and peanut butter do a lovely job of complementing it and bringing out flavors one would expect.

This is nice cream is basically a smoothie and something I have considered eating for breakfast, maybe stirring it into my oatmeal. So many options for a treat made from real ingredients with no added sugar.

 Ingredients

  • 1 1/2 frozen bananas cut into 1″ chunks (about 2 cups)
  • 6 TBL full fat canned coconut milk
  • 1 tsp pure vanilla extract
  • pinch of salt
  • 3 TBL cocoa powder
  • 3 TBL crunchy peanut butter

Instructions

  1. Puree banana, coconut milk, vanilla, salt, and cocoa powder until smooth in a food processor or blender.
  2. Add peanut butter and pulse a few times to combine.
  3. Eat immediately, or store in the freezer for later. If storing in the freezer allow nice cream to thaw at room temperature a few minutes before serving.

Almond French Toast

Almond French Toast
Almond French Toast

French toast is a lovely, quick breakfast. It is one of my go to breakfasts for my toddler. By using a sprouted grain bread and add a few things I am increasing the nutritional value and converting a quick diner breakfast into a healthy start to you day.  I have a few versions, one with pumpkin to continue on my quest for veggies in everything, and this one that just adds a bit more protein and nutrients from the almonds. This french toast is filled with almond goodness and bursting in with flavor. I love to top it with plain yogurt, bananas, and a light drizzle of maple syrup.

 Ingredients

  • 2 happy eggs
  • 1 TBL milk or nondairy milk
  • 1/3 cup almond meal
  • 1 tsp pure vanilla extract
  • 1/2 tsp pure almond extract
  • 3 slices sprouted grain bread
  • Coconut oil for cooking

Instructions

  1. Whisk the eggs in a small bowl until uniformly yellow in color.
  2. Add milk, almond meal, vanilla, and almond and whisk to combine.
  3. Heat a large skillet over medium high heat, when hot melt a little coconut oil in the bottom, just enough to coat the pan you are using.
  4. Dip the bread in the egg mixture one slice at a time making sure each slice is completely coated with egg mixture on all sides.
  5. Place egg coated bread in the hot skillet and cook until golden brown on the first side, about 2-3 minutes. Flip and continue to cook until the second side is also golden brown. 2-3 minute more.
  6. Serve hot with your choice of toppings.