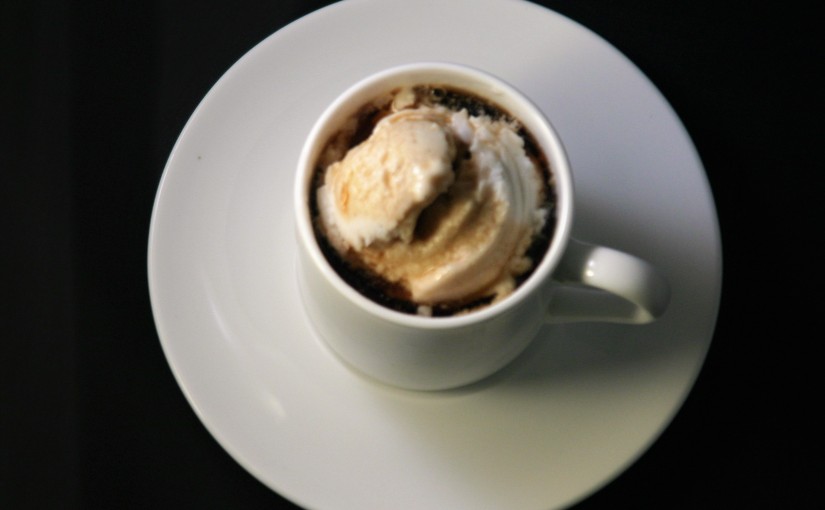
Valentine’s day is just around the corner, and I’m sure you are planning for a lovely evening. I hope you get to stay home snuggled with your special someone, be that your dog or a human partner. To celebrate I am bringing you a super simple treat to finish the evening (or get it started…) Afffogato, which is traditionally espresso over ice cream. Here it is the delightful cold brew whiskey coffee from last week over vegan ice cream. If you are able, you should make your own. I recommend a simple vanilla flavor, but please be adventurous. If making ice cream is out of the picture, then store bought is fine. I love Luna and Larry’s coconut bliss as a second best to my own. And, well, let’s say you are reading this 2 hours before your date arrives. No stress, just go buy some espresso, mix it with a little whiskey, pour it gracefully over ice cream, and you are in business. No one will know you had grand plans to truly impress, but got caught by a snowstorm and had to make do.
In celebration of my birthday, which is today, I am sharing this delightful little idea. It came from a fun restaurant near us in Somerville, MA: The Kirkland Tap and Trotter. They have an affogato there with vanilla ice cream and whiskey coffee. Our server explained to use they used whiskey as the liquid in which to cold brew coffee. Mind blown! It was absolutely amazing and I had to try it at home. So simple, so amazing. Make sure to get good coffee beans and grind them at home if you have that ability. They should be very coarsely ground, even more coarse that a regular french press coffee grind. Make and serve responsibly giving a toast to my birthday.
Cold Brew Whiskey Coffee
Ingredients
62 grams, or about 1 1/4 cups coarsely ground coffee beans
2 cups whiskey, I used Jameson with great results
2 cups cold water
Instructions
Combine ingredients in a French press , or any type of container if you don’t have a French press, and stir well.
Set aside in a cool dark place overnight, at least 12, should be closer to 24 hours if you have the time.
Stir occasionally, like every 6-8 hours. When you think of it.
Press, or strain coffee from liquid and discard the coffee grounds.
Store your precious liquid in covered container in the refrigerator.
It will keep for a very long time, but you may not be able to resist it.
Labor Day is here and that means it is your last chance for summer pies! This delightful blueberry pie is the one to finish your summer with. Sorry for the terrible picture; it really does taste much better than it looks this time around! I personally feel this pie is perfect for dessert, and also for breakfast. Since it is full of fresh fruit and has some whole wheat flour in the crust I think you could even say it is a healthy breakfast…
This Blueberry Pie is the one of dreams. I have never had another like it, though it is not originally my recipe. It is from Beans and Barley, a restaurant in Milwaukee, WI. Once I started making this blueberry pie I have never wanted one with cooked blueberries again. The fresh, juicy, blueberries burst with flavor, and the light flaky crust brings the perfect balance. If you are feeling decadent you could top this with a little coconut whipped cream. If you are headed to a pot luck, this pie is the perfect addition and will be the hit of the party!
If you need tips on making a homemade crust you could watch this video of my mom making her famous crust.
Fresh Blueberry Pie
Originally from Beans and Barley
Ingredients
For the Crust
¾ C. unbleached flour
¼ c. whole-wheat flour
¾ tsp. salt (divided)
6 TBL solid vegetable shortening
6TBL. Plus ¼ C. cold water (divided)
For the Pie
¼ c. cornstarch
¾ c. boiling water
1 c. sugar
2 pints fresh blueberries (about 6 cups)
1 1/2 TBL. Lemon juice
1 TBL margarine
Instructions
To make crust: preheat oven to 350.
In bowl, combine flours and ½ tsp salt.
Cut shortening into mixture until it resembles coarse meal.
Add 4 TBL cold water while stiffing with a fork, and mix lightly to form a ball.
Let dough rest at least 5 minutes at room temperature, then roll out to fit a 9-inch pan.
Slip into pan, trimming as needed and crimping edges.
Fill crust with dry beans, rice or pie weights and back 30 minutes or until light brown.
Remove from oven and cool.
To make filling:
Mix cornstarch thoroughly with remaining ¼ cold water.
Add boiling water, stirring until smooth.
Place in a 1-quart saucepan over medium heat.
Add sugar, remaining ¼ tsp. salt and ½ cup of the blueberries, stirring constantly and crushing berries against sides of pan as liquid comes toa low boil, thickens and clears, about 10 minutes.
Reduce heat and cook 3-4 minutes.
Add lemon juice and margarine and mix gently.
Remove mixture from heat, add remaining berries, mix gently and pour into prepared shell. Refrigerate pit at least 2 hours before serving.
Sorry I missed posting last week, I had my baby! I had another beautiful little girl, this one we’ll call Fox. We are just starting to settle in and figure out how this whole 4 person family thing is going to work. Wolfie is doing amazingly well with Fox. She really just wants to hold her and touch her all the time. It’s very sweet. With all the adjustments I haven’t been cooking, but I have been starving! I did make time to throw together this mug cake one night, and piled on the coconut milk ice cream for a bedtime snack. (best thing about breastfeeding is how much I can eat!)
This is a quick, easy, no frills dessert. It is best topped with some ice cream if you have it, but it will do for a lovely chocolate fix if that is your craving. Like all of my chocolate cake recipes this has less sugar than the norm. If you like it sweet add more.
Vegan Chocolate Mug Cake
Ingredients
3 TBL all purpose flour
1 TBL sugar
2 TBL cocoa powder
dash of salt
1 TBL mild flavored oil
3 TBL water or non-dairy milk
1/2 tsp pure vanilla extract
1 TBL chocolate chips (optional)
Instructions
Mix the dry ingredients in a microwave safe coffee mug with a fork.
Stir in the wet ingredients and mix until combined.
Stir in chocolate chips if using.
Microwave for 1-2 minutes until the cake is dry on top.
Eat immediately, topped with ice cream if you have it.
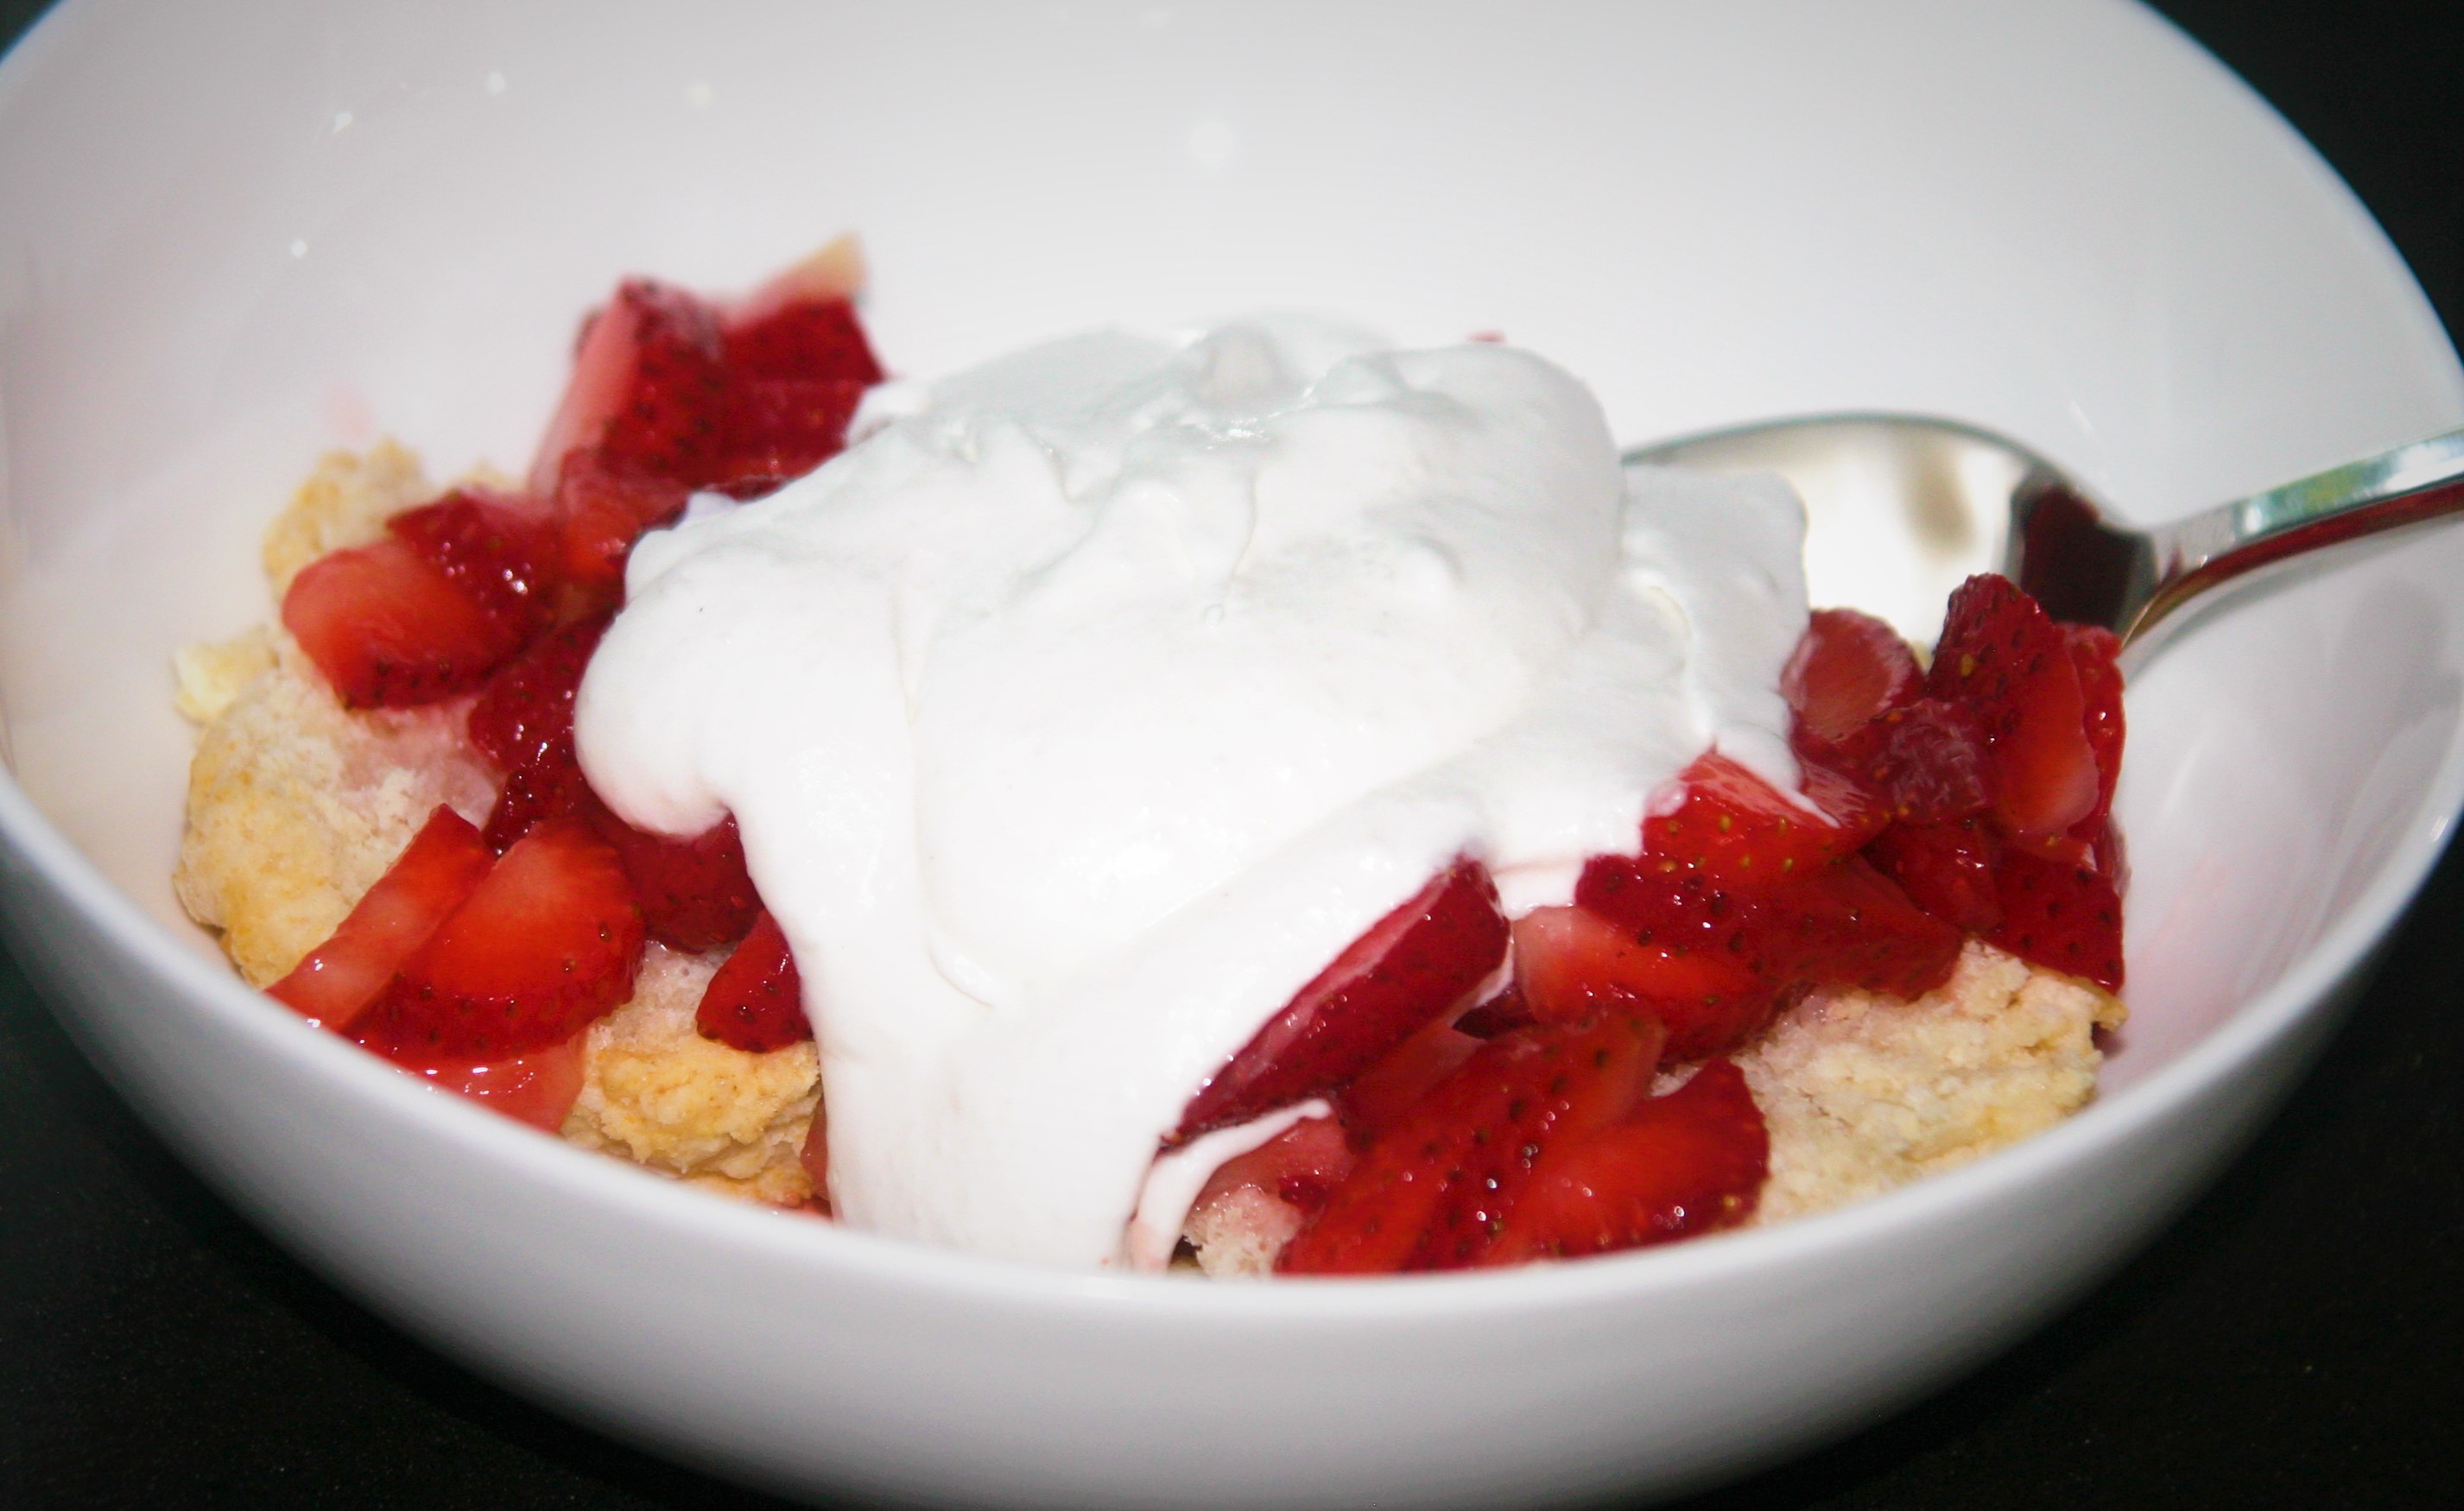
Summer has arrived, and with it my desire to eat strawberries and whipped cream as often as possible! This is a lovely vegan version of strawberry shortcake. As you know, I’m not into super sweet desserts so this does not call for a lot of sugar. If you like it sweet, just add more.
We are keeping it super simple here with a tweaked version of my drop biscuits, and coconut whipped cream. It is best to make the strawberries a few hours ahead of time so the sugar dissolves and they become nice and juicy. The coconut whipped cream can be made a day or so in advance, as can the shortcake if you are planning these for a busy day.
Vegan Strawberry Shortcake
Makes 4 large servings
Ingredients
Strawberries
3 cups sliced fresh strawberries (about 1 lb)
2-4 TBL granulated sugar (depending on how sweet strawberries are, and how sweet you like it)
Vegan Chocolate Aquafaba Brownies with Cheesecake Swirl
I saw this lovely recipe on the Aquafaba facebook page and had to try it out. Of course, I couldn’t leave well enough along and had to change things up just a bit. The brownie recipe is from Fried Dandelions ( I just reduced the sugar and added more chocolate) and the inspiration and cheesecake recipe is from Vegan Lass (I added a bit more flavor from extracts). I arranged my fruit into a flag just for Memorial Day. This part is optional, eating these brownies is not. I can’t even describe how amazingly fudgy these are. The cheesecake and fruit is just enough to balance the chocolate so you want to keep eating them. I especially recommend them at room temperature as that is when the fudge really stands out. Any fruit will do here as long as you like the combination of the fruit with the chocolate.
Vegan Chocolate Aquafaba Brownies with Cheesecake Swirl
Ingredients
For the Brownies
1/4 cup coconut or mild oil, plus extra for greasing the pan
1/2 cup semi sweet chocolate chips
1/3 cup brown sugar
1/4 cup maple syrup
1/4 tsp salt
1/2 cup aquafaba -liquid from a can of beans (white, garbonzo or black beans all work)
2 tsp vanilla
1/4 cup cocoa powder
3/4 c flour
For the Cheesecake Swirl
4 oz vegan cream cheese
1/4 cup unsweetened soy or almond milk
1 tsp good-quality vanilla extract
1/2 tsp bourbon
1/2 tsp almond extract
1 tbsp granulated sugar
A squeeze of fresh lemon juice (about 1/2 tsp)
1/4 cup sliced strawberries, or whole raspberries
1/4 cup blueberries
Instructions
Preheat your oven to 350 degrees. Grease an 8×6 or 8×8 inch baking pan and set aside. I used parchment paper also, but that is optional.
In a medium sauce pan over medium-low heat, melt the chocolate chips and oil together. When melted, remove from heat. Add in brown sugar, maple syrup and the salt and whisk together.
Whisk the black bean liquid in the measuring cup for about 1 minute until slightly foamy (bubble all around). Pour into the chocolate mix and whisk together. Add vanilla, cocoa powder and whisk to incorporate.
Add the flour to the chocolate mixture and mix well.
Pour the brownie batter into the prepared pan and set aside.
In a bowl beat the cream cheese until smooth with an electric mixer.
Add the milk, vanilla, almond, and bourbon, and lemon juice and beat until light and smooth.
Dot the brownie batter with spoonfuls of the cheesecake mixture.
Gently swirl the mixtures together using a knife or similar.
Distribute the fruit according to your plan, then place in the preheated oven for 35-45 minutes. The brownies should be mostly firm, with just a slight wobble in the middle when shaken.
Mother’s Day is on Sunday, yes, this Sunday. I know you want to make something special for the mother in your life, and since she is vegan it can be hard. This will be the perfect fix. Super easy to make as long as you have an electric mixer, looks fantastic, and will leave your both in the best of food comas. It can also be a mix and match to fit her taste buds allowing you to choose the toppings and extras of your choice. You will also impress her with your aquafaba chocolate mousse as aquafaba has just hit the mainstream in the last few weeks. You are on the cutting edge of vegan culinary delights!! Go you!
note: If you happen to be planning ahead the mousse is best made the night before-if not, don’t worry, make it now and it will still take perfect, it just won’t be as firm.
Mother’s Day Parfait with Aquafaba Chocolate Mousse
toppings and extras of choice: hot fudge sauce, liqueur such as amaretto, fruit such as berries, chopped nuts, candy, coarse salt, fresh mint, who knows!
Instructions
Start with a tall glass or parfait dish (does anyone actually have one of these?)
Layer as you desire starting with the cake.
If you are using liqueur drizzle a small amount (1 tsp) on each layer of cake.
Top with extras, then mousse. Your choice if you want to add some whipped cream to the layers of save it for the top.
Layer on until you reach the top of the dish and finish with a heap of whipped cream.
Today is my favorite silly holiday, Pi Day!! I mean, who doesn’t love to celebrate being a nerd and pie all at the same time? This girl can’t pass up the opportunity. Last year I celebrated with a savory vegan pot pie, this year it is one of my other favorite pies, lemon meringue! This is very much not vegan. I know you can make it vegan in all kinds of ways, but I haven’t really tried since I eat eggs these days. My husband did make me a vegan lemon meringue for my birthday a few years ago, but the meringue was a very funny texture. Now that I know about aquafaba that wouldn’t be a problem, so maybe one day I’ll experiment. For now, the real stuff! This is my mom’s recipe that was her mom’s.
This version of lemon meringue is tart, perfectly balanced with the sweet meringue, and all lovingly placed a the perfect homemade crust. If lemon meringue isn’t to your liking, or if you’re vegan, then please check out my mom’s apple pie, or this vegan french silk.
Lemon Meringue Pie
Lemon Meringue Pie
Ingredients
1 1/2 cups granulated sugar
1/3 cup + 1 TBL corn starch
1 1/2 cup water
3 eggs, separated
3 TBL butter or Earth Balance
2 tsp lemon zest
1/2 cup lemon juice
1/4 tsp cream of tarter
6 TBL granulated sugar
1/2 tsp pure vanilla extract
1 9″ Prepared and pre-baked pie crust
Instructions
Preheat oven to 400 degrees.
In a medium saucepan mix together 1 1/2 cups sugar and the corn starch.
Slowly whisk in the water and cook over medium heat until boiling stirring constantly.
Continue to cook and stir while boiling for one more minute.
Remove from heat.
Whisk egg yolks briefly in a medium bowl.
Slowly pour half hot sugar/water mixture into the egg yolks while whisking constantly.
Pour the mixed egg/sugar/water mixture slowly back into the remainder of the sugar/water in the pan whisking constantly.
Return to the burner and stir constantly over medium heat until boiling, then boil and cook one minute.
Remove from heat and stir in the butter, lemon zest, and lemon juice and pour in the pre-baked pie crust.
To make the meringue put the egg whites and cream of tarter in a large bowl and beat with an electric mixer on high until foamy.
Continue beating and add 6 TBL of sugar one TBL at a time beating between additions.
Add the vanilla extract and beat until stiff and glossy.
Pour meringue over lemon mixture in the pie crust and spread evenly to the edges sealing it to the crust.
Bake in pre-heated 400 oven until golden brown and beautiful.
Cool completely before serving.
Store in the refrigerator if you happen to have leftovers.
St.Patrick’s Day is coming up. Usually my husband and I celebrate with a silly tradition of watching “The Boondock Saints” and drinking Guinness and my vegan version of Baileys Irish Cream. It is possible that we mix these and drink them quite fast, but I’ll never confess to such debauchery. That won’t be happening this year because I’m pregnant, again. Since I hate to miss out on tradition I just had to come up with another way to celebrate, and, of course, I had to practice and share my idea with you. Simply, it is a perfectly delicious, creamy, cool, and decedent Irish Cream Ice cream. I might have tried mine over a brownie and topped with hot fudge. Don’t blame me, blame the baby.
Vegan Irish Cream Ice Cream
Ingredients
1/2 cup +1 TBL Irish whiskey
1/4 cup packed brown sugar
1 tsp pure vanilla extract
1/4 tsp almond extract
dash of salt
1 1/2 tsp brewed espresso or coffee
1 TBL chocolate chips (vegan)
1 can full fat coconut milk
Instructions
In a small saucepan heat 1/2 cup whiskey and the brown sugar over medium/low heat until simmering, stirring frequently.
Continue to simmer and stir frequently until the mixture has reduced to approximately 1/4 cup of liquid, about 10 minutes.
Remove from the heat and stir in vanilla, almond, salt, coffee, and chocolate chips stirring until the chocolate is completely melted.
Pour in the coconut milk. If it has separated in the can heat gently until just heated through, then stir until everything is uniformly combined with no chunks of floating coconut cream.
Pour the mixture into a blender and blend until light and foamy, about 45 seconds.
Freeze according to your ice cream makers instructions.
Vegan Chocolate Cupcake With Vegan Chocolate Buttercream
I woke up a few mornings ago thinking about chocolate cupcakes with chocolate frosting. Waking up thinking about food is not unusual for me, thinking about frosting is. In general I’m not a huge frosting fan, but something triggered a need and I had no choice. I made cupcakes with chocolate buttercream frosting. They were delicious.
Both recipes are from Vegan Cupcakes Take Over the World. A perfect cupcake book, and one you should own. In case you don’t, I’ll share the wonderful recipe here. These cupcakes are ultra light, tender, and moist, with a slightly dense frosting that is perfectly chocolatey, creamy, and seductive. Speaking of seductive, you should make these for your sweetheart on Valentine’s Day.
After the recipe I’m including a short tutorial on measuring. I know measuring seems simple enough, but when it comes to baking, the way you measure can make or break the finished product. I hope it helps turn your cupcake dreams into reality.
Chocolate Cupcakes
Ingredients
1 cup non-dairy milk
1 tsp. apple cider or white vinegar
3/4 cup granulated sugar
1/3 cup sunflower oil, canola oil, or other mild flavored oil
1 1/2 tsp. pure vanilla extract
1/2 tsp pure almond extract
1 cup unbleached all-purpose flour
1/3 cup cocoa powder
3/4 tsp. baking soda
1/2 tsp. baking powder
1/4 tsp salt
Instructions
Preheat oven to 350 F. and line muffin pan with paper liners.
Briefly stir non-dairy milk and vinegar in a large bowl and set aside to curdle.
In a separate bowl sift together flour, cocoa powder, baking soda, baking powder and salt.
Once the milk and vinegar has curdled add the sugar, oil and extracts.
Beat together until foamy.
Add dry ingredients to the wet and mix just until combined.
Pour batter into prepared cupcake liners filling 3/4 of the way full.
Bake for 18-20 minutes until a toothpick inserted in the middle of the tallest cupcake comes out clean.
Remove cupcakes from pan and cool on a cooling rack.
Do not frost until completely cool.
Vegan Chocolate Buttercream Frosting
Ingredients
1/4 cup Earth Balance buttery spread, softened to room temperature
1/4 vegetable shortening, softened to room temperature
1/2 cup unsweetened cocoa powder
2 1/2 cups powdered sugar
3 TBL non-dairy milk
1 1/2 tsp. pure vanilla extract
Instructions
Cream together the butter and shortening until thoroughly combined.
Add the cocoa powder, beating until combined.
Add the powdered sugar in three additions followed by a tablespoon of non-dairy milk after each addition.
Once all the sugar is incorporated add the vanilla extract, and beat until everything is light and fluffy.
How to Measure
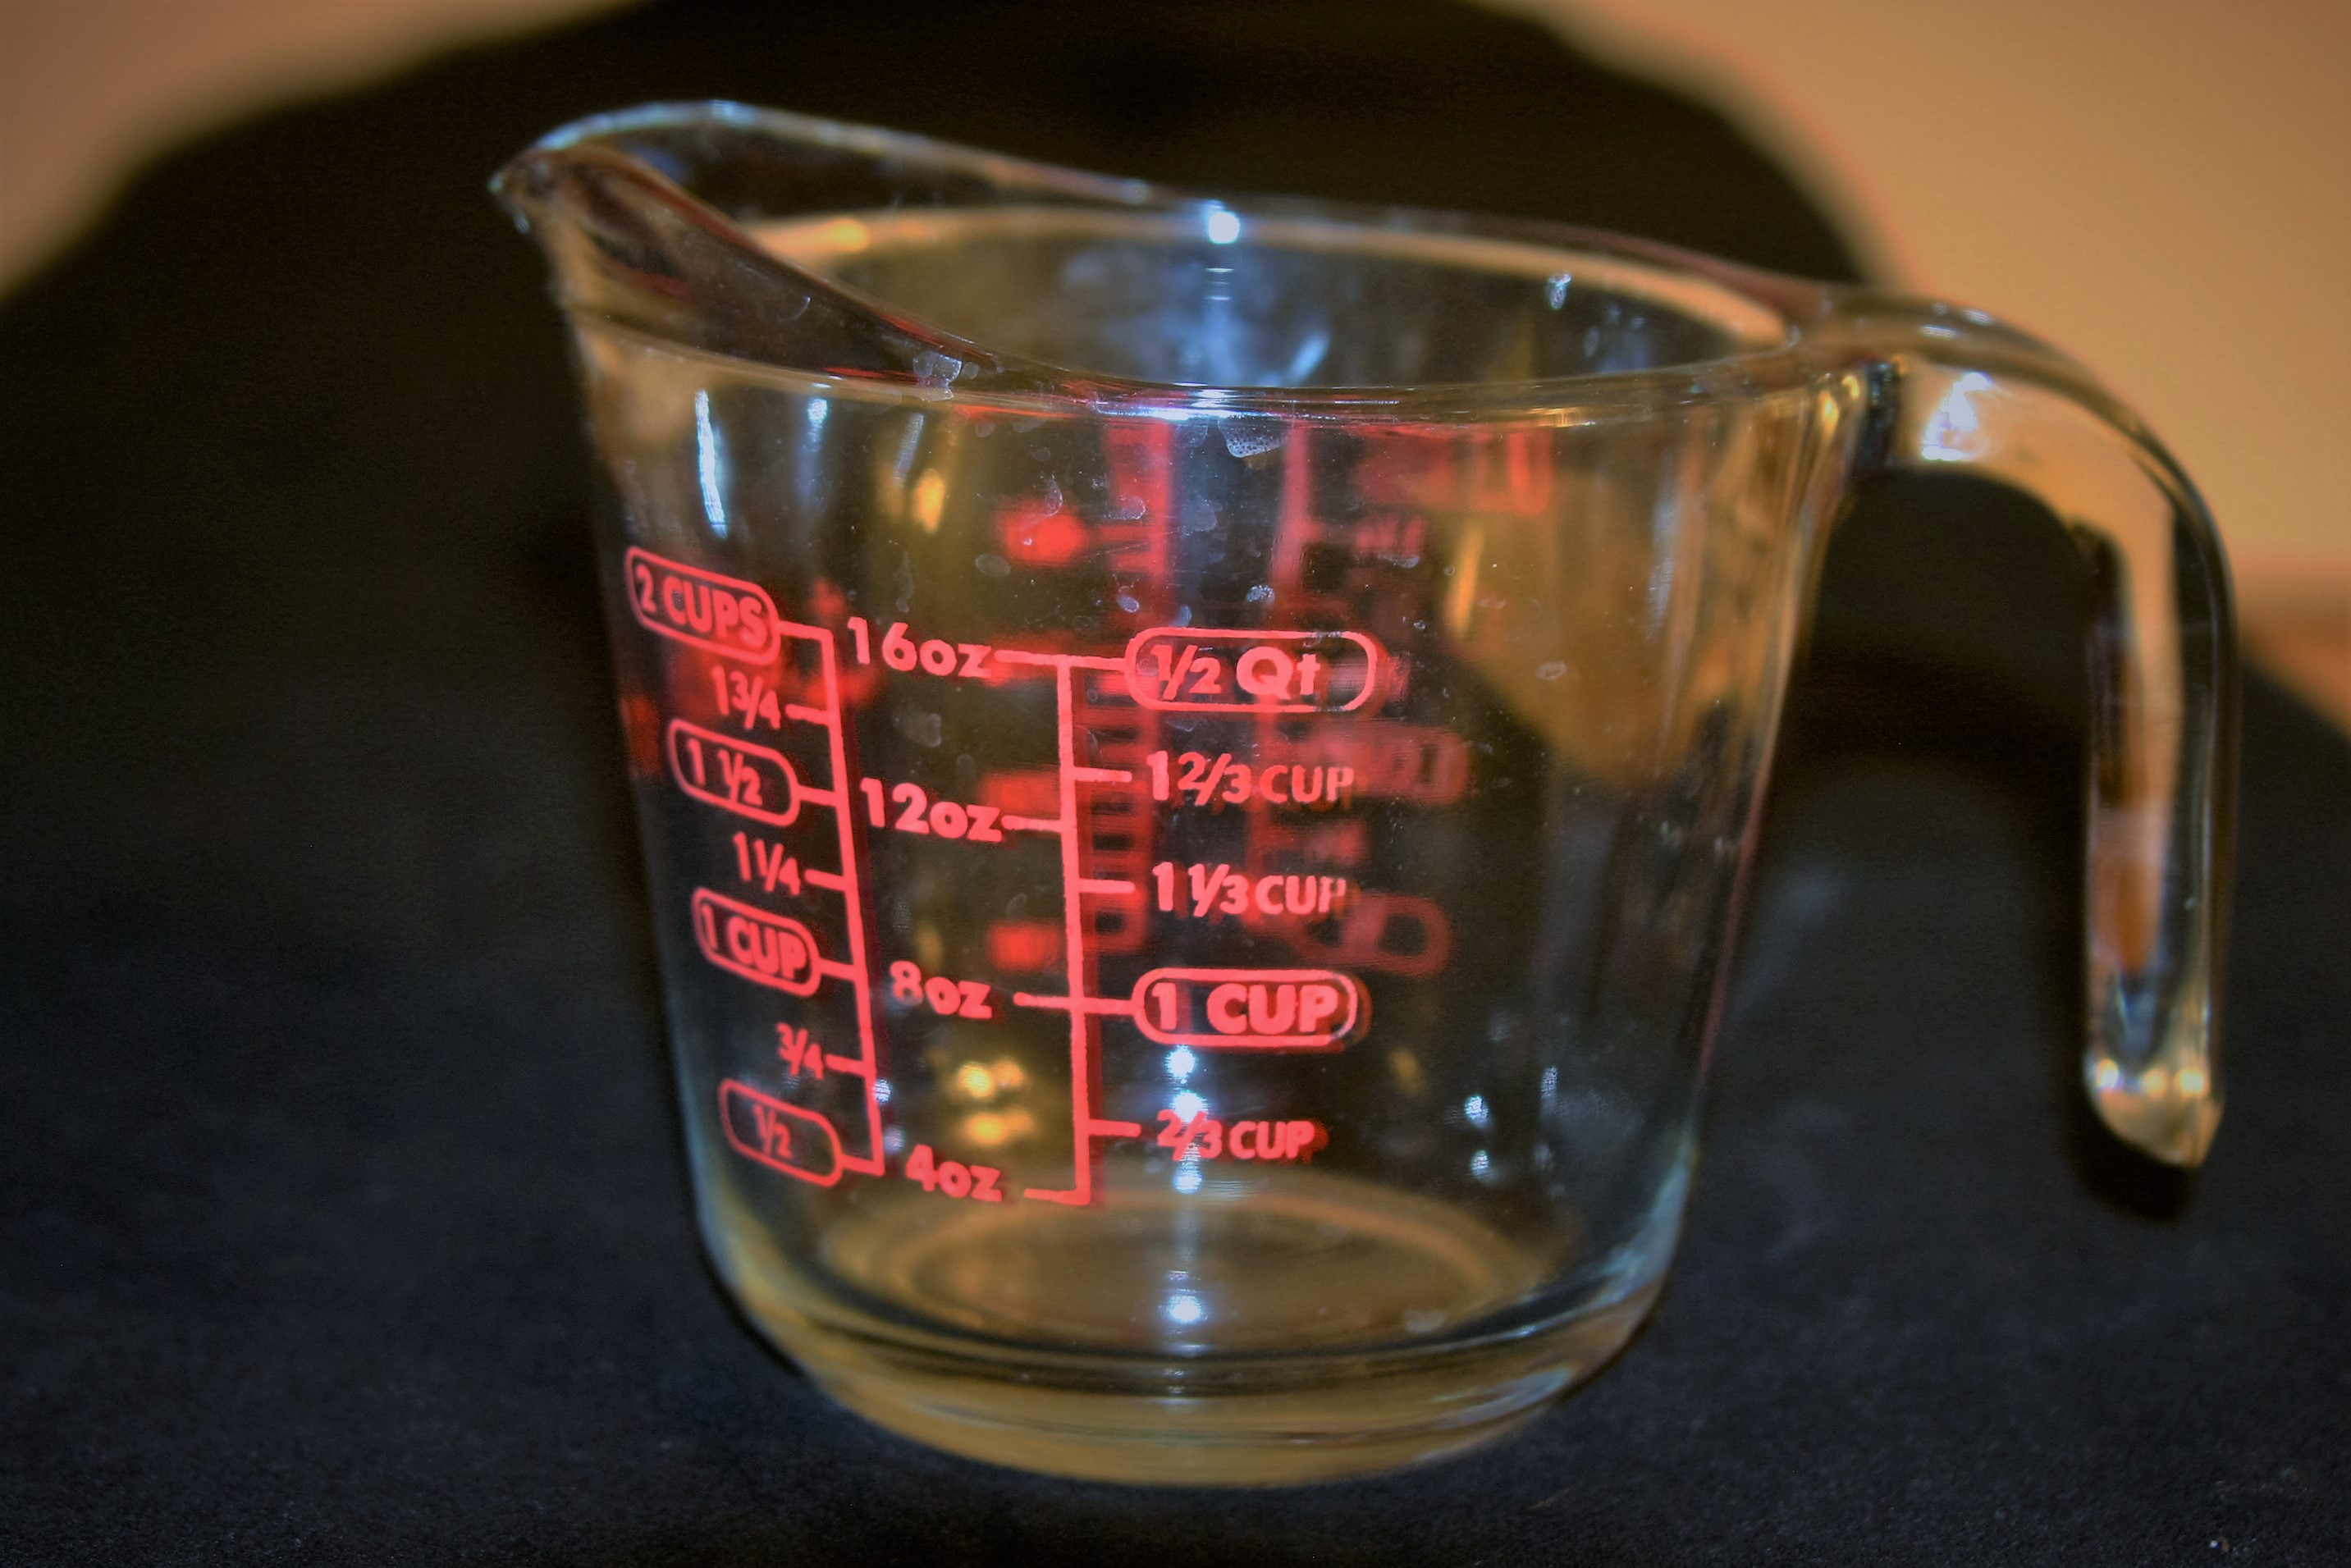
First off there are two kinds of measuring cups: those for wet ingredients, and those for dry ingredients.
Measuring cup for wet ingredients
Measuring cups for dry ingredients
You can use the dry ingredient cups for wet, but please, please, do NOT use the wet ingredient measuring cups for dry ingredients. Why you might ask? Simply; because you cannot get a precise measurement of dry ingredients. You might try, but then you will end up shaking or tapping the cup to level the ingredients, then they will become packed down, and you will have heavy, dense, yucky baked goods.
Another important thing to remember when measuring dry ingredients into a dryingredient measuring cup, is to never ever scoop with the measuring cup. Again, this results in too much of whatever you are measuring. You always want to scoopup your ingredient with a separate cup, scoop, or spoon, and sprinkle it into the correct size measuring cup. You overfill the cup, and level it off before adding your ingredient to your recipe. Please see this video of my mom measuring flour for a good example (she starts measuring flour at 24 seconds).
Sifting… I don’t always sift my dry ingredients when I bake, but I do find it important in most cakes. It removes any lumps from your dry ingredients and adds air creating a light, more tender finished product. So, when I do say sift, I really am suggesting you sift.